Hola otra vez querida comunidad!
Hoy quiero hablarles sobre el Mosaico en crochet. Es una técnica tan bonita, que puede ser tan fácil y compleja. Una técnica diversa que abre muchas posibilidades de creación. Es una técnica dinámica y que, a mi parecer, va transformándose cada vez más y econtramos nueva variantes.
A menudo, muchas personas que conocen esta técnica por primera vez me preguntan si es igual al tapestry… y no! son técnicas muy distintas. En el tapestry vas trabajando con los hilos por dentro de los puntos principalmente, con todos los colores a la vez. En mosaico vamos trabajando con rondas o filas con cada color por separado… Puede que se parezcan mucho con las formas que se pueden crear.. pero realmente no lo son y yo la verdad, prefiero mil veces el mosaico (si les soy sincera, no me llevo muy bien con el tapestry, pero guárdenme el secreto jajajja)
Hello again dear community!
Today I want to talk to you about crochet mosaic. It is such a beautiful technique, which can be so easy and so complex. A diverse technique that opens up many possibilities for creation. It is a dynamic technique and, in my opinion, it is changing more and more and we find new variations.
Often, many people who know this technique for the first time ask me if it is the same as tapestry… and no! they are very different techniques. In tapestry you will work with the threads inside the stitches mainly, with all the colours at the same time. In mosaic we will work in rounds or rows with each colour separately. They may look very similar with the shapes that can be created… but they really aren’t and the truth is, I prefer mosaic a thousand times (if I’m honest, I don’t get on very well with tapestry, but keep it a secret, hahahahaha).
Ahora, ¿sabían que no hay uno, si no que unos cuantos tipos de Mosaico en crochet?
Loco ¿no?, pero cierto. Una de las mejores cosas del ser humano, es su capacidad de mutar, transformar y afectar su entorno para bien. Con las «manualidades» no es la excepción. Podemos ir desarrollando cuantas técnicas se nos presenten con amor y dedicación… Y bueno, quiero hablarte sobre algunos de los que conozco, esta es una percepción desde mi experiencia.
Now, did you know that there is not one, but a few types of crochet Mosaic?
Crazy, isn’t it, but true. One of the best things about human beings is their ability to mutate, transform and affect their environment for the better. With «handicrafts» is no exception. We can develop as many techniques as we can with love and dedication? And well, I want to tell you about some of the ones I know, this is a perception from my experience.
1. MOSAICO
Se podría decir que este tipo de mosaico es el «tradicional».Este tipo de mosaico fue uno de los primeros que conocí, la verdad es bastante antiguo pero hace sólo un par de años ha logrado verse más en las redes sociales. Se trabaja cada dos filas con un mismo color. Con un color se trabaja una fila de ida y otra de vuelta; con el color se hace lo mismo. Utiliza puntos bajos, cadenetas y puntos altos… nada más. Qué fácil no? La dificultad es más bien ir calculando dónde pones los puntos altos o varetas para ir formando las figuras geométricas. Es un poco matemático en un principio, pero cuando ya agarras el «hilo», vuelas con el mosaico y no lo sueltas más!
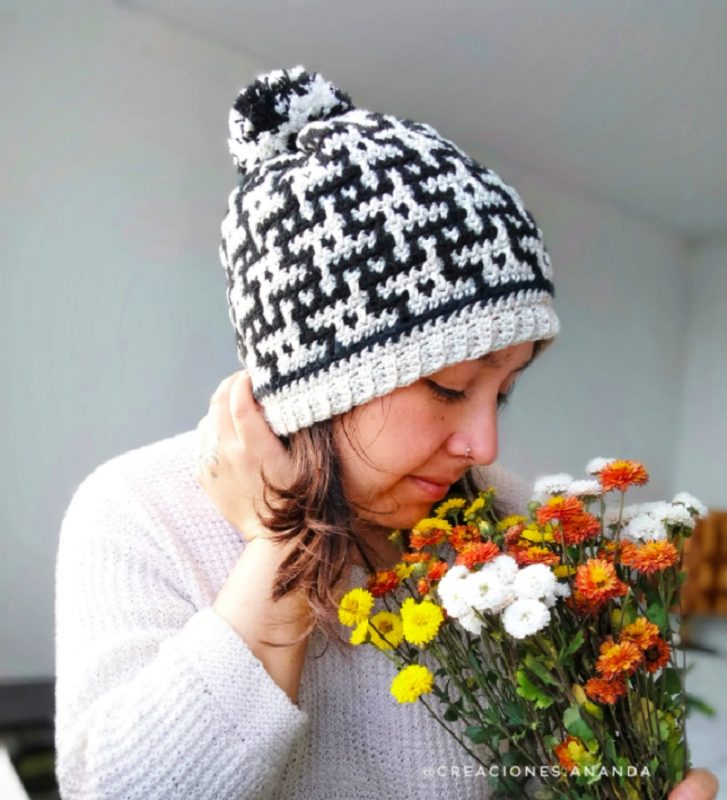
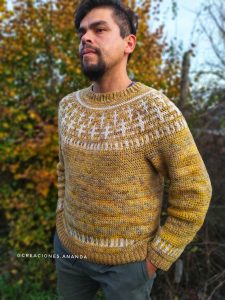
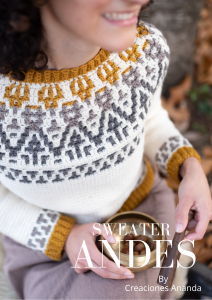
Ahora, generalmente se trabaja con filas, osea es un tejido plano en general, muy pocas veces se ve en un tejido circular… y eso es precisamente lo que aprenderemos en con este gorrito! Otra manera de trabajarlo es con aumentos, ahí ya se pone un poco más dificil la cosa, pero no es imposible como se muestra en el sweater Julio
We could say that this type of mosaic is the «traditional» one, it was one of the first ones I knew, it is actually quite old but only a couple of years ago it has become more popular on social networks. You will work each two rows with the same colour. With one colour you will work one row by right side and the other one by wrong side; with the other colour you will do the same. It work single, double crochet and chain stitch… nothing else. It’s easy, isn’t it? The difficulty is rather to calculate where you put the doubles stitches to form the geometric shapes. It’s a bit mathematical at the beginning, but when you get the «thread», you fly with the mosaic and you don’t let go!
Now, it’s usually worked with rows usually in a flat fabric, very rarely seen in a circular way… and that’s precisely what we’ll learn with this beanie! Another way to work it is with increases, then it gets a little bit more difficult, but it’s not impossible as shown in the sweater Julio.
2. OVERLAY MOSAIC
Es uno de los tipos de mosaico modernos y que más se teje en crochet también. Es un tanto distinto del tradicional… En este tipo de mosaico sólo se trabaja una ronda por color, y se utiliza mucho para tejidos en circular donde cierras cada ronda con un punto deslizado. Aquí ya no tejes por derecho y revés del tejido. Es sólo por el derecho. Los puntos utilizados son puntos bajos enganchado sólo en la hebra de atrás y puntos altos enganchados en las hebras de adelante, ¿en donde serán enganchados? Eso depende del diseño.
It is one of the modern types of mosaic and one of the most commonly crocheted as well. It is a bit different from the traditional one… In this type of mosaic you only work one round per colour, and it is often used for circular crocheting where you join each round with a slip stitch. Here you no longer crochet by wrong and right side of the fabric. It is only by the right side. The stitches used are single crochet stitches hooked only on the back loop and double crochet stitches hooked on the front loop, where will they be hooked? That depends on the design.
Este tipo de mosaico te da mucha más libertad de crear diseños que la anterior.
This kind of mosaic gives to you much more possiblities to make more designs than the tradicional one
 Claro que también podrías encontrar este tipo de mosaico en un tejido plano, pero tendrías que cortas la hebra cada vez que termines un fila.
Of course, you could also find this kind of mosaic in a flat fabric, but you would have to cut the yarn every time you finish a row.
3. VARIANTE DE OVERLAY CROCHET/ OVERLAY CROCHET VARIANT
Tampoco sé si este tipo de mosaico tiene algún nombre específico o no. Pero que, según lo que he visto, es bastante nuevo y lo ha desarrollado en gran parte esta talentosa mujer: Tinna. Ella es una master en Mosaico! (y una de mis diseñadoras inspiración favoritas). Puedes encontrar más de sus trabajos en su cuenta de Instagram
Este tipo de mosaico es similar a la variante anterior. Con la diferencia que se va escondiendo el color con el que se dibuja la figura. ¿Cómo? Tejiendo con el color que se dibuja sólo en las hebras posteriores del tejido, mientras que el color de fondo se teje sólo en las hebras delanteras del tejido, dejando así, el espacio a las hebras delanteras para que el color de fondo esconda el color del dibujo… se entendió? Jjaja pués si no lograste entender bien te dejo este granny tutorial gratuito de Tinna con este tipo de variante, para que lo entiendas mejor.
I don’t know if this type of mosaic has a specific name or not. But from what I have seen, it is quite new and has been largely developed by this talented woman: Tinna. She is a master in Mosaic! (and one of my favourite inspirational designers). You can find more of her work on her Instagram account.
This type of mosaic is similar to the previous one. The difference is that you hide the colour with which the figure is drawn, crocheting with the colour that is drawn only in the back strands of the fabric, while the background colour is worked only in the front strands of the fabric, leaving space for the front strands so that the background colour hides the colour of the drawing… got it? Jjaja well if you didn’t get it right I leave you this great free tutorial from Tinna with this kind of variant, so you can understand it better.

Es una maravilla no? Encuentralo AQUI y tejer todos los que quieras!
Como ven, tenemos un mundo de posibilidades de colores, de formas, de prendas con sólo una técnica. Desde aquí la imaginación es nuestro único límite… Y bueno, a lo nuestro!
It’s a wonder isn’t it? Find it HERE and crochet as many as you want!
As you can see, we have a world of possibilities of colours, shapes and garments with just one technique. From here imagination is our only limit…. And well, let’s get on with it!
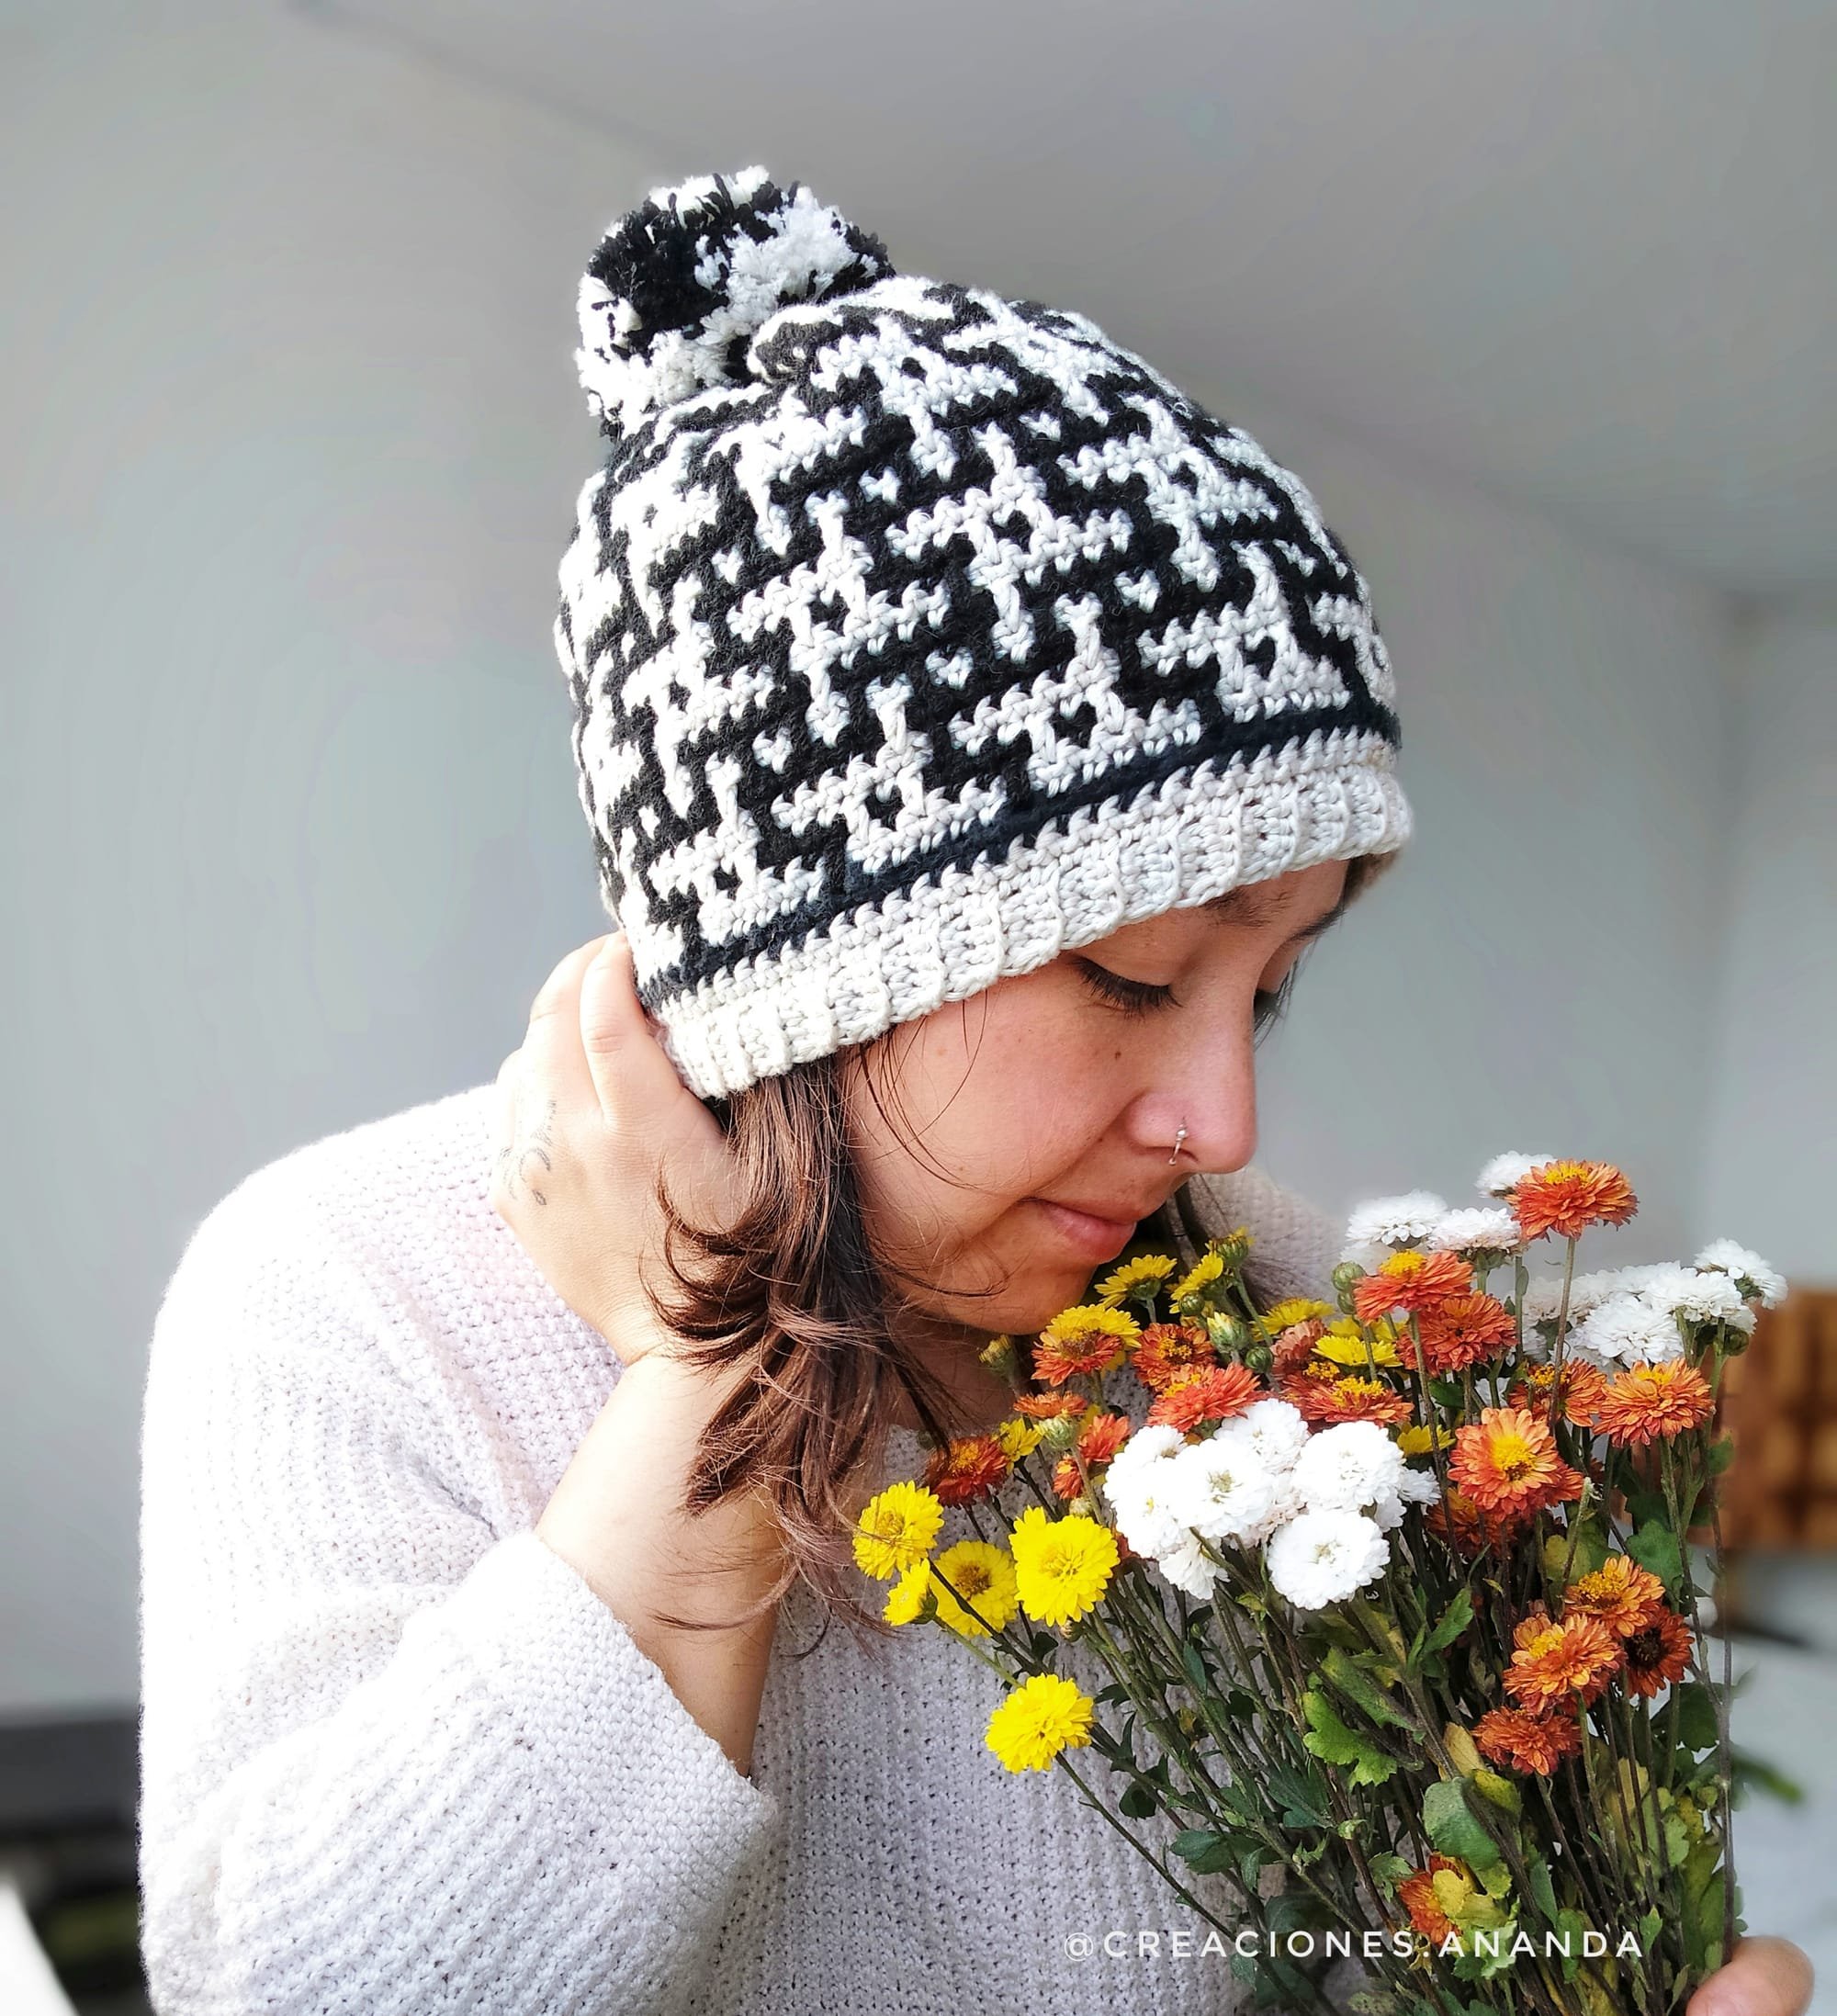
CLASE COLECTIVA GORRO AKASH
¿Por qué Akash? Akash significa éter: una finísima sustancia que baña todo el universo. El Akash es una energía de alta vibración que todo lo abarca. Cada pensamiento, cada movimiento, cada vibración que se genera queda registrado en el Akash. No es un lugar, es una frecuencia de vibración, Y está representado a los largo del gorro en una figura geométrica con este mini molino (que pareciera que gira), y representa el movimiento de la energía en el universo. No es un dibujo que haya inventado yo, sólo he transformado un patrón del mosaico en 2 agujas y lo he adaptado para el crochet.
COLLECTIVE CLASS AKASH BEANIE
Why Akash? Akash means ether: a very fine substance that bathes the whole universe. Akash is an all-embracing, high vibrational energy. Every thought, every movement, every vibration that is generated is recorded in the Akash. It is not a place, it is a frequency of vibration, AND it is represented along the cap in a geometric figure with this mini windmill (which looks like it is spinning), and represents the movement of energy in the universe. It’s not a pattern that I invented, I just transformed a pattern from the knitting mosaic and adapted it for crochet. The class was made last year by instagram live, so it was in spanish but you can be guided by chart or directions stitch by stitch
¿Qué necesitarás para esta clase colectiva? / What will you need to crochet it?
- 50 grs de COLOR 1
- 50 grs de COLOR 2
- Crochet de acuerdo a tu propia tensión.
En este sentido no utilizaremos muestra ni te pediré que utilices un grosor específico, sólo necesitas trabajar con lo que tienes, y el diseño lo podrás adaptar a la medida de tu propia cabeza.
Y por último, tendrás que tener a mano el siguiente diagrama para enseñarte las principales funciones del mosaico crochet en rondas.
- 50 g of COLOUR 1
- 50 grams of COLOUR 2
- Crochet hook according to your own tension.
In this sense we won’t use a gauge swatch and I won’t ask you to use a specific weight, you just have to work with what you have, and you can adapt the design to the size of your own head.
And finally, you will need to have the following chart to show you the main functions of the mosaic crochet in rounds, and in the video I show you how to join for the wrong and right side of the fabric.
CHART
← repeat on right side | repeat on wrong side →

Amé ese diseño de tu gorro Kash. Me encantan tus diseños son tan únicos
Gracias! espero puedas tejerlo para este o el próximo año de otoño invierno 🙂
Thanks for your words and comming to read! 🙂
Muchas gracias. ?Como puedo iniciar sesion?