CROCHET PRO:

Hola amigxs crocheters! nos encontramos una vez más para contarles un poco más sobre los «secretos» del crochet y la diversidad que reside en esta hermosa técnica.

Hoy vengo a contarles acerca de una -no tan- novedosa forma de comenzar los tejidos: PUNTOS EN FUNDACIÓN .
Es diferente que como lo hacemos usualmente: Comenzar con largas cadenetas, girar y seguir la otra fila (para tejidos planos).  Con las puntadas en fundación vamos directamente al grano, trabajando la cadena y la primera fila de puntos bajos en un solo paso. 

¿QUÉ ES?
Este método de inicio de proyectos consta de una base sin cadena. Es una alternativa a la creación de una cadena de base y hago énfasis en «alternativa» porque tú puedes utilizar el método que más te acomode usar, ya sea este o el tradicional. El crochet es tan diverso que podemos encontrar muchas formas de llegar al mismo lugar. La intención de este post es mostrarte otras alternativas de trabajo. 

Esta método crea la puntada y cadeneta al mismo tiempo y produce una fila de base que tiene un tamaño similar al de una fila normal. 

Hello crocheter friends! we meet once again to tell you a little more about the «secrets» of crochet world and the diversity that lies in this beautiful technique.

Today I’m here to tell you about a -not so- new way to start crocheting: FOUNDATION STITCHES.
It’s different than how we usually do it: Start with long chain stitches, turn and follow the other row (for flat projects).  With foundation stitches we go straight to the point, working the chain and the first row of single crochet stitches in one step. 

WHAT IS IT?
This method of starting projects consists of begin without bases chains. It is an alternative to creating a base chain and I emphasize «alternative» because you can use the method that suits you best, either this or the traditional one. Crochet is so diverse that we can find many ways to get to the same place. The intention of this post is to show you other alternative ways of working. 

This method creates the stitch and chain at the same time and produces a base row that is similar in size to a normal row. 

¿Cómo se trabaja?

Si investigan un poco más, se darán cuenta que hay por lo menos dos formas de trabajar los puntos en fundación. Uno que requiere un poco más de ojo crochetero para enganchar la base en dos bucles, y otra que a mi parecer, es un poco más fácil y se los enseño a continucación. 

How to work it

If you do a little more research, you will notice that there are at least two ways to work the foundation stitches. One that requires a bit more of a crocheter eye to hook the base in two loops, and another that I think is a bit easier and I’ll show you how to do it below. 


Comienzas con un nudo corredizo (1) y tejes dos cadenetas para punto bajo. Vamos a piner un marcador en la primera cad hecha para guiarnos mejor (2). Luego teje un punto bajo en la segunda cadeneta, la que tiene el marcador (3). El siguiente paso es introducir el crochet en la misma cad del marcador (4), ya que esa cuenta como la última «cadeneta base»; lazada y sacas esa lazada por el punto (5), tienes dos bucles en el ganchillo. Lazada (6) y las tiras sólo por el primer bucle (7) formando una cadenta, te quedarán  bucles en el ganchillo nuevamente. -Esta cadeneta es la que va a contar como la cadeneta base del punto bajo-. Lazada nuevamente y la tiras por los dos bucles en el ganchillo para formar el punto bajo (8). Puedes cambiar nuevamente el marcador de lugar para guiarte en el principio y repite todo nuevamente (9, 100, 11 y 12).

Start with  slip knot (1) and work ch2 for single crochet foundation. We are going to put a crochet marker on the first chain to guide us better (2). Then work 1 single crochet in the second chain from hook, the one with the marker (3). The next step is to insert the hook in the same ch as the marker (4), since that counts as the last «base chain»; yarn over and pull through the stitch (5), you have two loops on hook. Yarn over (6) and pull through the first loop (7) forming a chain, you will have 2 loops left on hook again. -This chain is the one that will count as the base chain of the single crochet-
Yarn over again and pull through 2 loops on hook to work the single crochet stitch (8). You can change the marker place again to guide you in the beginning and repeat all over again (9, 10, 11 and 12).

¿POR QUÉ USAR ESTE MÉTODO?

Hay tantas razones para amar este método y haré una lista de ellas:

1.- El conteo de puntadas es perfecto y siempre calzan.

Quién no ha comenzado un trabajo con muchisimas cadenetas y sólo al final de la primera es que das cuenta que te sobraron o faltaron puntos por hacer , diosa! 
Lo que es muy común y posible con una cadena larga, es casi imposible con este método, las puntadas son fáciles de ver y las vas contando a medida que avanzas

2.- Prolijidad 
Debido a que este método elimina la cadena base por completo, hace que la fila de la base y el resto de las filas y las puntadas de su proyecto estén más alineadas.

3.- Tensión
Otro beneficio de esta técnica es que ayuda a mantener una tensión uniforme desde la primera puntada hasta la última. ¿Te ha pasado alguna vez que comenzaste un proyecto cn cadenetas clásicas y te queda algo rigida, en comparación al resto de tu trabajo? A mi muchas veces, por eso este método es ideal para trabajo comenzados especialemente de abajo hacia arriba, porque las puntadas tendrán la misma tensión que el resto de su proyecto y el borde será más elástico que tenso.

4.- Accesibilidad
Puede usar este método en cualquier patrón, incluso en uno que no lo requiera o que no lo establezca. Simplemente elimine la cadena y comience con la primera fila, creando la misma cantidad de puntadas de base que requiere la fila, pero en puntada de fundación 

WHY YOU SHOULD USE THIS METHOD?

There are so many reasons to love this method and I will make a list of them:

1.- The stitch count is perfect and they always fit.

Tell me… who has not started a work with many chains and only at the end of the first row you realize that you have too many or too few stitches to do, oh my goddess! 
What is very common and possible with a long chain, is almost impossible with this method, the stitches are easy to see and you can count them as you go along.

2.- Neatness 
Because this method eliminates the base chain completely, it makes the base row and the rest of the rows and stitches of your project more aligned.

3.-Tension
Another benefit of this technique is that it helps to maintain an even tension from the first stitch to the last. Have you ever had a time when you started a project with classic chain stitches and it was a little stiff compared to the rest of your work? I have many times, that’s why this method is ideal for work started especially from the bottom up, because the stitches will have the same tension as the rest of your project and the edge will be more elastic than taut.

4.- Accessibility
You can use this method on any pattern, even one that does not require it or does not set it up. Simply remove the chain and start with the first row, creating the same amount of stitches as the row requires, but in foundation stitch. 

Como puedes ver es un método muy efectivo y tienes muchos beneficios. ¿Cuáles serán sus contras?  La verdad es que a mi parecer, sólo tiene un par: 

1.- Puede ser un poco difícil de entender al principio pero como ya saben y siempre les digo… todo en la vida requiere práctica

2.- Es un método que se «aconseja» utulizar más en tejidos planos que en circulares, ya que en el circular es un poco díficil juntar el primer punto con el último, ya que la ronda tendrá la altura del punto a utilizar. Pero no es nada que no se pueda solucionar con algunos nudos por aquí y por alla jejjeje

Puedes utilizar este método para cualquier tipo de puntada, lo único que varía son las cadenetas de inicio. En el video tutorial que tengo en mi instagram aparecen ambas formas de hacerlo, visitalo aquí! INSTAGRAM ó en mi Canal de Youtube!

Bien, hasta aquí llegó nuestro blog de domingo, espero te haya gustado! Recuerda comentar y dejarme tus impresiones 🙂

Yessabett

As you can see it is a very effective method and has many benefits. What are its cons?  The truth is that in my opinion, it only has a couple: 

1.- It can be a little difficult to understand at the beginning but as you know and as I always tell you… everything in life requires practice.

2.-It is a method that is «advised» to use more in flat crocheting than in circular crocheting, because in the circular crocheting it is a little difficult to join the first stitch with the last one, since the round will have the height of the stitch to be worked. But it is nothing that can not be solved with a few knots here and there hehehehehe.

You can use this method for any type of crochet stitch, the only thing that varies is the starting chain stitches. In the video tutorial I have on my instagram there are both ways to do it, visit it here! INSTAGRAM

Well, so much for our Sunday blog, I hope you liked it! Remember to comment and leave me your impressions 🙂

Yessabett

PUNTO BAJO EXTENDIDO… Y POR QUÉ ES UN PUNTO INCREIBLE

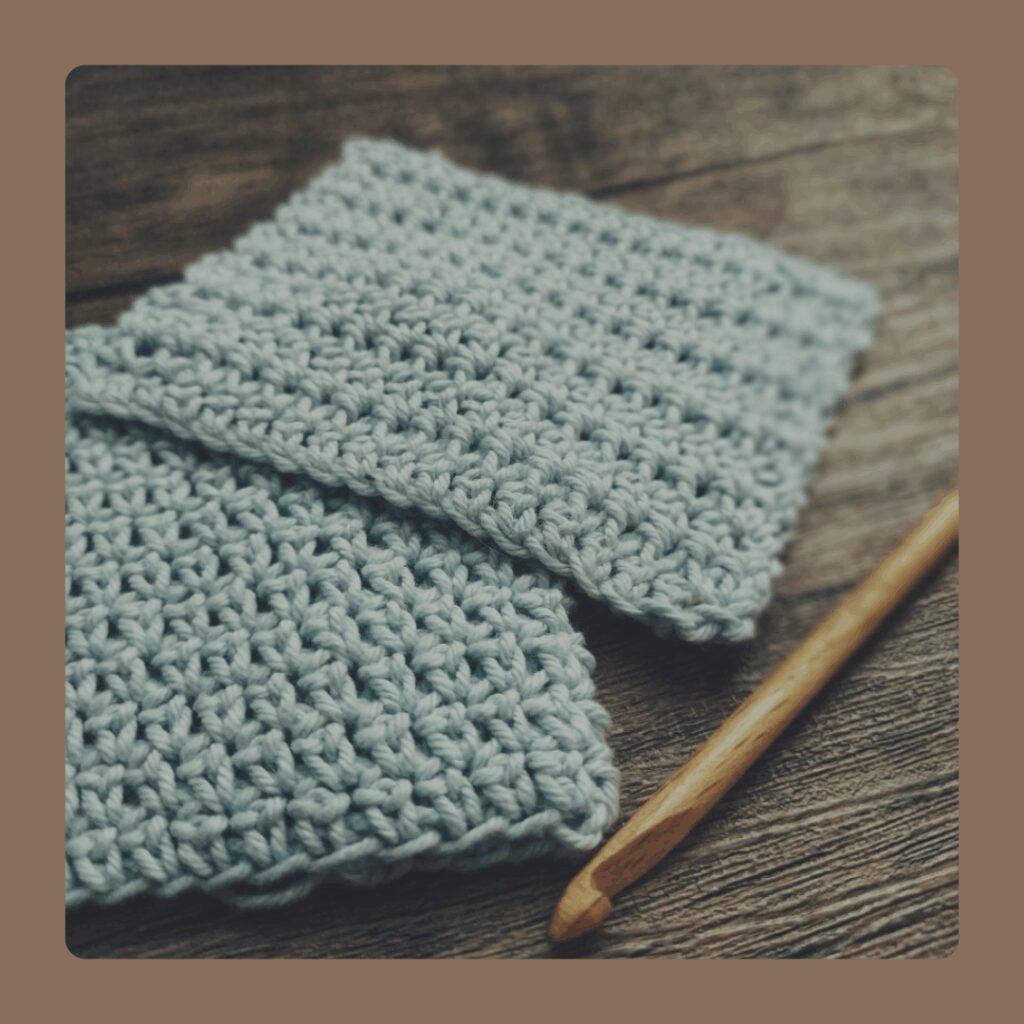
Si ya llevas harto tiempo en el mundo del crochet, seguramente conoces ya este maravilloso punto. Un punto dinámico, que aporta muchísimo técnicamente a tus trabajos y que seguro amas tanto como yo… Pero si llevas poco tiempo en el mundo crochetero y no lo conoces aún, te quiero contar de qué se trata, seguro te encantará y querrás probarlo enseguida!

Extended single crochet. Why this stitch is amazing to use? 
If you’ve been crocheting for a long time, you probably already know about this wonderful stitch. A dynamic stitch, that technically contributes to your fabrics and that I’m sure you love as much as I do. But if you haven’t been in the crochet world for long and you don’t learn it yet, I want to tell you what it’s all about, I’m sure you’ll love it and you’ll want to try it right away! 

Desconozco si esta puntada tiene otro nombre, si tu lo conoces de otra manera, déjala en comentarios! 
Las puntadas en crochet se caracterizan por tener distintas alturas, es una característica maravillosa, la que nos permite jugar con las formas en cualquier trabajo ya sea prenda, decoración o accesorio. La altura de cada puntada se determina por la cantidad de lazadas hechas al trabajar la puntada. El punto bajo extendido es una variación del punto bajo, pero que tiene una altura parecida al punto alto gracias a una cadeneta extra, y esto es muy útil por las razones que verán más adelante en este post.
Por ahora vamos a ver un mini tutorial de esta puntada.

I don’t know if this stitch has another name, if you know it in another way, leave it in comments! 
Crochet stitches are characterized by having different heights, it is a wonderful feature, which allows us to play with shapes in any work whether it is a garment, decoration or accessory. The height of each stitch is determined by the number of loops made when working the stitch. The extended single crochet is a variation of the single crochet, but it has a similar height to the double crochet thanks to an extra chain made, and this is very useful for the reasons you will see later in this post.
For now let’s take a look at a mini tutorial of this stitch.

CÓMO HACER PUNTO BAJO EXTENDIDO (PBE) HOW TO MAKE EXTENDED SINGLE CROCHET (ESC)

Inserta tu ganchillo directamente en el siguiente punto a trabajar (1 y 2),  lazada y pásala por el punto enganchado (3), lazada otra vez  (4) y pásala sólo por un bucle en el ganchillo formando un a cadeneta (5), lazada otra vez (6) y pásala por ambos bucles en el ganchillo (7) y listo, ya habás hecho tu Punto Bajo Extendido 🙂

Insert your hook through next stitch to be worked (1 and 2),  yarn over and pull up throught stitch (3), yarn over (4) and draw through first loop only, forming a chain stitch (5), yarn over (6) and draw through both loops on hook… and done!

4 razones por las que tienes que usar punto bajo extendido

1. Crea una mejor caída.
Creo que una prenda con una buena caísa es esencial y es un parámetro para sentarte a pensar qué puntada usarás para conseguirlo, ya que nadie quiere sentirse en una armadura mientras camina jajaja y si quieres hacer una prenda con un punto simple y útil, el punto bajo extendido seguro se convertira en tu punto favorito! Tiene una apariencia muy similar al punto alto, pero la cadeneta añadidos hacen que el tejido sea menos denso. Esto lo hace perfecto para suéteres, bufandas y otras prendas de cuerpo.

2. Es un punto menos denso
Siempre se los comento, y seguro también ya te habrás dado cuenta que el crochet es más denso que el tejido en dos agujas. Y esto está relacionado con la cantida de lazadas que haces antes de trabajar una puntada, y como aquí no hay lazadas previas, el punto queda más liviano y aireado. Al tener estas características, creará una mejor caída y evitará la rigidez en tu tejido, que guarda relación directa con nuestro punto anterior.

3. Utiliza menos hilo.
Un punto menos denso también significa que está usando menos hilo. Si se está preparando para hacer un suéter gigante, considera trabajar punto bajo extendido como alternativa al punto alto. No solo tendrá una caída más agradable, ¡tu hilo llegará más lejos en crochet de lo que habitualmente lo hace!

4. Es fácil y rápido
En este sentido, esta puntada es práctica, rápida cuando te acostumbras y se vuelve cada vez más fácil de hacer

4 Reasons why you need to work ESC Stitch

1. It creates better drape.

I think a garment with good drape is essential when you choosing stitches. No one wants to feel like they are in a suit of armor when walking hahahha. And if you want to make a garment with a simple and usefull stitch, the extended single crochet stitch will become  your favorite! It has a very similar appearance to double crochet, but the added chain stitches make the fabric less dense. This makes it perfect for Pullovers, cardigans, scarves, and other garments that you want to drape along the body.

2. It is a less dense stitch
As I always tell you, and I’m sure you’ve already noticed that crochet is denser than knitted. And this is related to the number of loops you make before working a stitch, as here there are no previous loops, the stitch is lighter and more «airy». By having these characteristics, it will create a better drape and avoid stiffness in your fabric, this is directly related to our previous point.

3.It uses less yarn.
A less-dense stitch pattern also means you’re using less yarn. If you’re preparing to make a giant sweater, consider working the crochet linen stitch as an alternative to single crochet. Not only will it have nicer drape, your yarn will go farther!

4. It is easy and fast
In this sense, this stitch is practical, quick when you get used to it, and it becomes easier and easier to do.

AHORA QUE LO SABES...

Como vez, este punto es fenomenal y seguro que aportará muchísimo a tus futuros trabajos y lo pensarás dos veces antes de seguir tejiendo con los puntos tradicionales. 
En términos prácticos y visuales, debes considerar también que este punto cambiará de aspecto si lo tejes en plano o lo tejes en ronda como puedes ver en las fotos a continuación. Pareciera que son dos puntos totalmente diferentes entre sí! entonces, como un extra, el punto aporta dinamismo! 🙂 

NOW THAT YOU KNOW IT...

As you can see, this stitch is phenomenal and will surely add a lot to your future projects and you will think twice before continuing to crochet with traditional stitches. 
In practical and visual terms, you should also consider that this stitch will change its appearance if you crochet it flat or crochet it in the round , as you can see in the pictures below. It looks like they are two totally different stitches from each other! then, as an extra, the stitch brings dynamism! 🙂 

Crocheted in the round
Tejido en circular

Crocheted flat
Tejido en plano

CARICIA CARDIGAN Y PUNTO BAJO EXTENDIDO

Si sigues algunos de mis diseños ya te habrás dado cuenta que este punto lo he ocupado en varios de ellos ya, como en el Sweater Prana o el Sweater Julio y es que realmente me gusta usar este punto tan dinámico.
Y en el Caricia cardigan no fue la expeción. Un diseño veraniego necesitaba una puntada holgada que aportara frescura en tiempos de calor, no? y creo que cayó como anillo al dedo. 
El Caricia cardigan es un diseño con toques retro, «vuelos» y crochet lace en la zona del canesú. Se teje de arriba hacia abajo y lo encuentras en 7 tallas, desde la XS a la 3X. Lo diseñé pensando en esas tardes de verano, quizás cerca de un muelle observando la puesta de sol… recordando buenos momentos de tu vida, esas que son una caricia para el alma. 

CARICIA CARDIGAN AND EXTENDED SINGLE CROCHET

If you follow some of my designs you will have noticed that I have already used this stitch in several of them, like in the Prana Sweater or the Julio Sweater and I really like to use this dynamic stitch.
And Caricia cardigan was no exception. A summer design needed a loose stitch that would bring freshness in hot weather, right? and I think it fitted like a glove. 
The Caricia cardigan is a design with retro touches and crochet lace in the yoke area. It is crocheted from the top down and you can find it in 7 sizes, from XS to 3X. I designed it thinking about those summer afternoons, maybe near a pier watching the sunset… remembering good moments of your life, those that are a caress for the soul… from there comes its name, Caricia means caress

CONSÍGUELO EN LA WEB SHOP

GET IT ON RAVELRY

Gracias por leer, cuentame si conocías este punto, o en qué trabajos lo has ocupado 🙂 Espero te haya gustado el post de hoy!

Thanks for reading, tell me if you knew this stitch, or in what prjects you have used it 🙂 I hope you liked today’s post!