AUTÓCTONO CUSHION

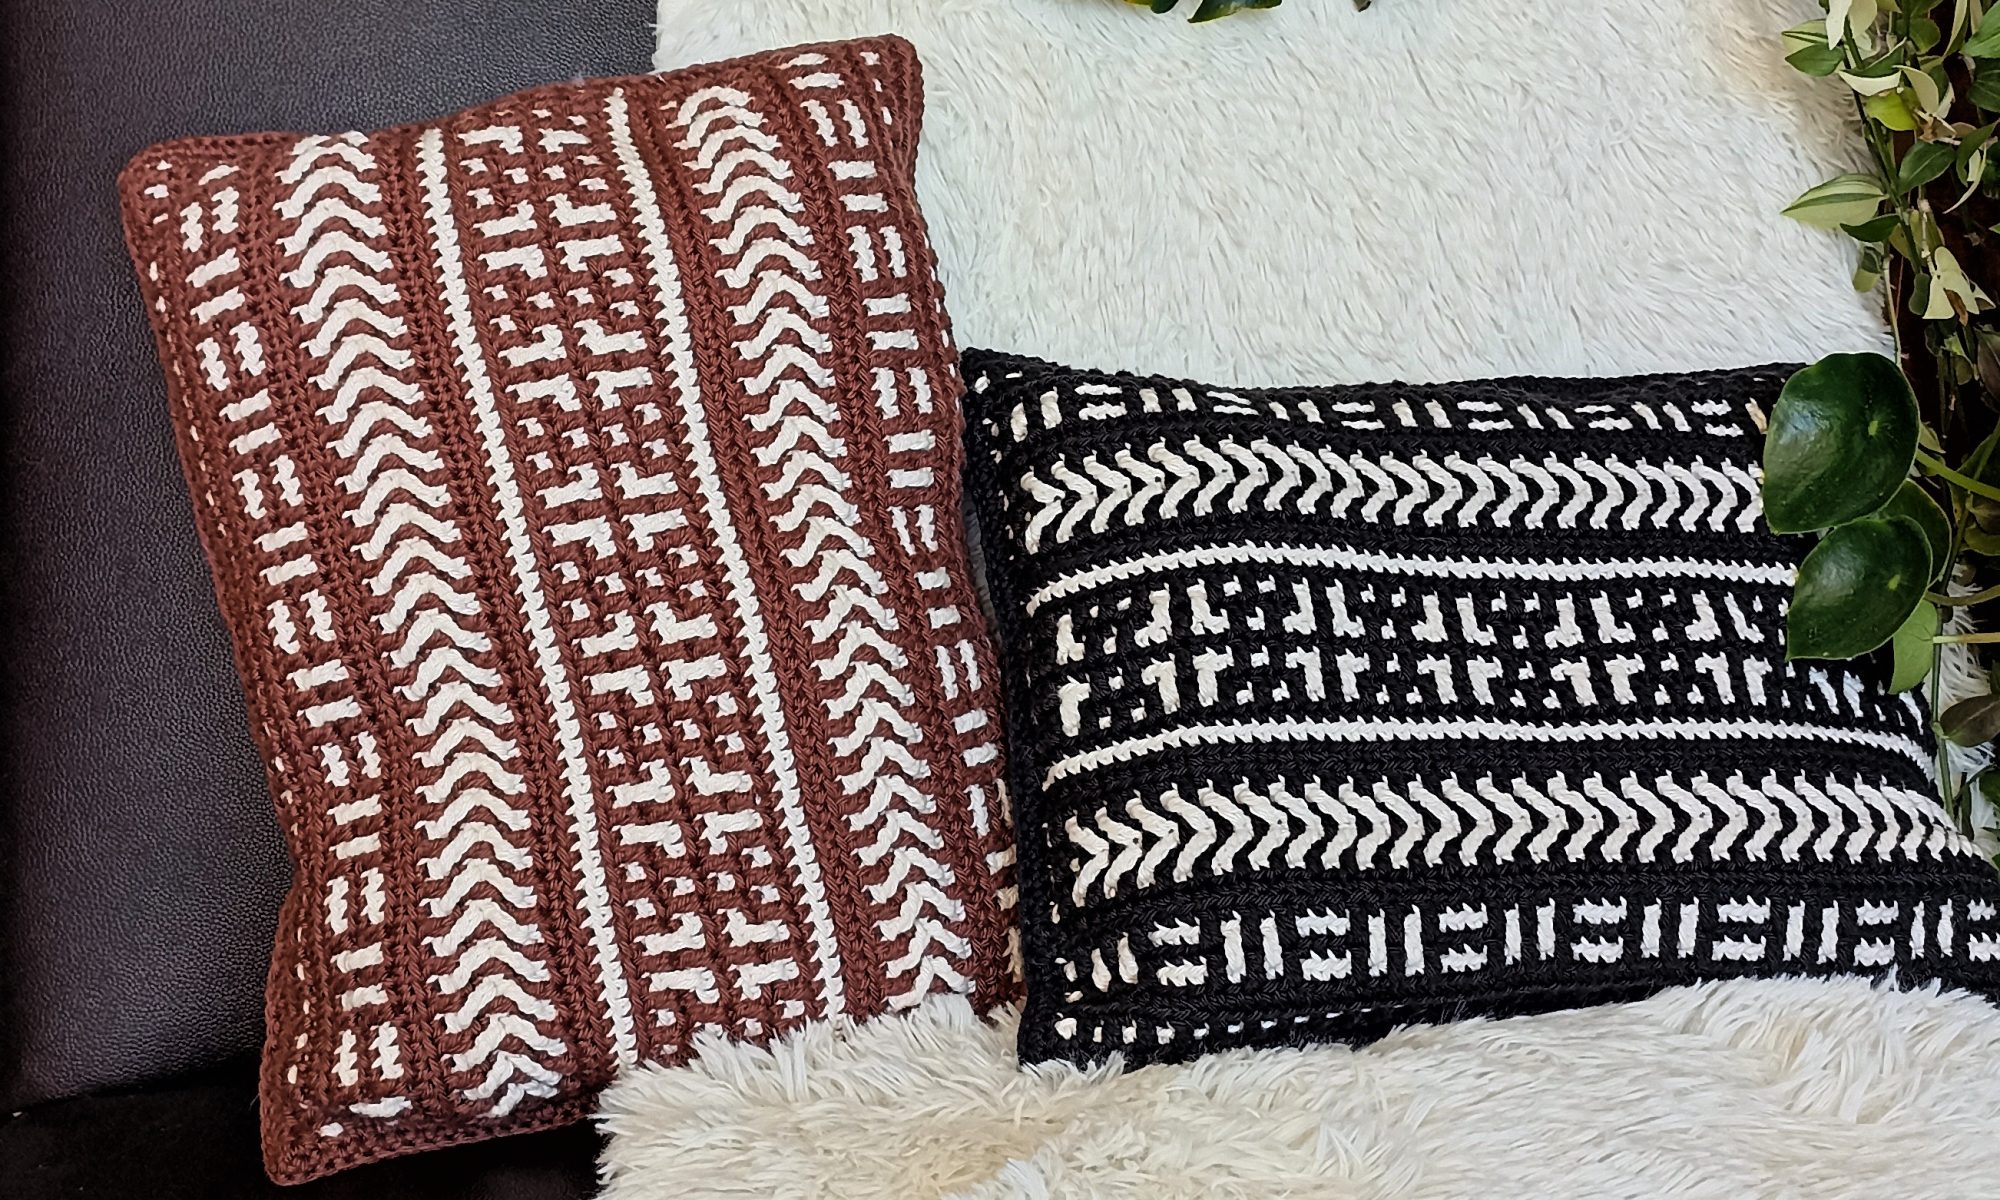
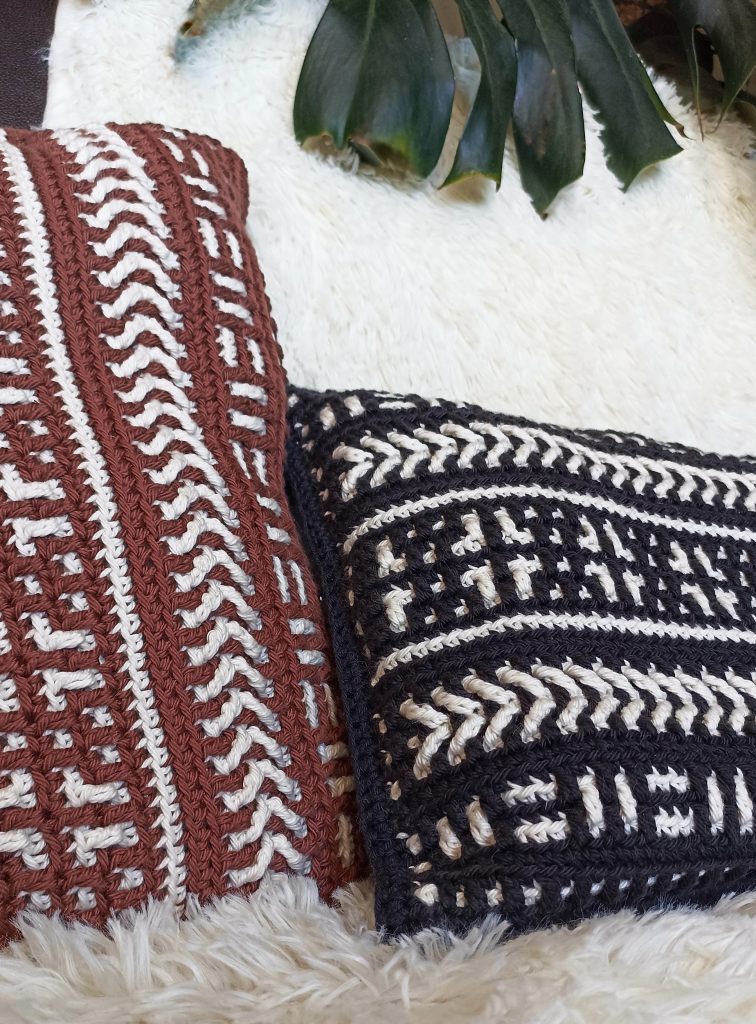
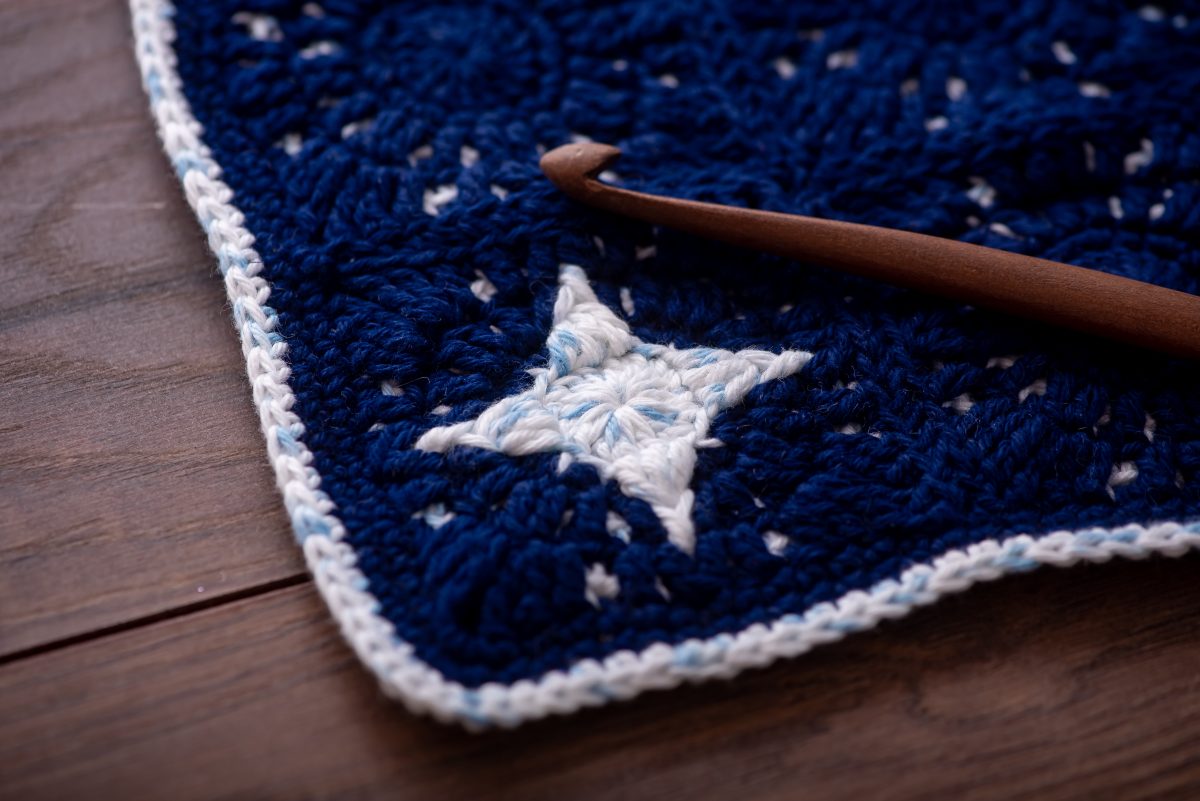
Hola queridxs Anandinis! Hace un tiempo que nos les traía un diseño gratuito, así que hoy les traigo AUTÓCTONO CUSHION (ya saben que amo el mosaico y los cojines). Es un diseño rápido, fácil y muy entretenido de tejer!

Hello dear Anandinis! It’s been a while since I brought you a free design, so today I bring you AUTÓCTONO CUSHION (you know I love mosaic and cushions). It’s a quick, easy, and very entertaining design to crochet!

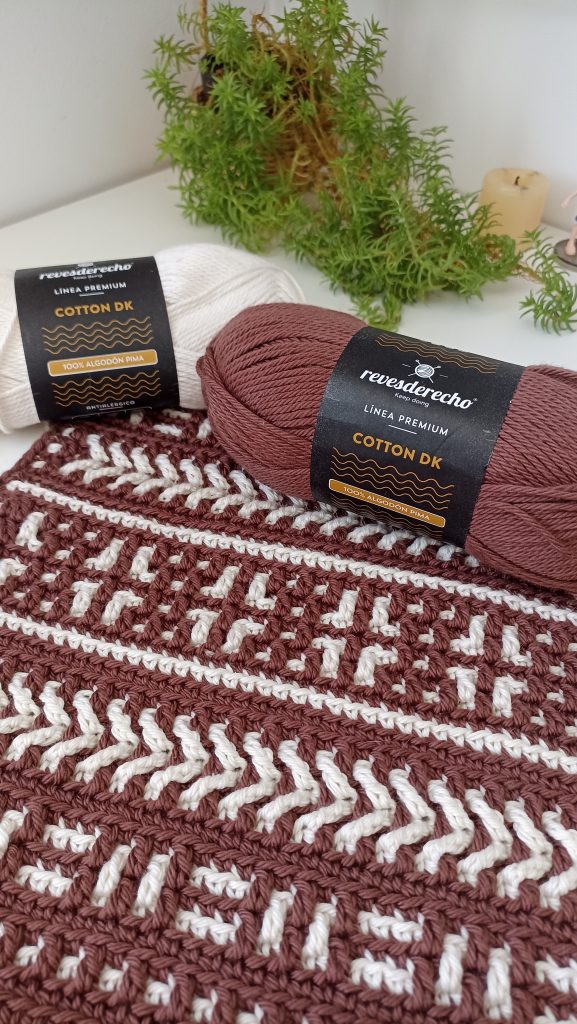
Esta vez usé los maravillosos Algodones premium grosor DK de revesderecho, y no les mentiré, son M A R A V I L L O S O S, con una suavidad inmejorable. Asi que si pueden hacer el cojín con estos materiales, no se arrepentirán. Para la versión 1: utilicé 1 ovillo de 100g de café moro (008) y 1 ovillo de color crudo (049). 
Para la versión 2: 1 ovillo de negro (002) y un ovillo de crudo (049).

MATERIALS

Cotton yarn- DK weight
Colour 1: 100g/230m
Colour 2: 100G/230m

MATERIALES

Hilo de algodón- Grosor DK
Color 1: 100g/230m
Color 2: 100g/230m

ABBREVIATIONS (US TERMS)

ch: chain
sc: single crochet
blo: back loop only
dc: double crochet
flo: front loop only
sk: skip
RS: Right side
tr: treble crochet
C1-C2: Colour 1-2

ABREVIACIONES

cad: cadeneta
pb: punto bajo
sht: tomar sólo hebra trasera
pa: punto alto
shd: tomar sólo hebra delantera
salt 1p: saltar 1 punto
LD: lado derecho del tejido
dpa: doble punto alto
C1-C2: Color 1-2

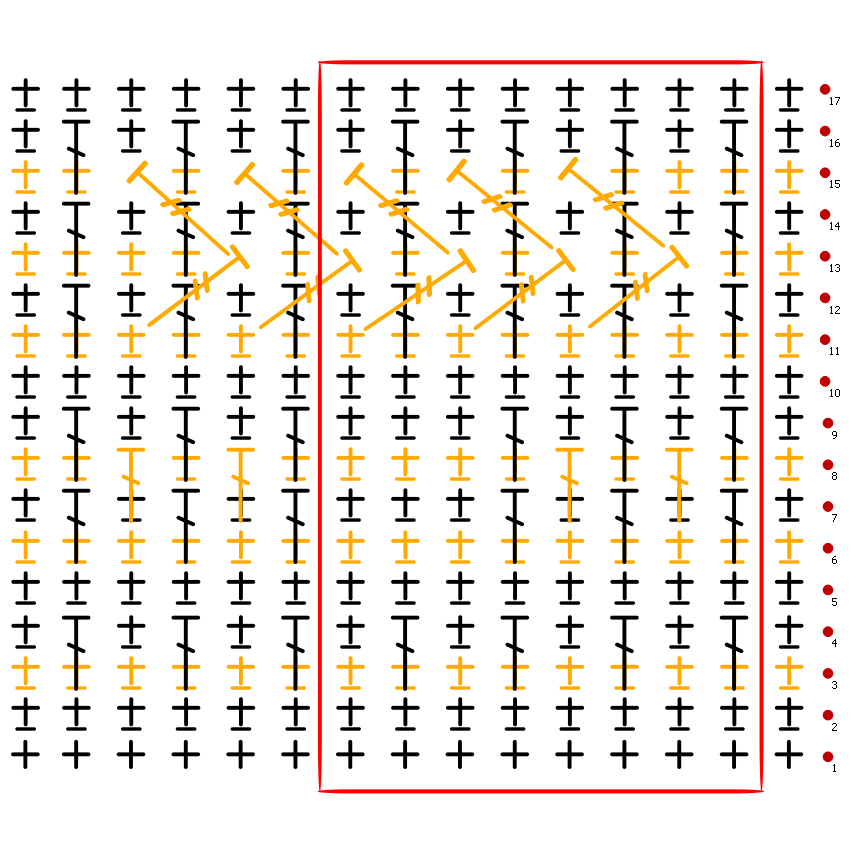
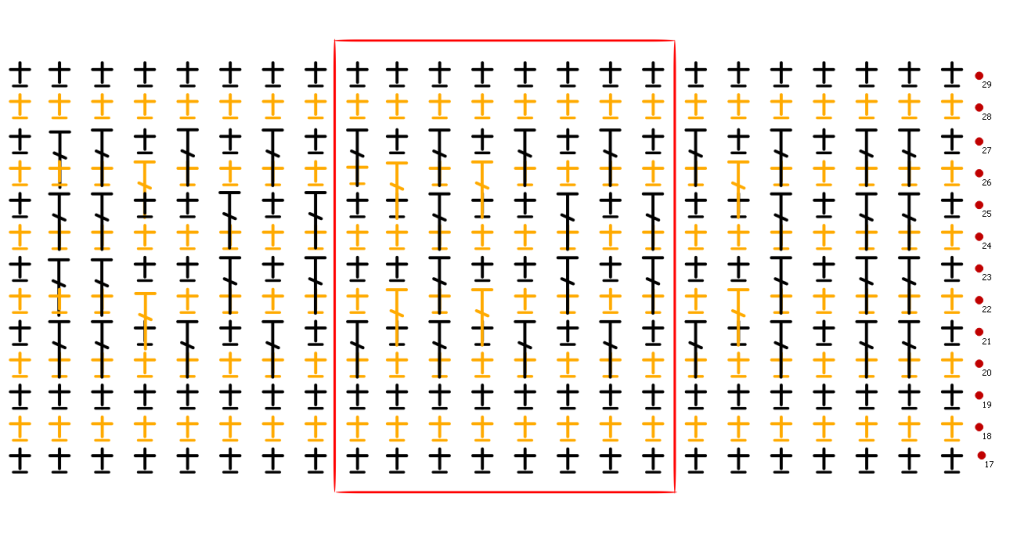
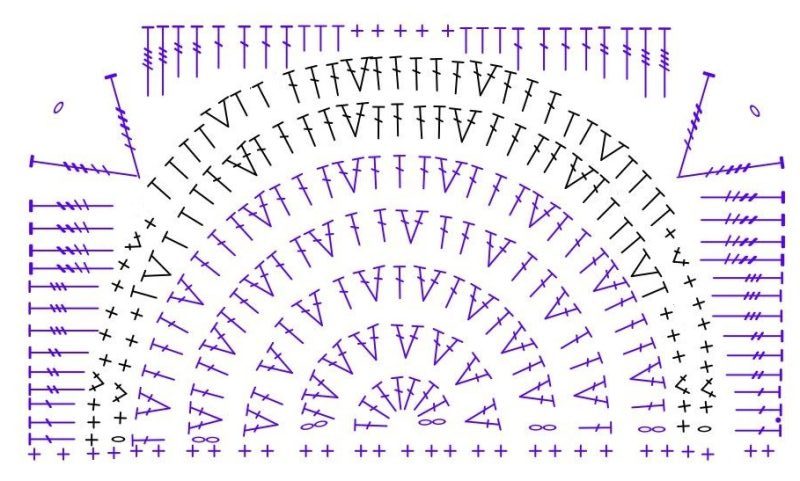
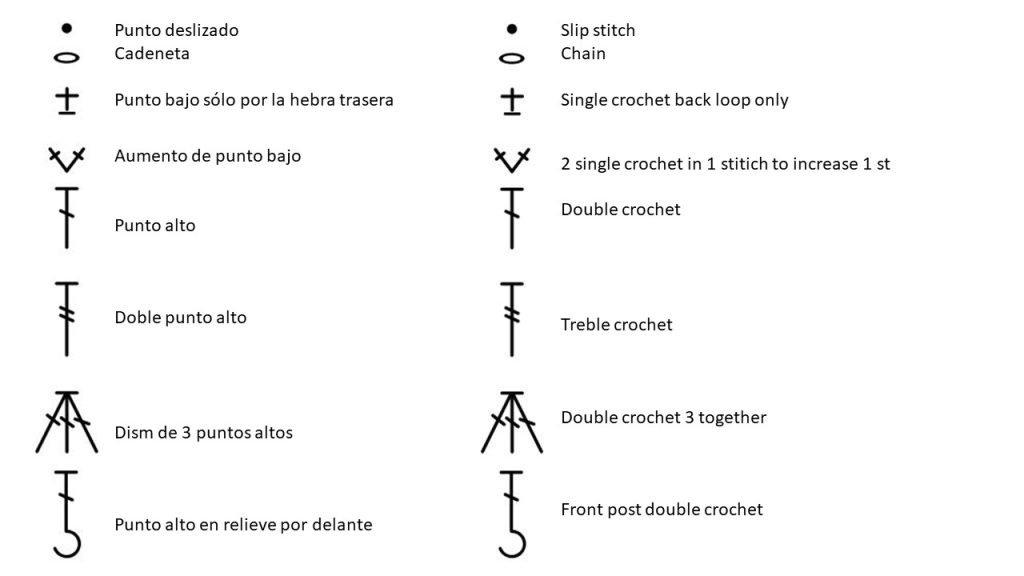
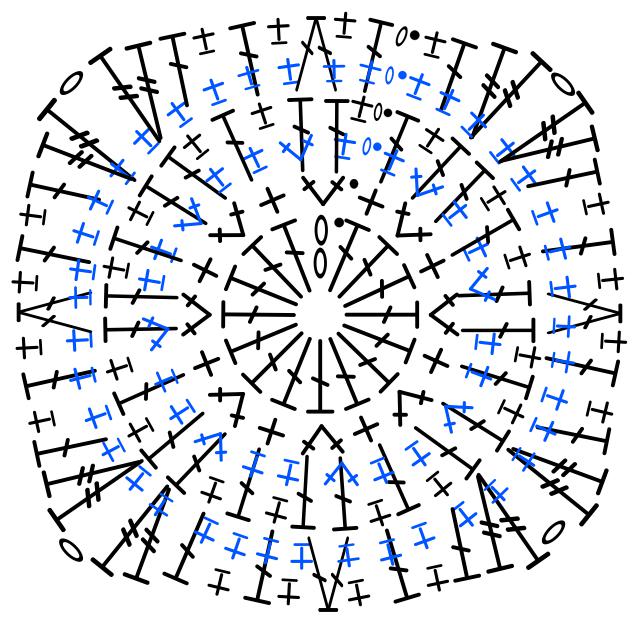
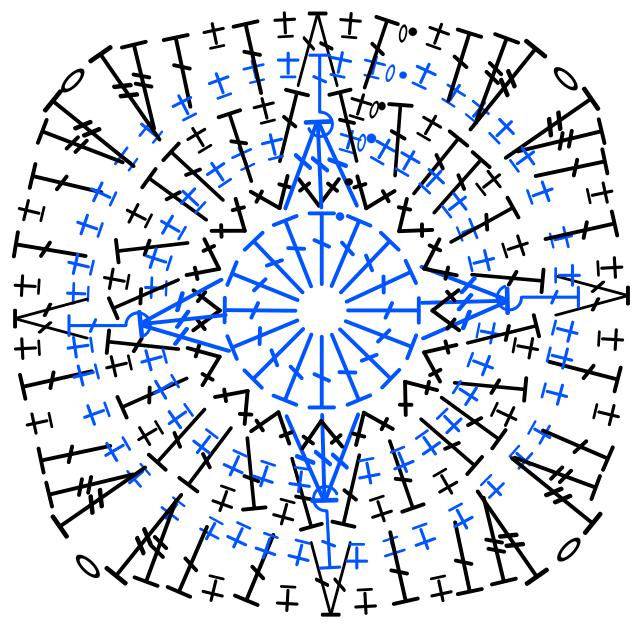
Gráficos de mosaico/ mosaic charts

Gráficos clásicos/ clasical charts

Gráfico A/ Chart A

Gráfico B / Chart B

Acerca del patrón

  • En un diseño en overlay mosaico. Trabajaremo siempre por el lado derecho del tejido, así que cuando terminemos una fila, debemos cortarla y comenzar por el otro extremo nuevamente; por ejemplo: si comienzas por la derecha, terminarás la fila en el extremo izquierdo, lo cortas y unes el color siguiente al extremo derecho nuevamente.
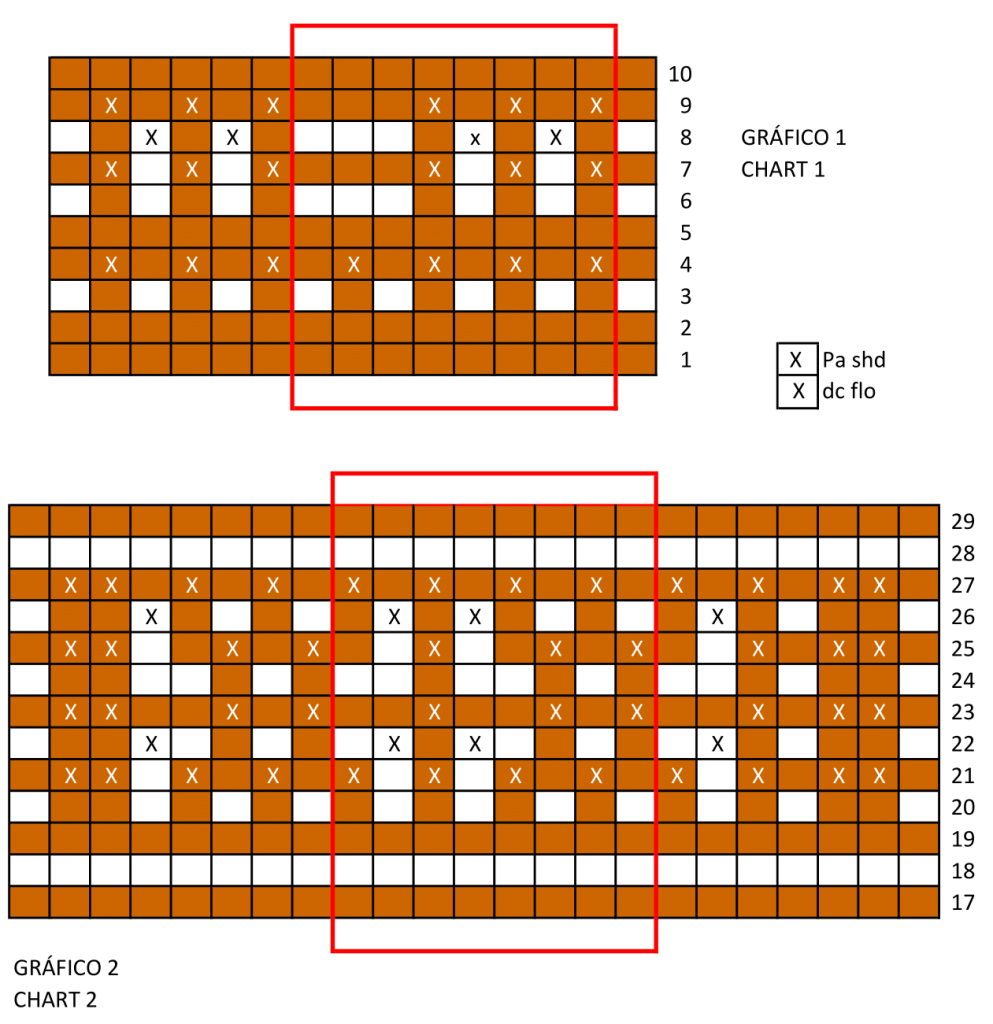
  • Hay dos tipos de gráficos (Gráficos 1-2 y A-B), ambos tipos de gráficos te llevarán al mismo resultado, por lo que puedes elegir cualquiera para guiarte. Recuerda revisar las instrucciones escritas por si tienes dudas.
  • La muestra no es necesaria ya que es un accesorio. Sólo debes utilizar un grosor DK. En caso de que quieras utilizar un grosor más delgado, ten en cuenta que el múltiplo de este diseño es de 8+7

About the pattern

  • It is a mosaic overlay design. We will always work on the right side of the fabric, so when you finish a row, you must fasten it off and start again from the other end; for example: if you start from the right end, you’ll finish the row at the left end, fasten it off, and join the next color back to the right end again.
  • There are two types of charts (Charts 1-2 and A-B), both types of charts will lead you to the same result, so you can choose either one to guide you. Remember to check the written instructions if you have any doubts.
  • The gauge is not necessary as it is an accessory. You only need to use a DK weight yarn. In case you want to use a thinner weight, keep in mind that the multiple for this design is 8+7 stitches.

Comienza ................../ Start

Con C1, Urde 63 cad
F1, C1. LD: 1cad (no cuenta como p), 63 pb, cierra y corta.
F2, C1: 63 pb sht, cierra y corta.
F3, C2: 63 pb sht, cierra y corta.
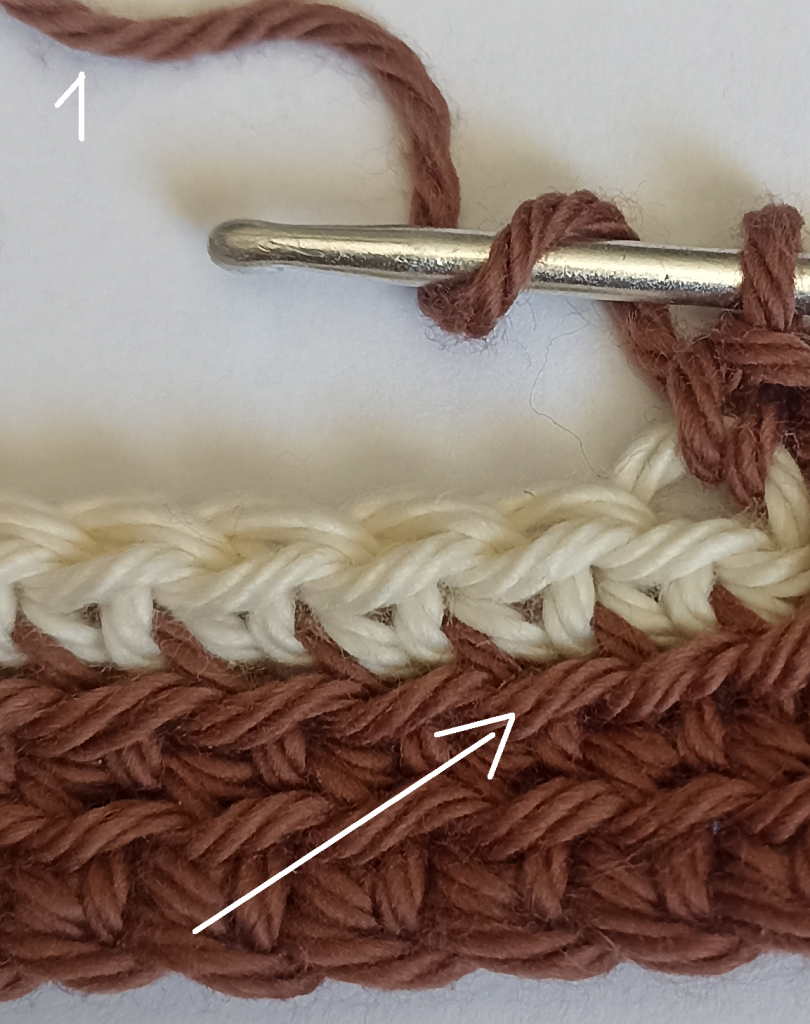
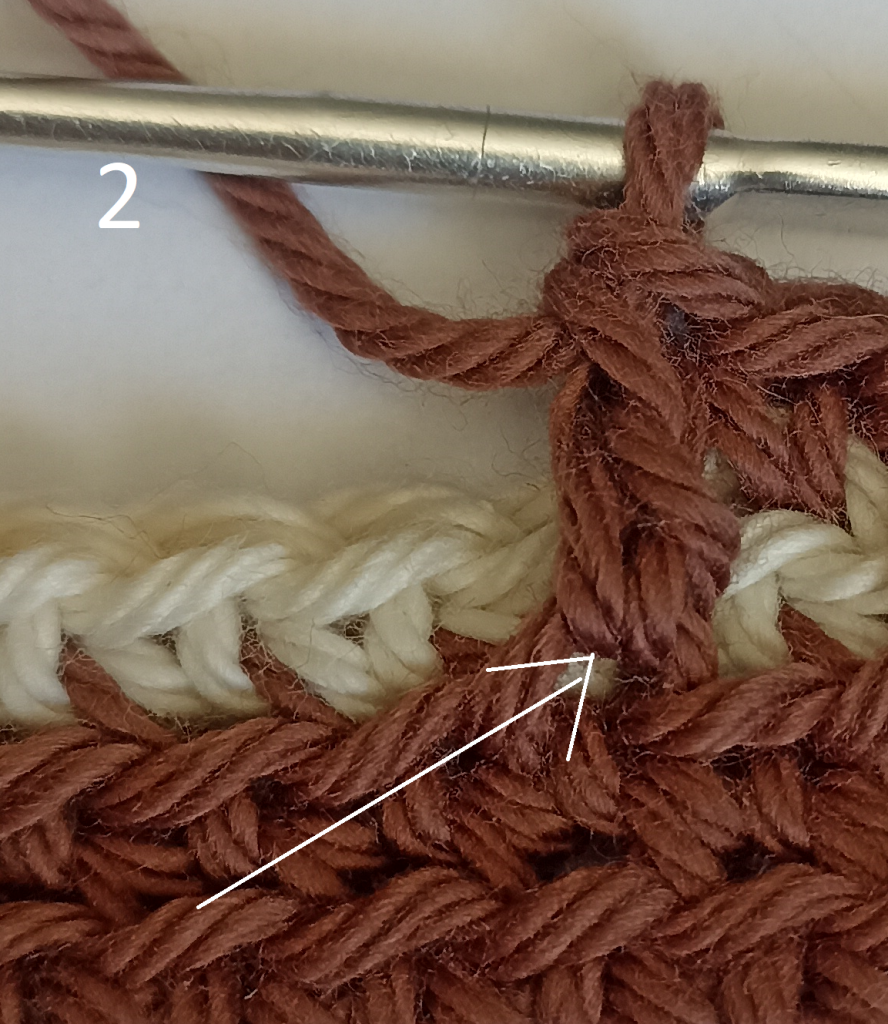
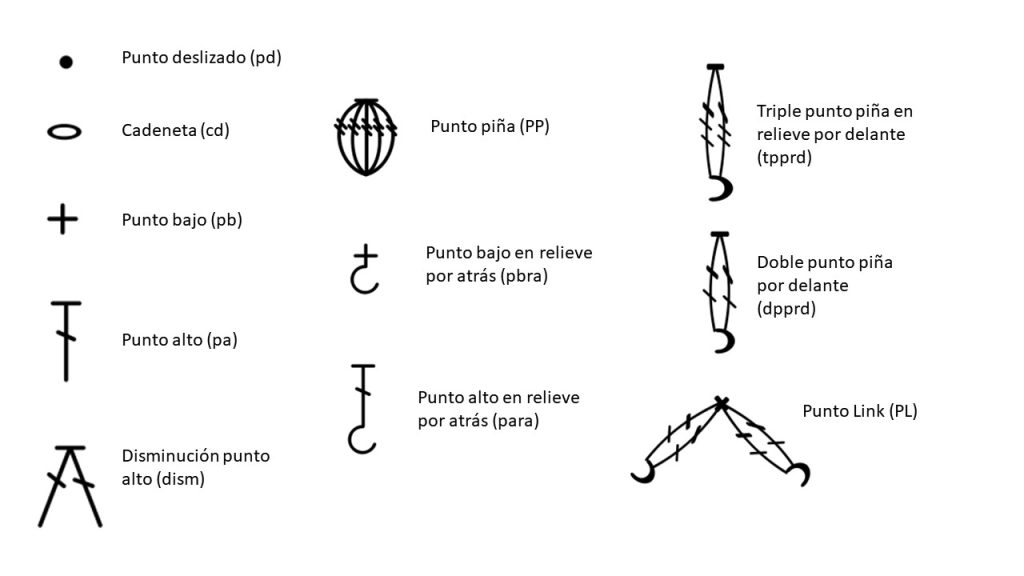
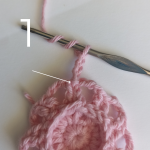
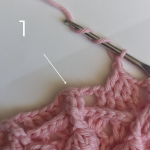
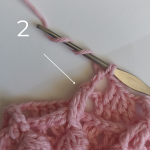
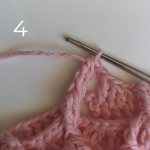
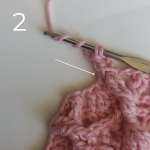
F4, C1: 1pb sht, *1pa shd en pb justo abajo en la F2 (fig 1 y 2), salt 1p, 1pb sht, rep desde* hasta el final, cierra y corta.

F5, C1: 63 pb sht, cierra y corta.
F6, C2: 63 pb sht, cierra y corta.
F7, C1: 1pb sht, *[1pa shd en pb justo abajo en la F5, salt 1p, 1pb sht] 3 veces, 2pb sht, rep desde* 7 veces, [1pa shd en pb justo abajo en la F5, salt 1p, 1pb sht] 3 veces, cierra y corta.
F8, C2: 1pb sht, *[1pb sht, 1pa shd en pb justo abajo en la F6, salt 1p] 2 veces, 4pb sht, rep desde* 7 veces, [1pb sht, 1pa shd en pb justo abajo en la F6, salt 1p] 2 veces, 2pb sht, cierra y corta.
F9, C1: Rep F7
F10, C1: 63 pb sht, cierra y corta.
F11, C2: 63 pb sht, cierra y corta.
F12, C1: Rep F4.
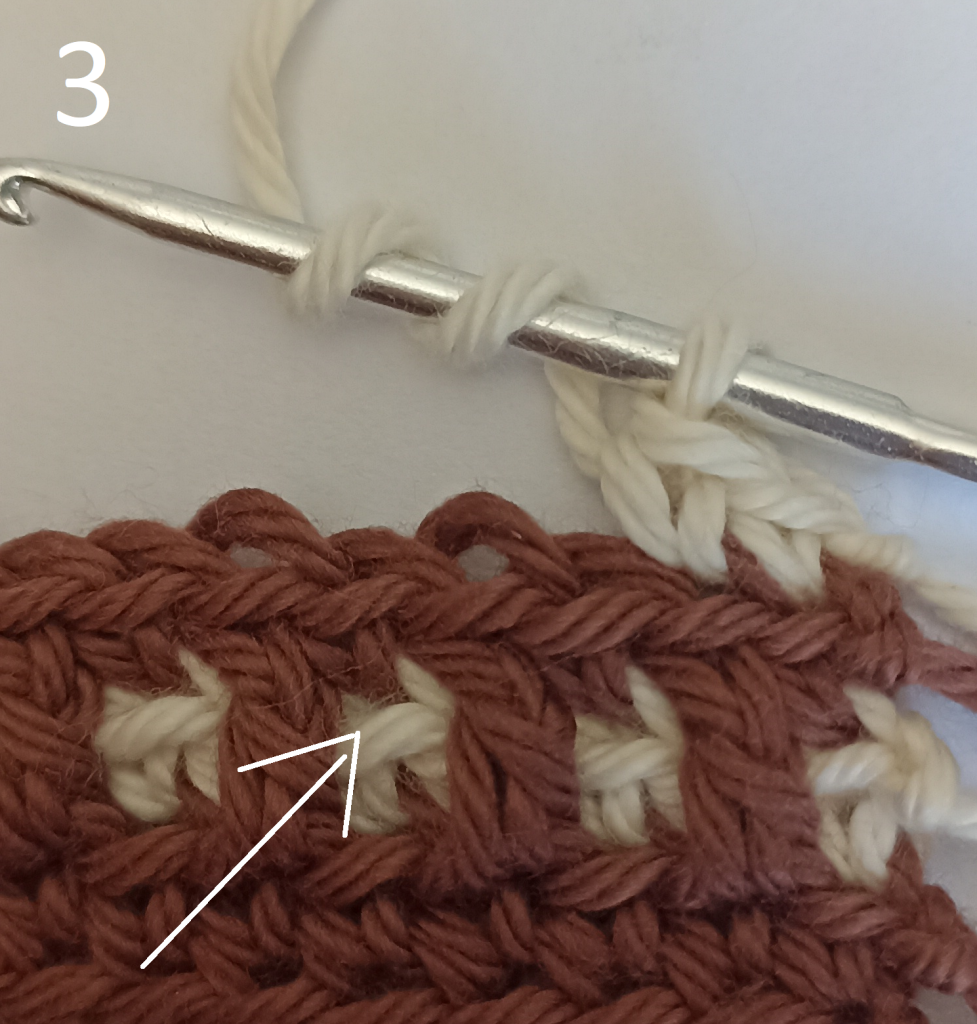
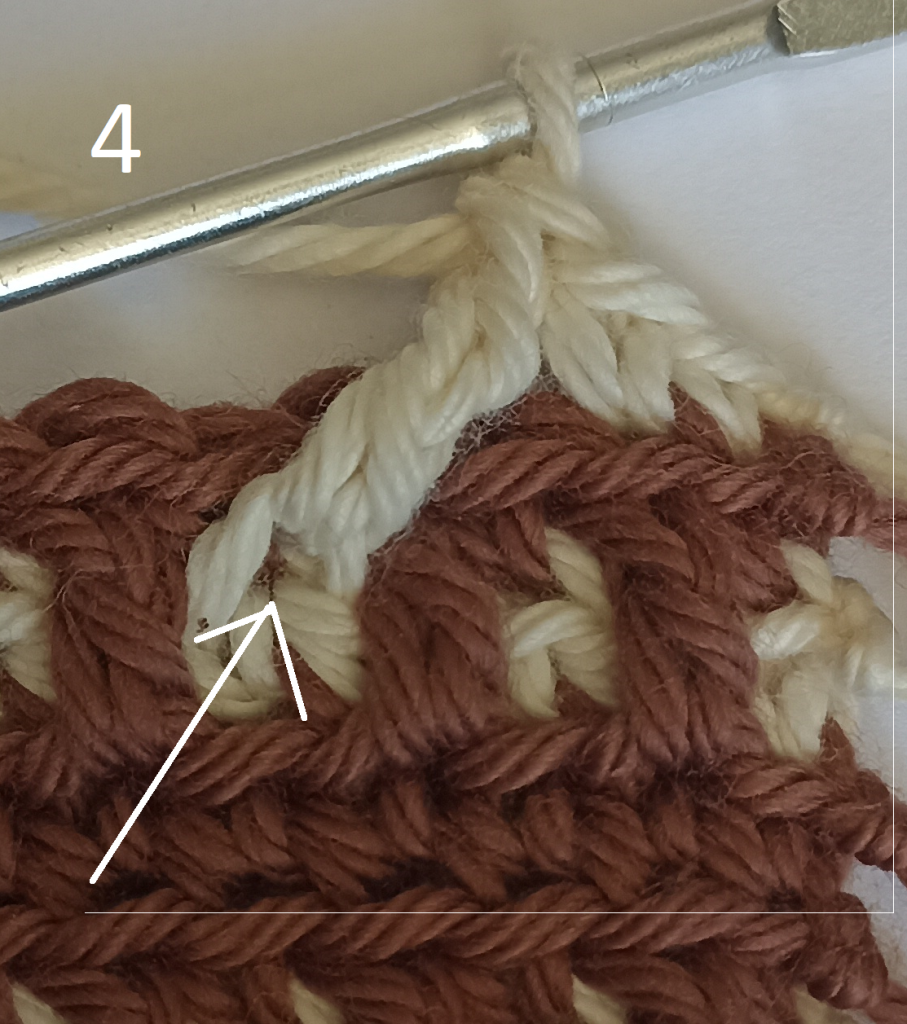
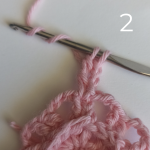
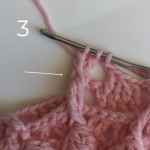
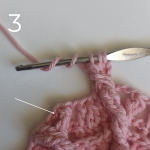
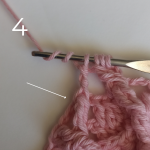
F13, C2: 1pb sht, *1pb sht, 1dpa shd en pb dos pts más adelante en la F11 (fig 3 y 4), salt 1p, rep desde* hasta 4pts antes de terminar la fila, 4pb sht, cierra y corta.

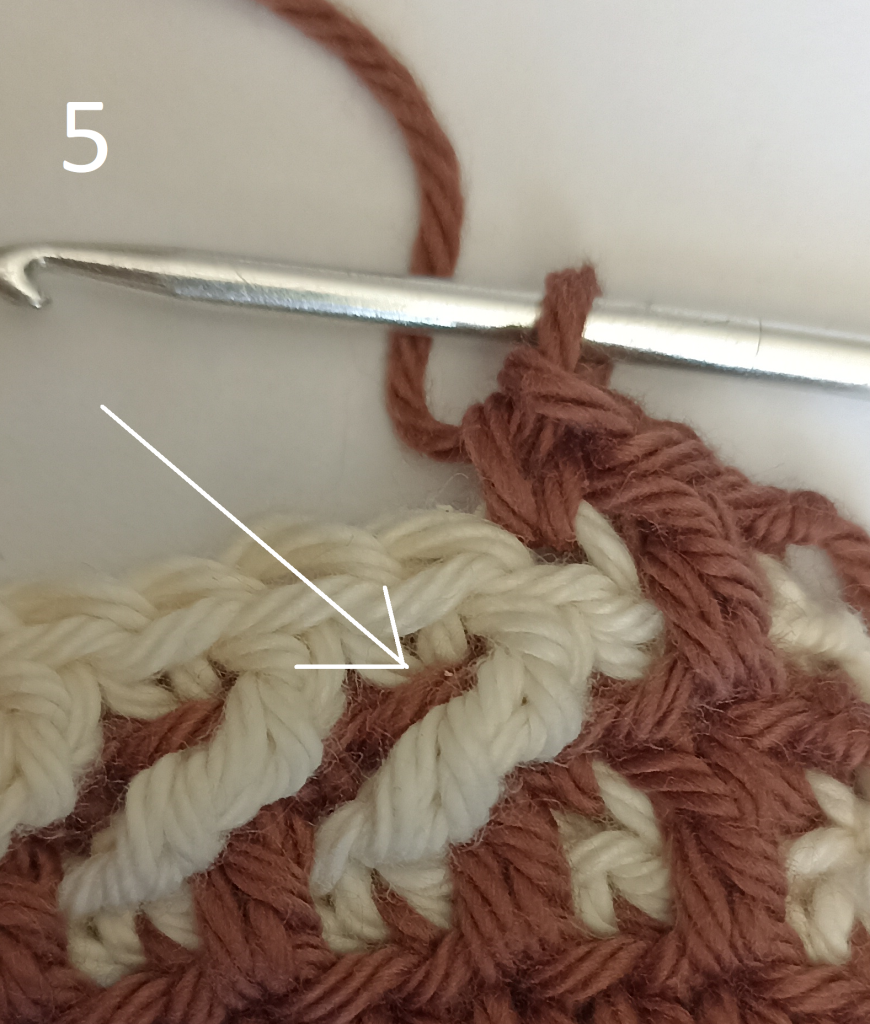
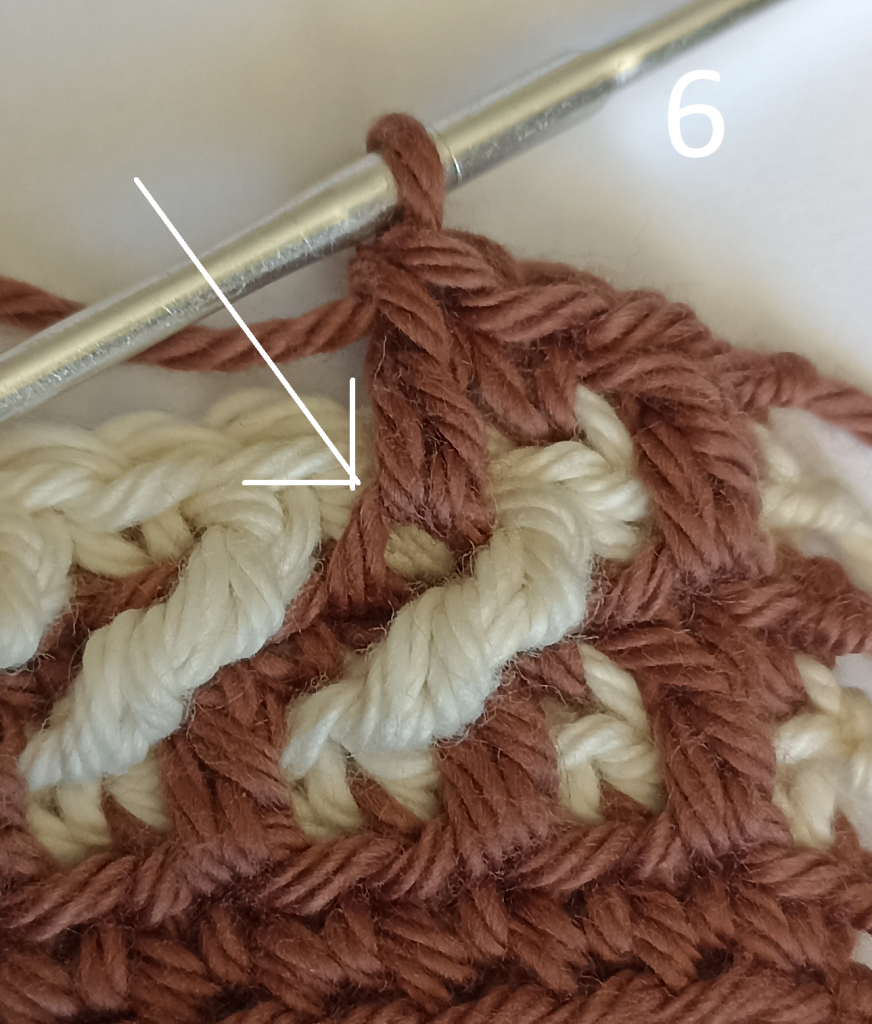
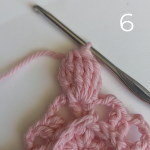
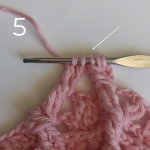
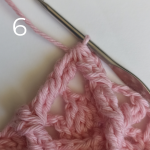
F14, C1: 1pb sht, *1pa shd en pa justo abajo en la F12 (fig 5 y 6),  salt 1p, 1pb sht, rep desde* hasta el final, cierra y corta.

F15, C2: 4pb sht, *1dpa shd en dpa dos puntos más atrás en la F13 (ver gráfico B), salt 1p, 1pb sht, rep desde* hasta 1 pt antes de terminar, 1pb sht, cierra y corta.
F16, C1: Rep F14
F17, C1: 63 pb sht, cierra y corta.
F18, C2: 63 pb sht, cierra y corta.
F19, C1: Rep F17
F20, C2: Rep F18
F21, C1: 1pb sht, 2pa shd en 2pb justo abajo en la F19, salt 2pts,* 1pb sht, 1pa shd en pb justo abajo, salt 1p, rep desde* hasta 2pts antes de terminar, 1pa shd, 1pb sht, cierra y corta.
F22, C2: 5pb sht, 1pa shd en pb justo abajo en la F20, salt 1p, 1pb sht, *4pb sht, [pa shd en pb de la F20, salt 1p, 1pb sht] 2 veces, rep desde* 6 veces, 4pb sht, 1pa shd en pb de la F20, salt 1p, 3pb sht, cierra y corta.
F23, C1: 1pb sht, 2pa shd en 2pa justo abajo en la F21, salt 2pts, 1pb sht, 1pa shd en pb justo abajo, salt 1p, 2pb sht,* [1pa shd en pb justo abajo, salt 1p, 1pb sht] 2 veces,  1pb sht, 1 pa shd, salt 1p, 2pb sht, rep desde* 6 veces, [1pa shd en pb justo abajo, salt 1p, 1pb sht] 2 veces,  1pb sht, 2 pa shd en 2pa justo abajo en la F21, salt 2pts, 1pb sht,  cierra y corta.
F24, C2: 63 pb sht, cierra y corta.
F25, C1: Rep F23
F26, C2: Rep F22
F27, C1: Rep F21
F28, C2: Rep F24
F29, C1: Rep F19
F30- F36: Rep desde la F10 a la F16
F37- F41: Rep desde la F5 a la F9
F42- F45: Rep desde la F2 a la F5

With C1, work 63 ch
F1, C1, RS: ch1 (does not count as st), 63 sc, fasten off.
F2, C1: 63 sc blo, fasten off.
F3, C2: 63 sc blo, fasten off.
F4, C1: 1sc blo, *1dc flo in sc right below in F2 (fig 1 and 2), sk 1st, 1sc blo in next st, rep from*, to end, fasten off.

F5, C1: 63 sc blo, fasten off.
F6, C2: 63 sc blo, fasten off.
F7, C1: 1sc blo, *[1dc flo in sc right below in F5, sk 1st, 1sc blo in next st] 3times, sc blo in next 2 sts, rep from* 7 times, [1dc flo in sc right below in F5, sk 1st, 1sc blo in next st] 3 times, fasten off.
F8, C2: 1sc blo, *[1sc blo in next st, 1dc flo in sc right below in F6, sk 1st] twice, sc blo in next 4sts, rep from* 7 times, [1sc blo in next st, 1dc flo in sc right below in F6, sk 1st] twice, sc blo in  next 2sts, fasten off.
F9, C1: Rep F7
F10, C1: 63 sc blo, fasten off.
F11, C2: 63 sc blo, fasten off.
F12, C1: Rep F4
F13, C2: 1sc blo, *[1sc blo in next st, 1tr flo in sc two sts ahead in F11 (fig 3 and 4), sk 1st* to 4 sts before ending the row, sc blo in next 4 sts, fasten off.

F14, C1: 1sc blo, *1dc flo in dc right below in F12 (fig 6 and 7), sk 1st, 1sc blo in next st, rep from* to end, fasten off.

F15, C2: 4sc blo, *1tr in tr two sts  back in F13 (see Chart B), sk 1st, 1sc blo in next st, rep from* 1st before ending the row, 1sc blo in next st, fasten off.
F16, C1: Rep F14
F17, C1: 63 sc blo, fasten off.
F18, C2: 63 sc blo, fasten off.
F19, C1: Rep F17
F20, C2: Rep F18
F21, C1: 1sc blo, dc flo in next 2sc right below in F19, sk 2sts, *1sc blo in next st, 1dc flo in sc right below in F19, sk 1st, rep from* to 2sts before ending the row, 1dc flo in sc right below in F19, 1sc blo in last st, fastn off.
F22, C2: 5sc blo, 1dc flo in sc right below in F20, sk 1st, 1sc blo in next st, *sc blo in next 4sts, [1dc flo in sc right below in F20, sk 1st, 1sc blo in next st] twice, rep from* 6 times, sc blo in next 4 sts, 1dc flo in sc right below, sk 1st, sc blo in next 3 sts, fasten off.
F23, C1: 1sc blo, 1dc flo in 2dc right below in F21, sk 2sts, 1sc blo in next st, 1dc flo in sc rightbelow in F21, sk 1st, sc blo in next 2sts, *[1dc flo in sc right below in F21, sk 1st, 1sc blo in next st] twice, 1dc flo in sc right below in F21, sk 1st, sc blo in next 2sts, rep from* 6 times, [1dc flo in sc right below in F21, sk 1st, 1sc blo in next st] twice, sc blo in next st, dc flo in next 2dc right below in F21, sk 2sts, sc blo in last st, fasten off.
F24, C2: 63 sc blo, fasten off.
F25, C1: Rep F23
F26, C2: Rep F22
F27, C1: Rep F21
F28, C2: Rep F24
F29, C1: Rep F19
F30- F36: Rep from F10 to F16
F37- F41: Rep from F5 to F9
F42- F45: Rep from F2 to F5

Otra mitad: Teje la otra mitad con 63 puntos bajos tomando sólo la hebra trasera por 45 filas. Utiliza los restos de hilos que ya utilizaste en el orden que prefieras.
Bloquealas.
Únelas: Enfrenta ambas mitades por el lado revés de tejido,  une los extremos trabajando 1 punto bajo en cada punto, pasando con 3 puntos bajos en cadaesquina, y unos puntos antes de finalizar, rellénala.

The other half: Crochet the other half with 63 single crochets, working only in the back loop, for 45 rows. Use the leftover yarn in the order you prefer.
Block them.
Joining: Place both halves with the wrong sides facing each other, join the ends by working 1 single crochet in each stitch, working 3 single crochets in each corner, and a few stitches before finishing, stuff it.

Realmente espero que hayas disfrutado de este bello proyecto. Recuerda leer bien. Tómate tu tiempo para comprender las instrucciones, gráficos y fotos que aquí aparecen.

Recuerda compartir este post, compartir tu progreso con el hashtag #AutoctonoCushion para ver todos sus avances 🙂

PD: este diseño NO ha sido testeado. Así que si encuentras algún error, por favor envíame un mensaje para actualizar el blog 🙂

I truly hope you’ve enjoyed this beautiful project. Remember to read carefully. Take your time to understand the instructions, charts, and photos provided here.

Remember to share this post, share your progress with the hashtag #AutoctonoCushion to see everyone’s advancements 🙂

PS: This design has NOT been tested. So if you find any mistakes, please send me a message to update the blog 🙂

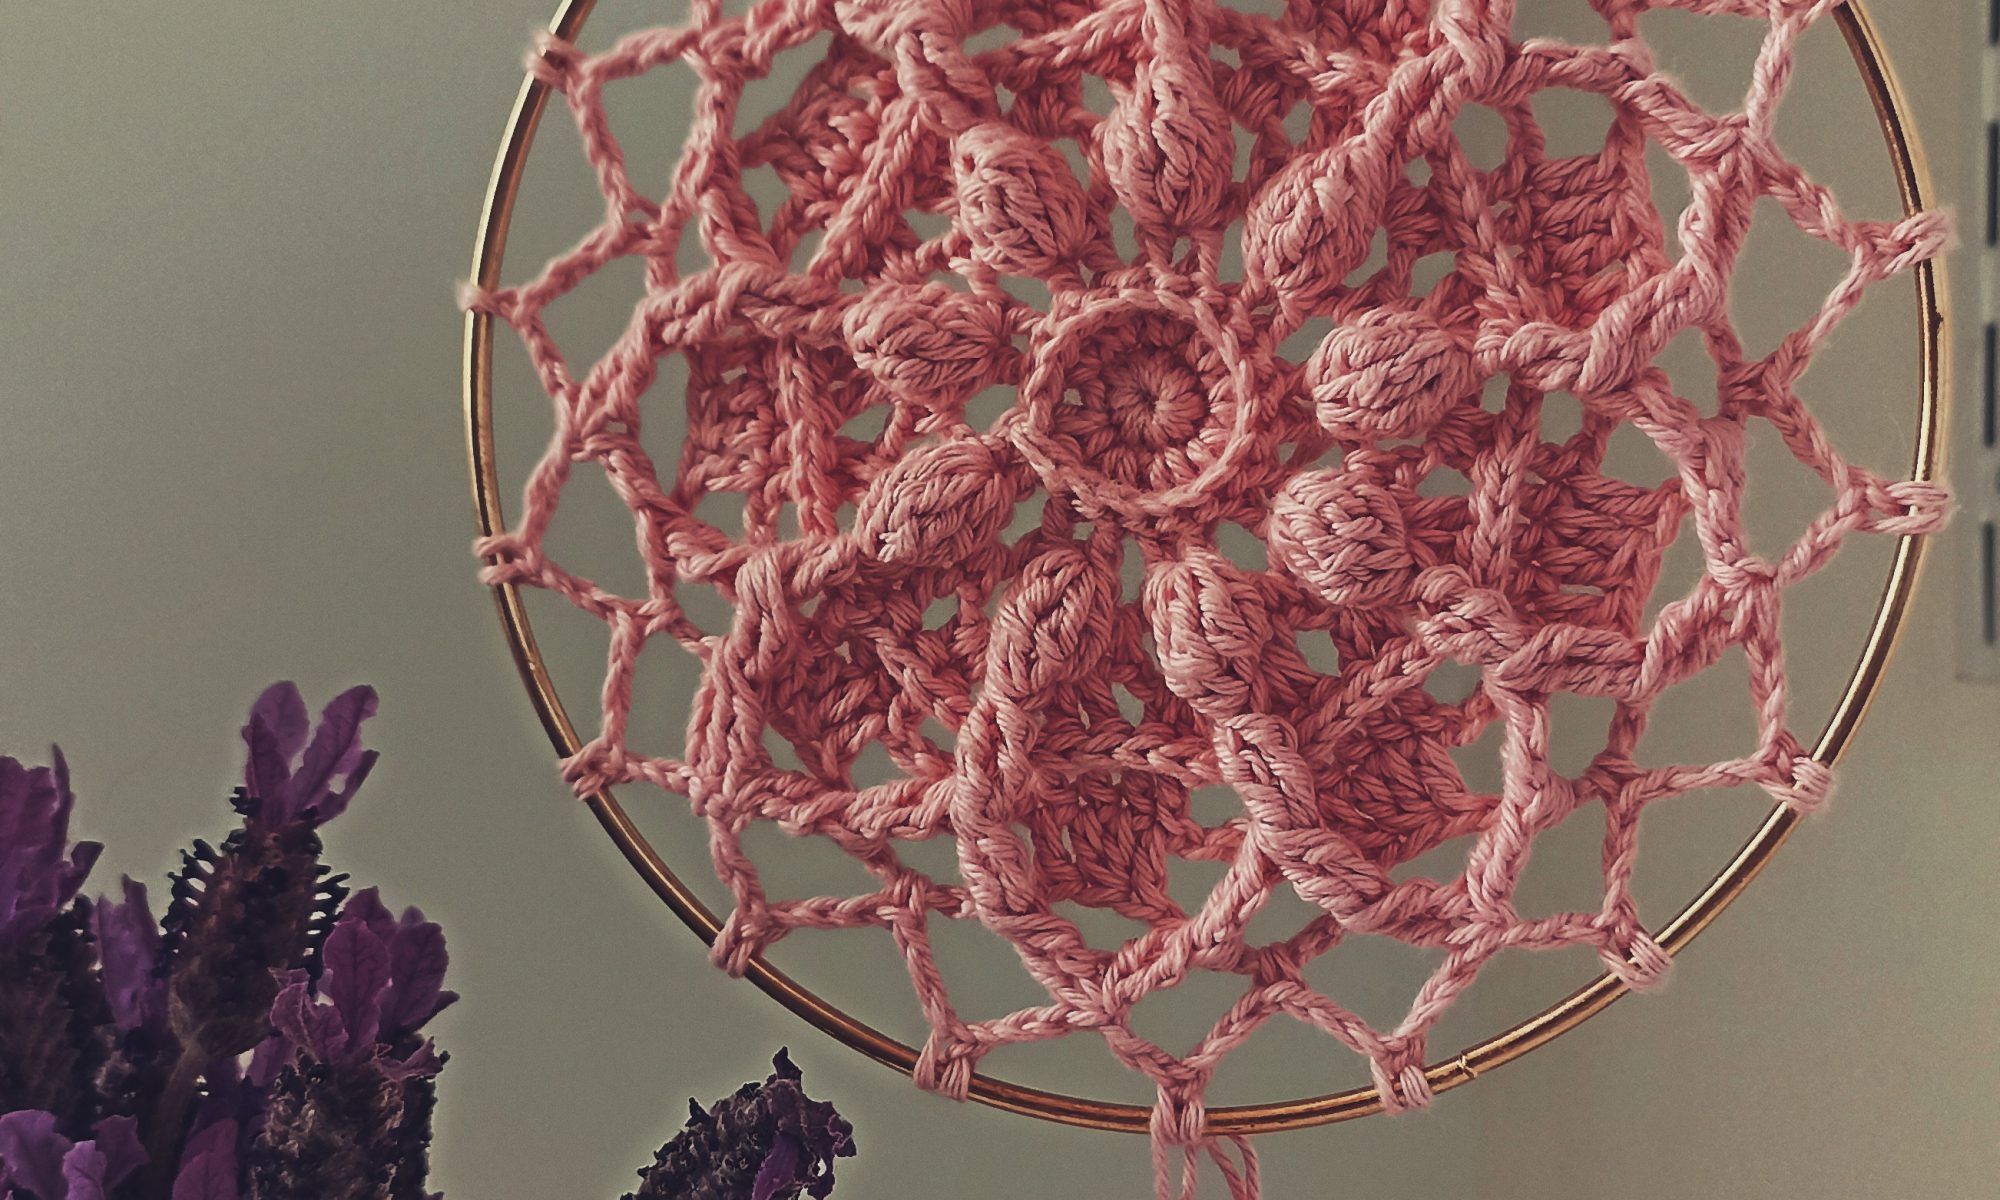
Un pequenio Mandala, diseño gratuito

Hola queridxs Anandinis <3 nos vemos una vez más por acá, esta vez para traerles un entretenido tutorial de «Un pequenio mandala». Tiene sólo 8 rondas de amor y cariño 🙂 con algunos toques de puntos en relieve (ya saben que los amo) por delante y por atrás. así que disfrútenlos!

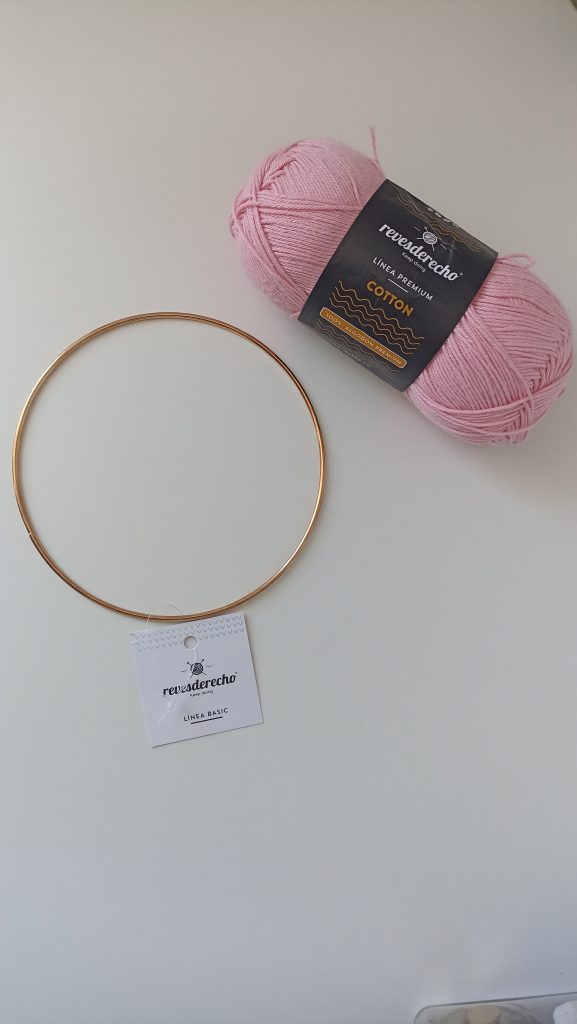
MATERIALES

  • Hilo de algodón o cualquier otro hilado grosor sport
  • 1 argolla de 15 cm mínimo
  • Marcadores
  • Tijera
  • 1 crochet de 2mm

MATERIALS

  • Cotton yarn or any yarn of sport weight
  • 1 ring of 15cm
  • markers
  • 1crochet hook 2mm

Patrón/Pattern

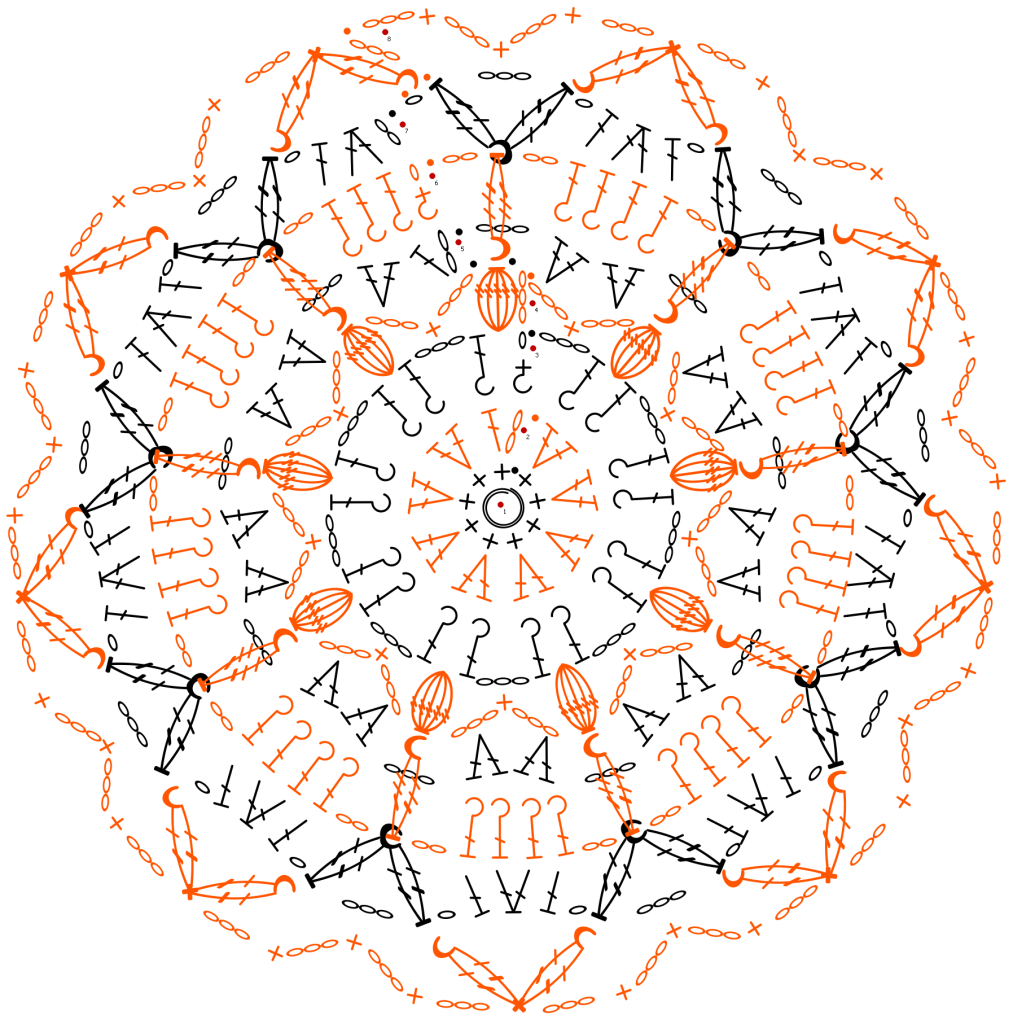
Gráfico/ chart

simbología/ Key

Puntos especiales/special stitches

Punto piña (PP) / Cluster stitch (CL)

Desde el último punto hecho, 2 lazadas y prepárate para enganchar el punto indicado (1), inserta el ganchillo en el punto indicado y 1 laz, tendrás 4 loops en el ganchillo, [1laz y pásala por 2 loops] 2 veces, tendrás 3 loops en el ganchillo, *inserta el ganchillo en el mismo punto, 1 laz, [1laz y pásala por 2 loops] 2 veces, rep desde* 4 veces, tendrás 6 loos en el ganchillo, 1laz y pásala por los loops restantes en el ganchillo (6)

From last stitch made, 2 yo and prepare to hook into the indicated stitch (1), insert the crochet hook into the indicated stitch and 1 yo, you will have 4 loops on the hook, [1yo and pass it through 2 loops] 2 times, you will have 3 loops on the hook, *insert the crochet hook in the same stitch, 1yo, [1yo and pass it through 2 loops] 2 times, repeat from* 4 times, 1 yo and pass it through the remaining 6 loops on the hook (6)

Triple punto piña en relieve por delante (TPPrd)/ double treble cluster stitch front post (dtCLFP)

Desde el último punto hecho, teje 3 lazadas (1), pasa el ganchillo por el punto indicado y haz 1 laz, tendrás 5 loops en el ganchillo, *1laz y pásala por 2 loops, rep desde* 3 veces, tendrás al final 2 loops, 3 lazadas en el ganchillo (2) y prepárate para en ganchar en el mismi punto anterior, haz 1 laz, tendrás 6 loops en el ganchillo, *1laz y pásala por 2 loops, rep desde* 3 veces, tendrás al final 3 loops (3), 1 laz y pásala por todos los loops del ganchillo (4)

From the last stitch made, 3 yarn over (1), pass the hook through the indicated stitch and 1yo, you will have 5 loops on the hook, *1 yo and pass it through 2 loops, repeat from* 3 times, you will have 2 loops at the end, 3 yo (2) and get ready to work in the same stitch, 1yo , you will have 6 loops on the hook, *1 yo and pass it through 2 loops, rep from* 3 times, you will have at the end 3 loops (3), 1yo and pass it through all the loops on the hook (4)

Doble punto piña en relieve por delante (dPPrd)/ treble cluster stitch front post (tCLFP)

Desde el último punto hecho, teje 2 lazadas (1), pasa el ganchillo por el punto indicado y haz 1 laz, tendrás 4 loops en el ganchillo, *1laz y pásala por 2 loops, rep desde* 2 veces, tendrás al final 2 loops, 2 lazadas en el ganchillo (2) y prepárate para en ganchar en el mismo punto anterior, haz 1 laz, tendrás 5 loops en el ganchillo, *1laz y pásala por 2 loops, rep desde* 2 veces, tendrás al final 3 loops (3), 1 laz y pásala por todos los loops del ganchillo (4)

From the last stitch made, 2 yarn over (1), pass the hook through the indicated stitch and 1yo, you will have 4 loops on the hook, *1 yo and pass it through 2 loops, repeat from* 2 times, you will have 2 loops at the end, 3 yo (2) and get ready to work in the same stitch, 1yo , you will have 5 loops on the hook, *1 yo and pass it through 2 loops, rep from* 2 times, you will have at the end 3 loops (3), 1yo and pass it through all the loops on the hook (4)

Punto link (PL) / Treble  cluster stitch front post (tCLFP)

Desde el último punto hecho, 2loops, y pepárate para enganchar (1), inserta el ganchillo en el punto indicado y haz 1 loop, tendrás 4 loops en el ganchillo, ]1laz y pásala por 2 loops] 2 veces, tendrás 2 loops en el ganchillo, 2laz (2), inserta el ganchillo en el mismo punto, 1laz, [1laz y pásala por 2 loops] 2 veces, te quedarán 3 loops en el ganchillo, 2 laz, inserta el ganchillo en el siguiente punto indicado (3), 1laz, [1laz y pásala por 2 loops] 2 veces, tendrás 4 loops en el ganchillo, 2 loops (4), inserta el ganchillo en el mismo punto, 1 laz, [1laz y pásala por 2loops] 2 veces, tendrás 5 loops en el ganchillo (5), 1laz y pásala por todos los loops en el ganchillo (6)

From the last stitch made, 2yo (1), insert the hook into the indicated stitch and work 1yo, you will have 4 loops on the hook, ]1yo and pass it through 2 loops] 2 times, you will have 2 loops on the hook, 2yo (2), insert the hook into the same stitch, 1yo, [1yo and pass it through 2 loops] 2 times, you will have 3 loops left on the hook, 2yo, insert the hook in the next indicated stitch (3), 1yo, [1yo and go through 2 loops] 2 times, you will have 4 loops on the hook, 2yo (4), insert the hook in the same stitch, 1yo, [1yo and go through 2 loops] 2 times, you will have 5 loops on the hook (5), 1yo and go through all the loops remaining on the hook (6)

Abreviaturas / abbreviations (US terms)

Rnd: ronda
pd:
 punto deslizado
cd: cadeneta
pb: punto bajo
pbra: punto bajo en relieve por atrás
pa: punto alto
para: punto alto en relieve por atrás
aum: aumento
dism: disminución
PP: punto piña
dPPrd: doble punto piña en relieve por delante
tPPrd: triple punto piña en relieve por delante
PL: punto link
[ ]: repite las instrucciones dentro del corchete las veces que se indique luego
**: repetir las instrucciones dentro de los asteriscos las veces que se menciona luego
esp-cd: trabaja en el espacio de las cadenetas

Rnd: round
sl st: slip stitch
ch: chain
sc: single crochet
scBP: single crochet back post
dc: double crochet
dc2tog: 1double crochet 2 stitches together
dcBP: double crochet back post
CL: cluster stitch
tCLFP: treble cluster stitch front post
dtCLFP: double treble cluster stitch front post
tCLFP2tog: treble cluster stitch front post 2 stitches together
ch-xsp: work into the x chain space
[ ]: repeat the instructions between the brackets as many times as mentioned next to it
**: repeat the instructions between the asterisks as many times as indicated next to it

Comienza

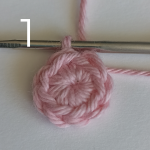
Rnd1: doble anillo mágico, 9 pb, pd para unir (foto 1)
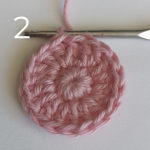
Rnd2: 2cad (cuentan como 1pa), 1pa en mismo primer p, 8 aum pa, pd para unir. [18pts] (foto 2)
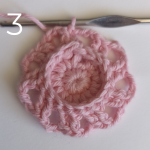
Rnd3: 1pbra más 1 cad cuenta como *1para , 1para, 3cd; rep desde* 9 veces, pd en cd para unir. (foto 3)
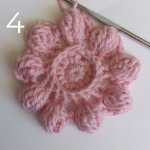
Rnd4: 3cd (no cuentan como p), *1PP en medio de 2pa de la rnd anterior, 3cd, 1pb en esp-3cd, 3cd; rep desde* 9 veces, pd en tercera cd para unir. (foto 4)
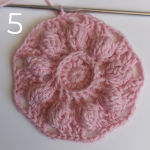
Rnd5: 2pd para llegar al espacio de 3cd, 2cad (cuenta como 1pa), 1pa en esp-3cd, 2pa en sig esp-3cd, *3cd, salt 1PP, 2pa en esp-3cd, 2pa en sig esp-3cd; rep desde* 8 veces, pd en segunda cd para unir. (foto 5)
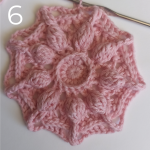
Rnd6: 1pbra más 1 cad que cuentan como *1para, 1para, 1para, 1para, 2cd, 1tPPrd en PP de la rnd4, 2cd; rep desde* 9 veces, pd en cd para unir. (foto 6)
Rnd7: 2cd que cuentan como *1pa, 1dism pa, 1pa, 1cd, 1dPPrd en tPPrd de la rnd anterior, 3cd, 1dPPrd en mismo tPPrd de la rnd anterior, 1cd; rep desde* 9 veces, pd en segunda cd para unir. (foto 7)
Rnd8: 3cd (no cuentan como 1p), *1PL, 3cd, 1pb en argolla (foto 8), 3cd, 1pb en esp-3cd, 3cd, 1pb en argolla, 3cd; rep desde* 9 veces, 1pd en tercera cd para unir. (foto 9 y 10).

Rnd1: doble magic ring, 9sc, sl st to join (pic 1)
Rnd2: ch2 (count as 1dc), 1dc in same first st, [2dc in next st]8 times, sl st to join [18sts] (pic 2)
Rnd3: 1scBP,  ch1 (count as  *1dcBP) , 1dcBP, ch3; rep from* 9 times, sl st in ch to join. (pic 3)
Rnd4: ch3 (dont count as st), *1CL in the middle of 2next dc from prev rnd , ch3, 1sc in ch3-sp, ch3; rep from 9 tiemes, sl st in 3th chain to join (pic 4)
Rnd5: 2sl st to reach next ch3-sp, ch2 (count as 1dc) 1dc in ch3-sp, 2dc in next ch3-sp, *ch3, skp 1CL, 2dc in ch3-sp, 2dc in next ch3- sp; rep from* 8 times, 1sl st in second ch to join. (pic 5)
Rnd6: 1scBP, ch1 (count as *1dcBP), 3dcBP, 2cd, 1dtCLFP in CL from rnd4, ch2; rep from* 9 veces, sl st in ch to join (pic 6)
Rnd7: ch2 (count as *1dc), 1dc2tog, 1dc, ch1, 1tCLFP in dtCLFP from prev rnd, ch3, 1tCLFP in dtCLFP from prev rnd, ch1; rep from* 9 times, sl st in second ch to join (pic 7)
Rnd8: ch3 (dont count as st), *1tCLFP2tog, ch3, 1sc on ring (pic 8), ch3, 1sc in ch3-sp, ch3, 1sc on ring, ch3; rep from* 9 times, sl st to join (pic 9 and 10).

¿Les gustó? ¡cuéntame en qué colores lo harás!

Espero te haya gustado tanto como a mi, y cuando lo termines, !decora tu espacio sagrado! Por favor, usa el hashtag #UnPequenioMandala para ver tus resultados en instagram!

Y recuerda que si encuentras algún error, estaré encantada de escucharte para corregirlo

Did you like it? let me know in which colors you will do it!

I hope you liked it as much as I did, and when you finish it, decorate your sacred space! Please use the hashtag #UnPequenioMandala to see your results on instagram!

And remember, if you find any errata, I’ll be happy to hear from you to correct them!

Sunset Pillow

FADE EN CROCHET

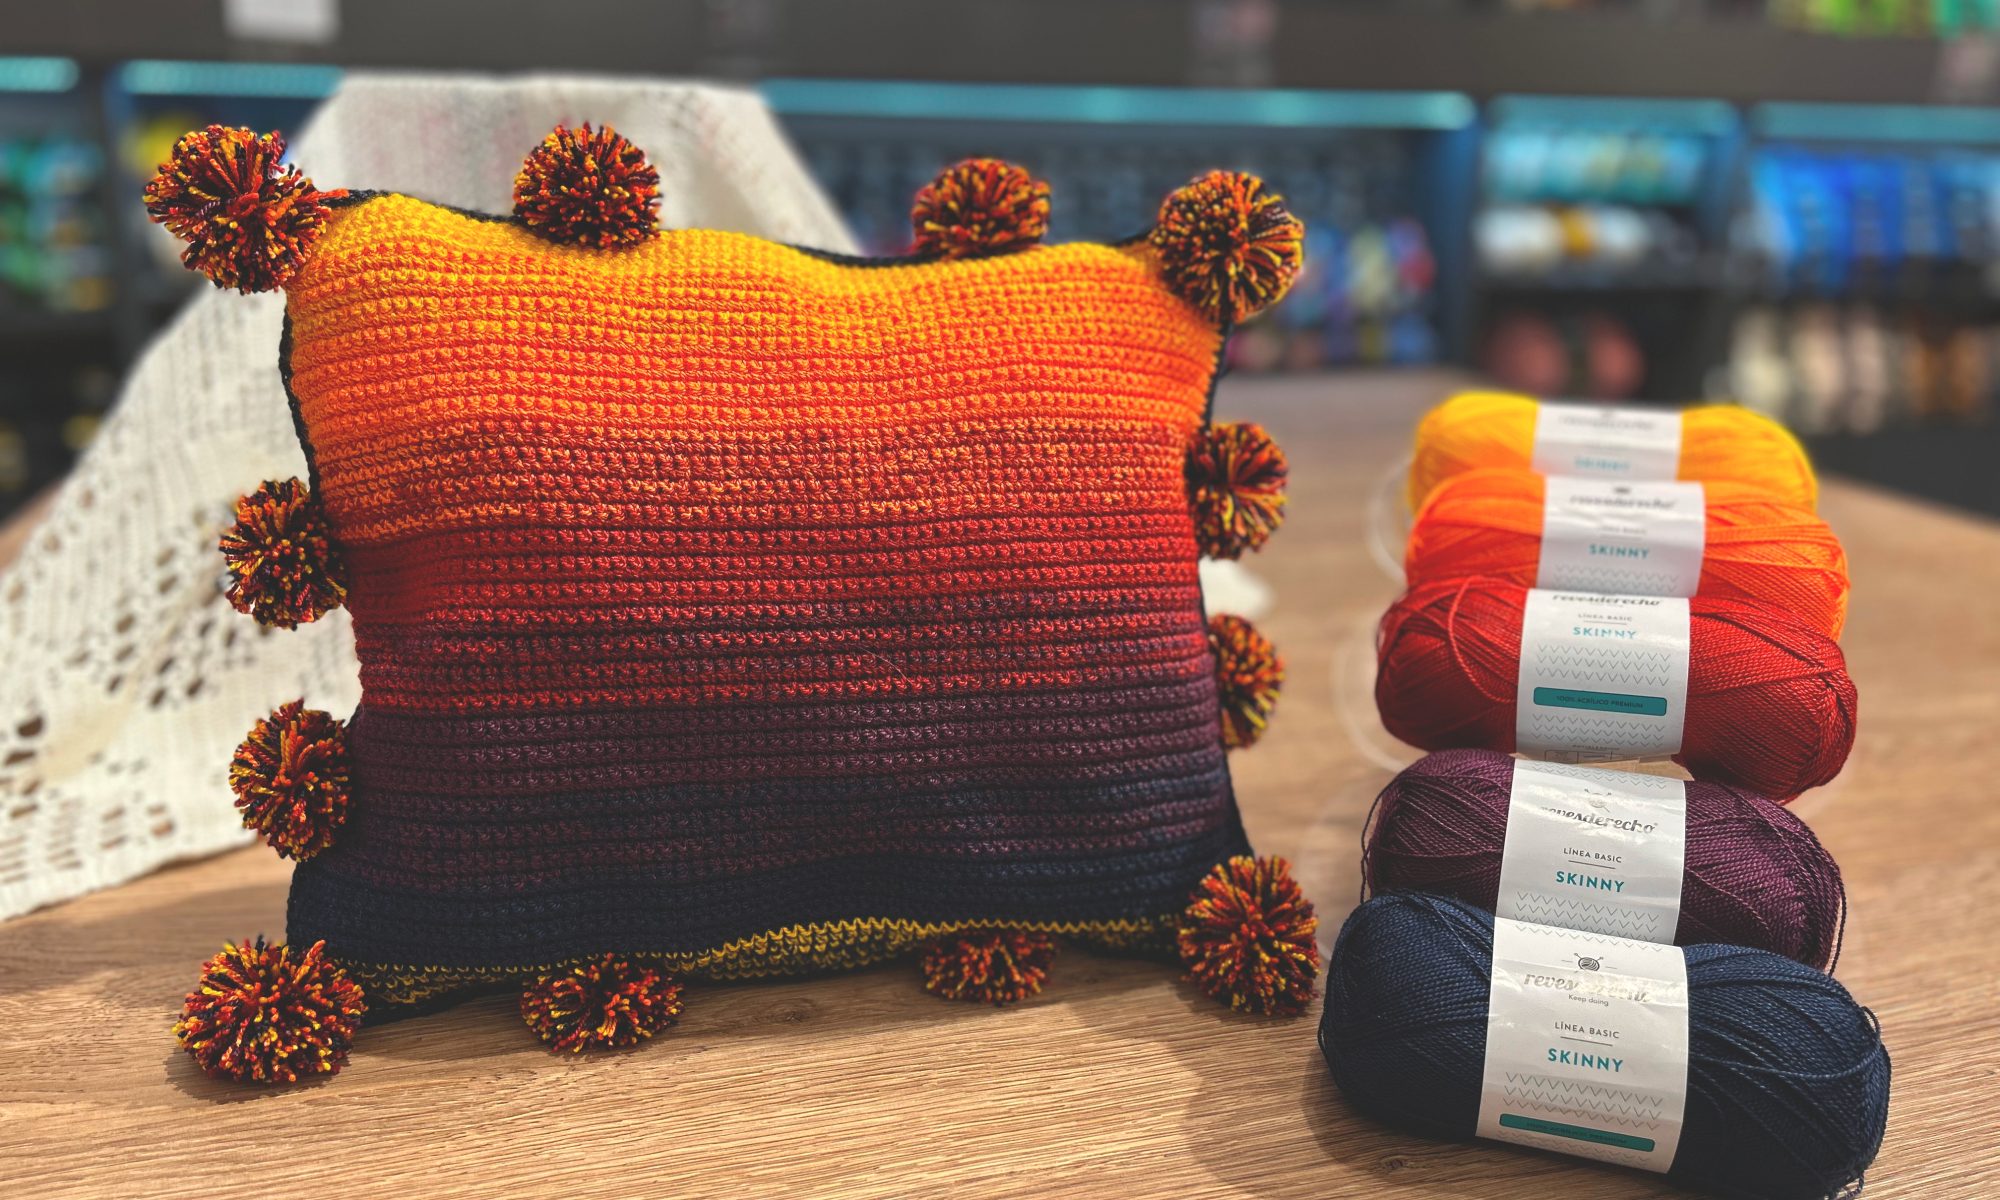
Hola queridxs Anandinis <3 Retomando un poco el blog, creí que sería bueno hablarles sobre una técnica de color que amo, y que estoy segura que les encantará y no sólo eso, porque además de contarles de qué se trata, también les enseñaré cómo se hace con un lindo, corto y decorativo proyecto ara tu hoga, ¿No es genial? ¿Estamos listxs?
Primero que todo, es importante saber qué significa esto de «fade», ¿de dónde salió? 
El fade en crochet, también conocido como «degradado» en español, se refiere a una técnica de tejer que implica la transición gradual de un color a otro en una prenda de crochet utilizando colores sólidos (es decir, colores que son de un sólo tono y no tienen ningún tipo de matizado).

Para crear un fade en crochet, se pueden utilizar varios métodos, pero uno común es trabajar con hilos de diferentes tonalidades o colores en una misma fila o ronda. Por ejemplo, si se está tejiendo un chal triangular, se puede comenzar con un color sólido en la primera fila y, a medida que se avanza, ir agregando hilos de otros colores para crear un degradado.

También se puede utilizar el método del cambio de color para crear un fade. En este caso, se cambia de color en puntos específicos de la prenda, creando una transición suave de un color a otro. Este método se puede utilizar para tejer cualquier prenda, desde bufandas hasta mantas.

Una de las ventajas del fade en crochet es que permite crear piezas únicas y personalizadas que se adaptan a cualquier estilo o gusto personal. Además, es una técnica relativamente sencilla que se puede aprender con práctica y experimentación.

Hello dear Anandinis <3 Taking up the blog a bit, I thought it would be nice to tell you about a colour technique that I love, and that I’m sure you’ll love and not only that, because besides telling you what it is, I’ll also show you how to do it with a nice, short and decorative project for your home, isn’t it great? Are we ready?

First of all, it’s important to know what this «fade» means, where did it come from?

Crochet fade, also known as «degradado» in Spanish, refers to a crocheting technique that involves the gradual transition from one colour to another in a crochet garment using solid colours (i.e. colours that are a single tone and do not have any shading).

To create a fade in crochet, several methods can be used, but a common one is to work with yarns of different shades or colours in the same row or round. For example, if you are working a triangular shawl, you can start with a solid colour in the first row and, as you go along, add yarns of other colours to create a gradient.

You can also use the colour change method to create a fade. In this case, you change colour at specific stitches on the garment, creating a smooth transition from one colour to another. This method can be used to work anything from scarves to blankets.

One of the advantages of crochet fade is that it allows you to create unique and personalised pieces to suit any style or personal taste. It is also a relatively simple technique that can be learned with practice and experimentation.

¡EMPECEMOS!

PASO 1: MATERIALES

  1. El grosor de los materiales es muy importante en este aspecto, ya que trabajaremos co doble hebra, por lo que el grosor debe ser bastante delgado: entre light fingering y fingering (imagina que si trabajas con un grosor mayor, el tejdio quedará con puntadas gigantes y muy duro, nada confortable para el uso)

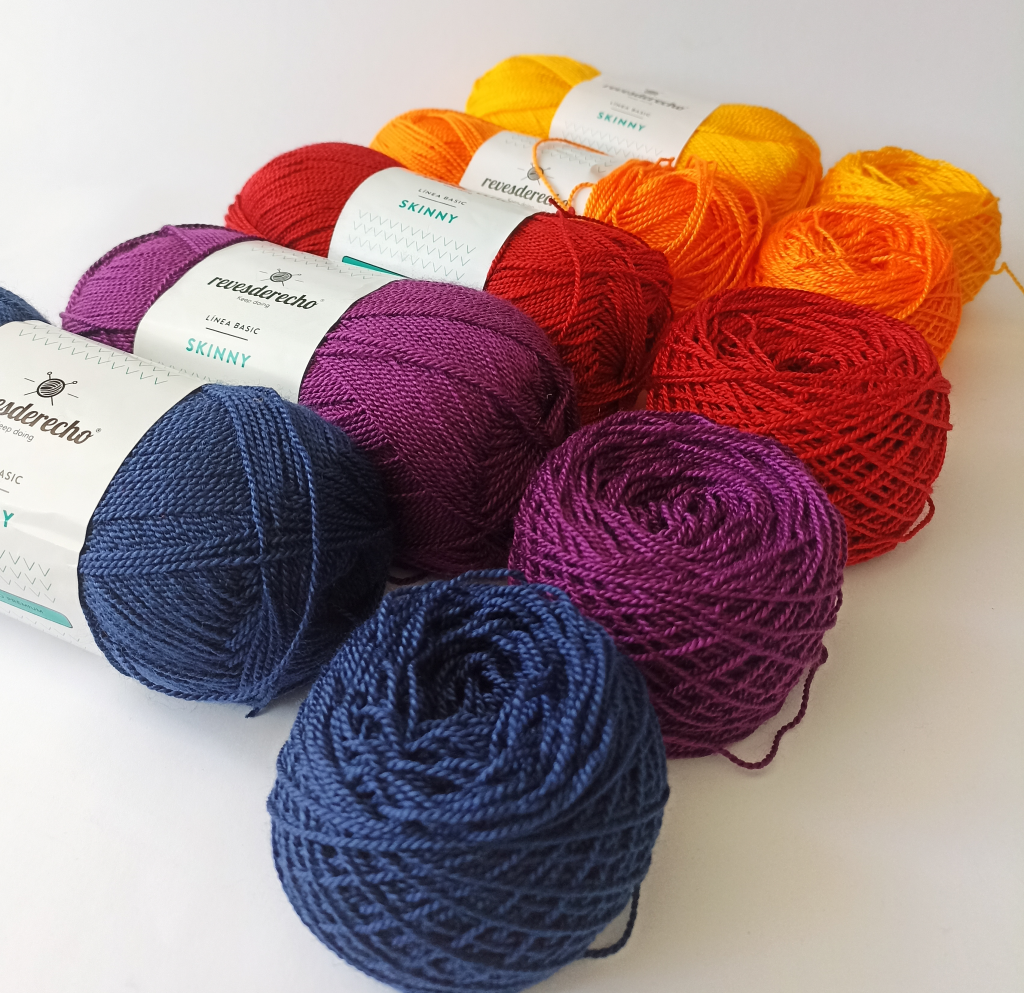
Utilicé 5 colores sólidos de la marca revesderecho, línea basec «skinny». A continuación les dejo los códigos de los colores por si quisieran hacer uno con los mismos colores: 
Color amarillo oro: 0828 / lote 07
Color naranjo fuerte: 0033/ lote 09
Color rojo italiano: 3602/ lote 12
Color uva claro (morado): 0712 / lote 07
Color azul marino: 6210

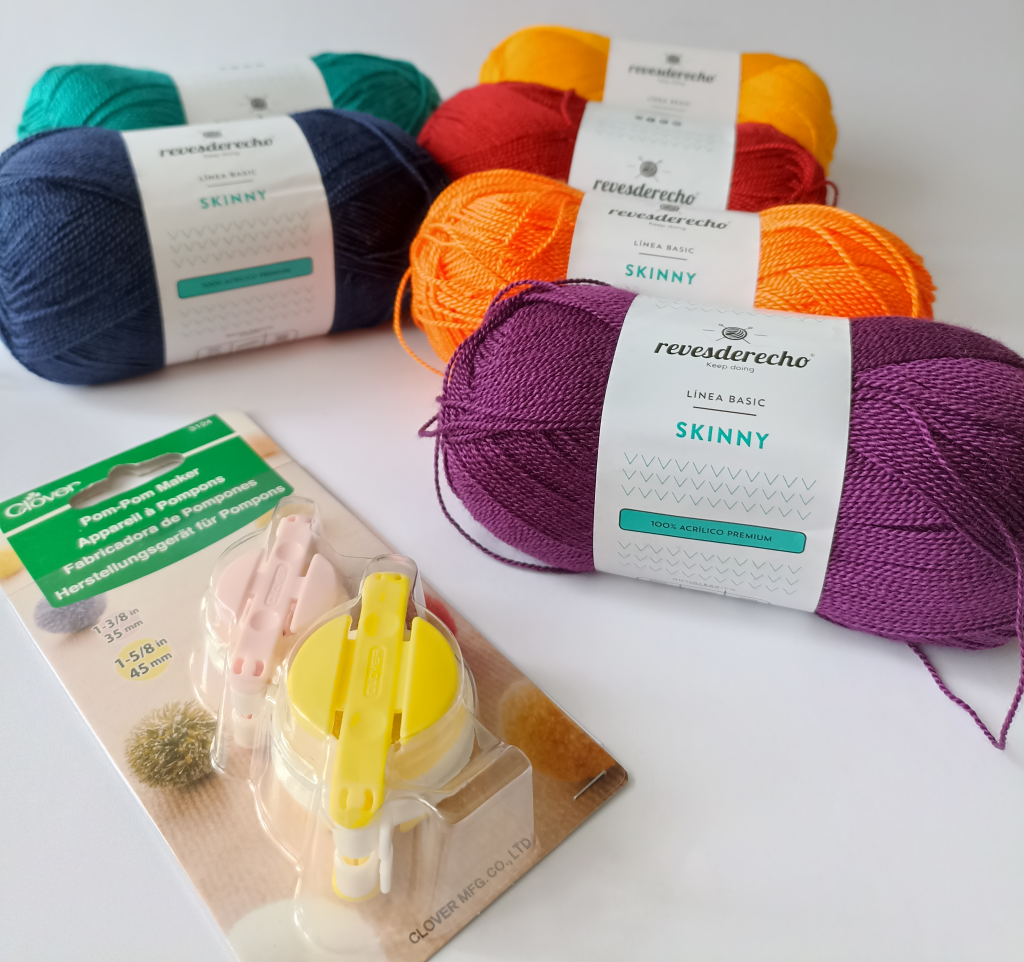
2. También necesitarás algo con qué hacer pompones. Si puedes conseguir esta máquina-super-super-hacedora-de-pompones, ¡Genial! si no, puedes hacerlo a la vieja usansa ¡todo sirve! (Además, al final de este blog, te dejo un minitutorial de cómo utilizarlo)

The weight of the yarn is very important in this aspect, as we will be working with double strands, so the thickness must be quite thin: between light fingering and fingering (imagine that if you work with a thicker material, the fabric will have giant stitches and will be very hard, not comfortable to use).

I used 5 solid colours. Here are the colour codes in case you would like to make one with the same as me:
Golden yellow
Strong orange colour
Italian red colour
Purple colour
Navy blue colour

2. You will also need something to make pom-poms with. If you can get your hands on this super-pom-pom-machine, great! If not, you can do it the old-fashioned way, anything goes! (Also, at the end of this blog, I leave you a mini tutorial on how to use it).

PASO 2: ORDENAR LOS COLORES Y HACER MINI OVILLITOS

MINI OVILLOS: Para hacer los mini ovillos es tan simple como sacar la hebra del medio del ovillo o de afuera. Los míos fueron hechos con ovilladora por lo que quedaron bien armaditos 🙂 hacerlos bolita también sirve. No ocupen otro ovillo nuevo, ya que utilizarán pocos metros de cada color

MINI YARNS: To make the mini balls it’s as simple as pulling the strand from the middle of the ball or from the outside. Mine were made with a balling machine, so they were well assembled 🙂 making them in a ball is also useful. Don’t need a new ball, as you will use only a few metres of each colour.

ORDEN DE COLORES: Aquí es super importante que interiorices, observes y elijas el orden de los colores a trabajar. Siempre los colores tienen un orden previsto y tendrás que encontrar el orden de los colores que eligas. 

Si no eres tan experta con los colores, te dejo esta pequeña ayuda que seguro te servirá a la hora de encontrar el orden adecuado

ORDER OF COLOURS: Here it is very important that you internalise, observe and choose the order of the colours to work with. The colours always have an order and you will have to find the order of the colours you choose.

If you are not so expert with the colours, I leave you this little help that will surely help you to find the right order.

PASO 3: DEFINIR ORDEN Y TEJER

Ahora vamos a lo práctico. Recuera que siempre tejeremos con dos hebras, a veces tejeremos con dos hebras del mismo color, otras veces con dos hebras de distinto color.
Yo definí el orden de mis colores, a continuación, los clasificaré en número a trabajar:

Color amarillo: C1
Color naranjo: C2
Color rojo:C3
Color morado:C4
Color azul marino: C5

Remember that we will always weave with two strands, sometimes we will weave with two strands of the same colour, sometimes with two strands of different colours.
I defined the order of my colours, then I will classify them in number to work with:

Yellow colour: C1
Orange colour: C2
Red colour: C3
Purple colour: C4
Navy blue colour: C5

¡Tejamos!

Urde 70 cad
De la ronda 1 a la 7: 70 pb
Hebra 1: C1,
Hebra 2: C1
De la ronda 8 a la 14: 70 pb
Hebra 1: C1
Hebra 2: C2
De la ronda 15 a la 21: 70pb
Hebra 1: C2
Hebra 2: C2

Set up ch70
Round 1 to 7: 70sc
Strand 1: C1
Strand 2: C1
Round 8 to 14: 70sc
Strand 1: C1
Strand 2: C2
From round 15 to 21: 70sc
Strand 1: C2
Strand 2: C2

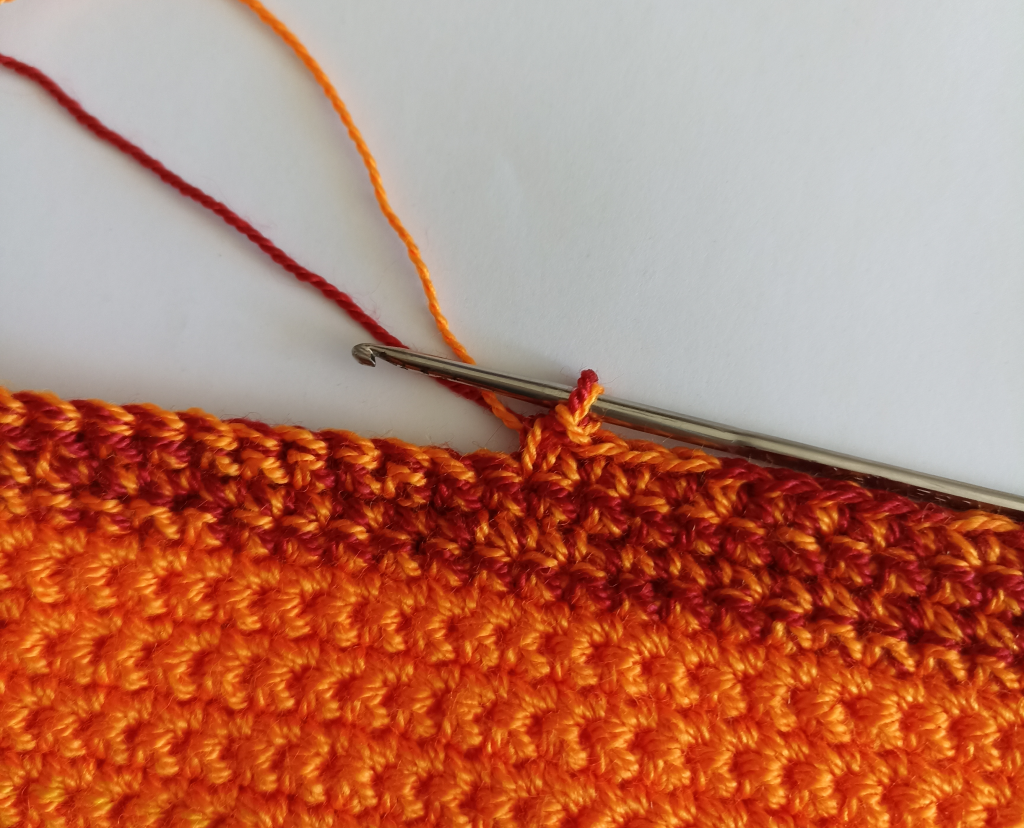
al terminar cada panel de color, puedes rematar para comenzar con las 2 nuevas hebras, al final del tejido sólo tendrás que entrar hebras.

at the end of each colour panel, you can fasten off to start with the 2 new strands, at the end of the project you will only need to weave in ends

De la ronda 22 a la 28: 70 pb
Hebra 1: C2
Hebra 2: C3

Round 22 to 28: 70sc
Strand 1: C2
Strand 2: C3

De la ronda 29 a la 35: 70 pb
Hebra 1: C3
Hebra 2: C3
De la ronda 36 a la 42: 70 pb
Hebra 1: C3
Hebra 2: C4
De la ronda 43 a la 49: 70pb
Hebra 1: C4
Hebra 2: C4
De la ronda 50 a la 56: 70 pb
Hebra 1: C4
Hebra 2: C5
De la ronda 57 a la 63: 70 pb
Hebra 1: C5
Hebra 2: C5
De la ronda 64 a la 70: 70pb
Hebra 1: C5
Hebra 2: C1

Round 29 to 35: 70sc
Strand 1: C3
Strand 2: C3
Round 36 to 42: 70sc
Strand 1: C3
Strand 2: C4
From round 43 to 49: 70sc
Strand 1: C4
Strand 2: C4
Round 50 to 56: 70sc
Strand 1: C4
Strand 2: C5
Round 57 to 63: 70sc
Strand 1: C5
Strand 2: C5
From round 64 to 70: 70sc
Strand 1: C5
Strand 2: C1

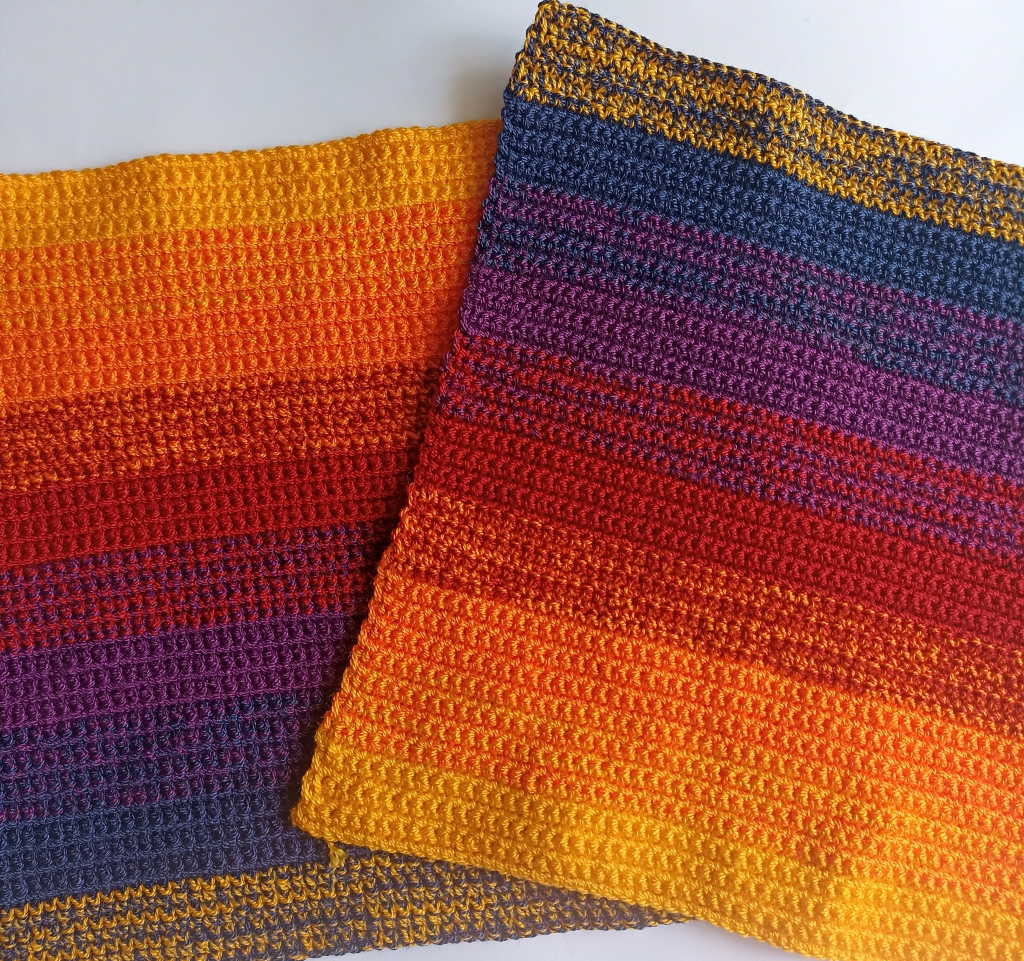
Cuando termines una pieza, repites otra igual. Ahora sólo nos queda unir ambas piezas.

When you have finished one piece, repeat the same piece. Now all that remains is to join the two pieces together.

ANTES DE UNIR, HAZ LOS POMPONES

Los pompones pueden ser hechos de un sólo colores o de muchos. En mi caso hice con los 5 colores que utilicé. Lo demás depende de ti.

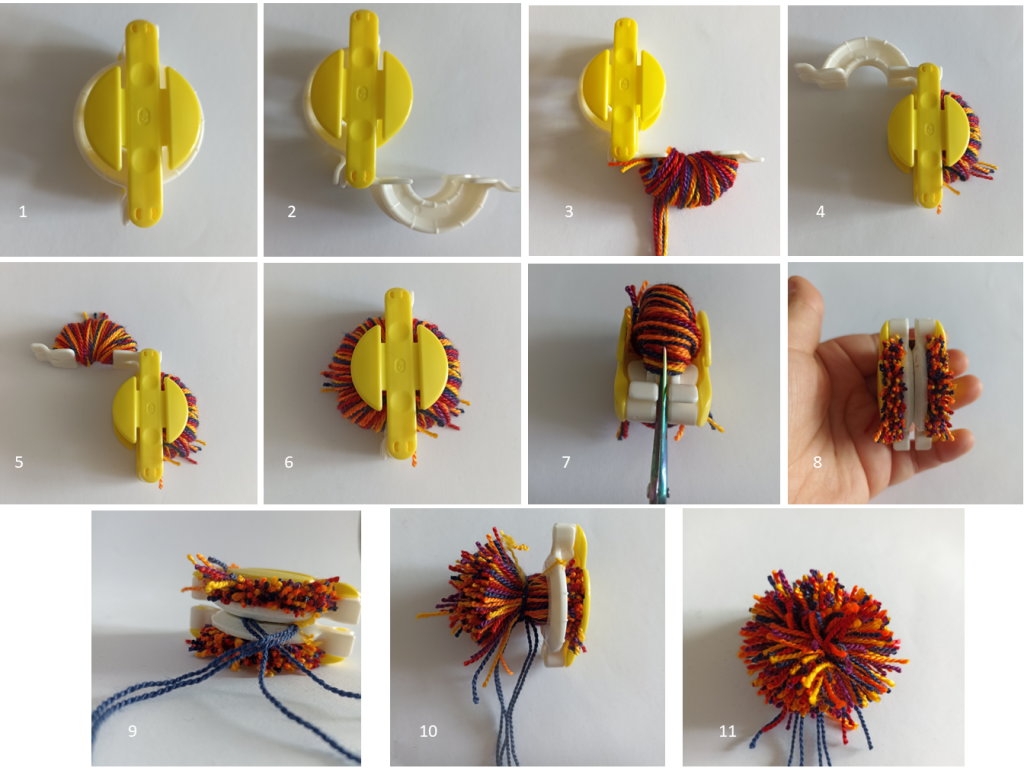
Primero te darás cuenta que esta herramienta tiene 2 mitades. En la foto 1 puedes ver 1 mitad. Cada  mitad se subdivide en 2 «ganchos» que se abre en direcciones opuestas.

Con esto en mente, abres un gancho (foto 2), enrollas los hilos (foto 3), vuelves a dejar en gancho en su posición inicial, abres el otro gancho (foto 4), enrollas los hilos (foto 5), vuelves a dejar el gancho en su posición inicial (foto 6). Lo gira y justo en medio de ambas mitades queda un división donde metes la punta de la tijera y comienzas a cortar (foto 7, la tijera debe tener una punta fina, de lo contrario no entrará), una vez que hayas cortado te quedará como en la foto 8 por ambos lados. Tomas un hilo aparte y lo enrollas por la división de ambas mitades (foto 9) y lo anudas muy bien. Tomas ambas mitades y las separas. En la foto 10 verás que ya no hay una mitad, entonces sólo queda sacar la otra. Y finalmente te quedará el pompom que tendrás que detallar cortando algunos hilos largos.

Unión

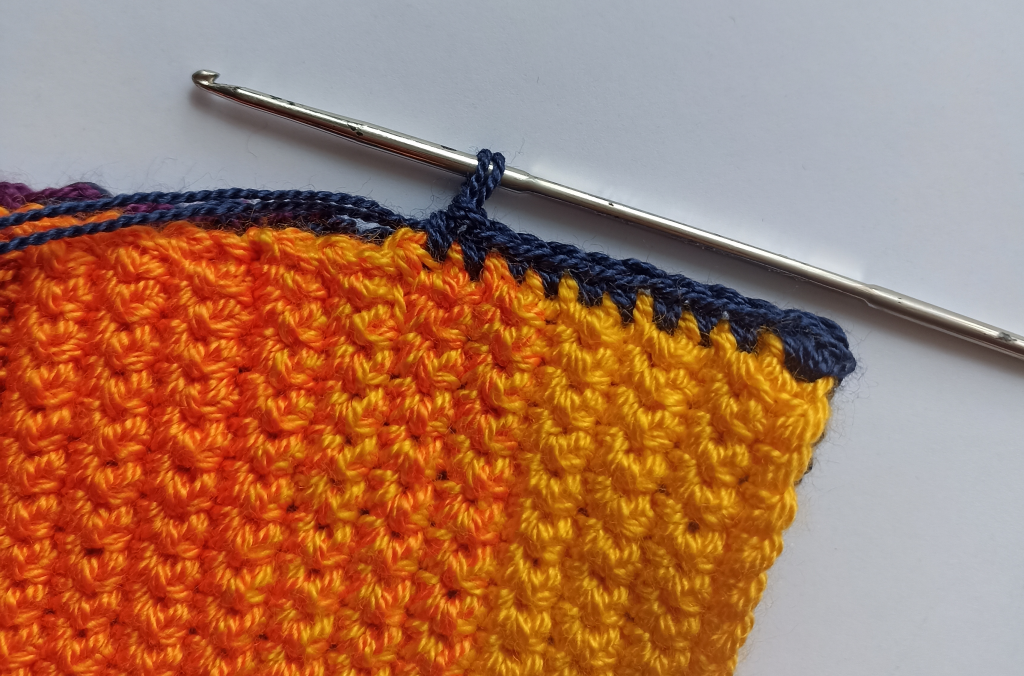
Junta ambas mitades. Con el color de tu preferencia y con 2 hebras, teje un punto bajo en cada fila y cada punto alrededor de las piezas.

Join both halves together. With the colour of your choice and 2 strands of yarn, work 1 single crochet in each row and each stitch around.

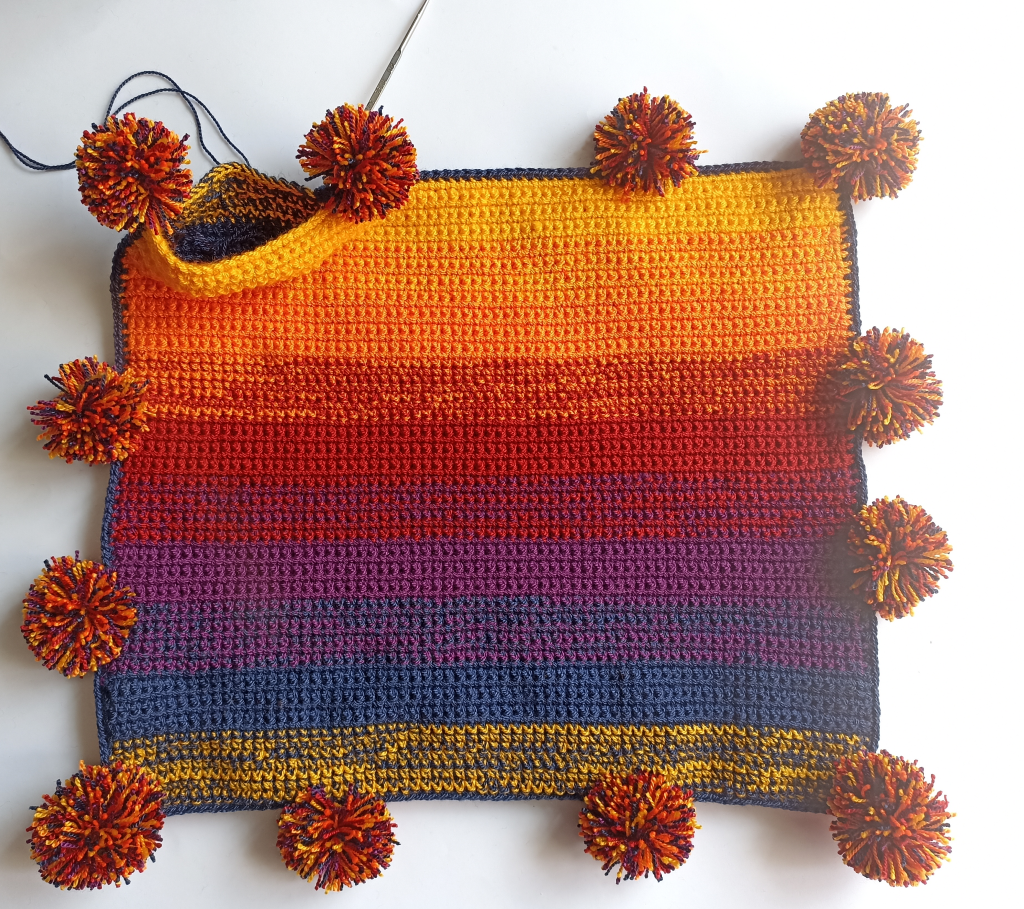
Antes de cerrar completamente el cojín, une los pompones en el orden que más te guste. Puedes ser simplemente con un nudo o alguna otra técnica de tu elección, de esta manera puedes llevar las hebras hacia el revés del tejido. Una vez unidos los pompones, rellénalo y cierra completamente.

Before closing the cushion completely, join the pompoms together in the order you like. This can be simply with a knot or some other technique of your choice, this way you can bring the strands to wrong side. Once the pompoms are joined, stuff it and close it completely.

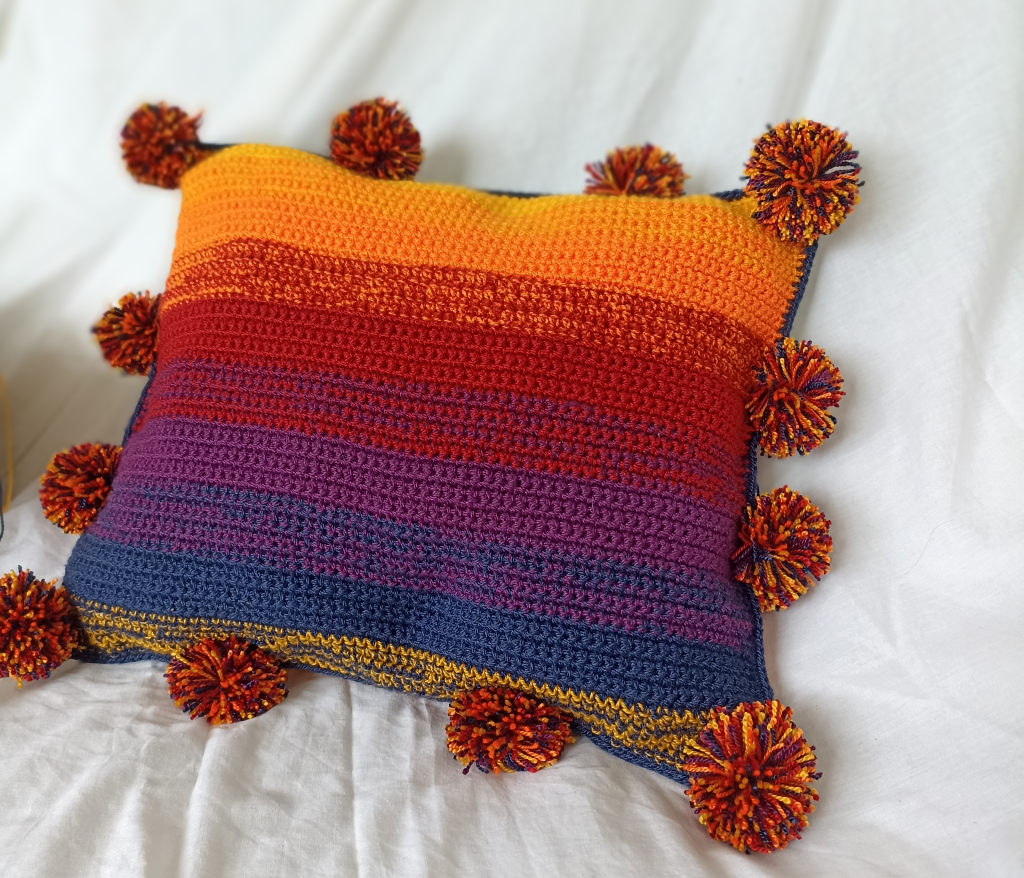
¡Y ya está listo para usar!

PUNTADAS

¿Son importantes las puntadas al momento de crear un fade?

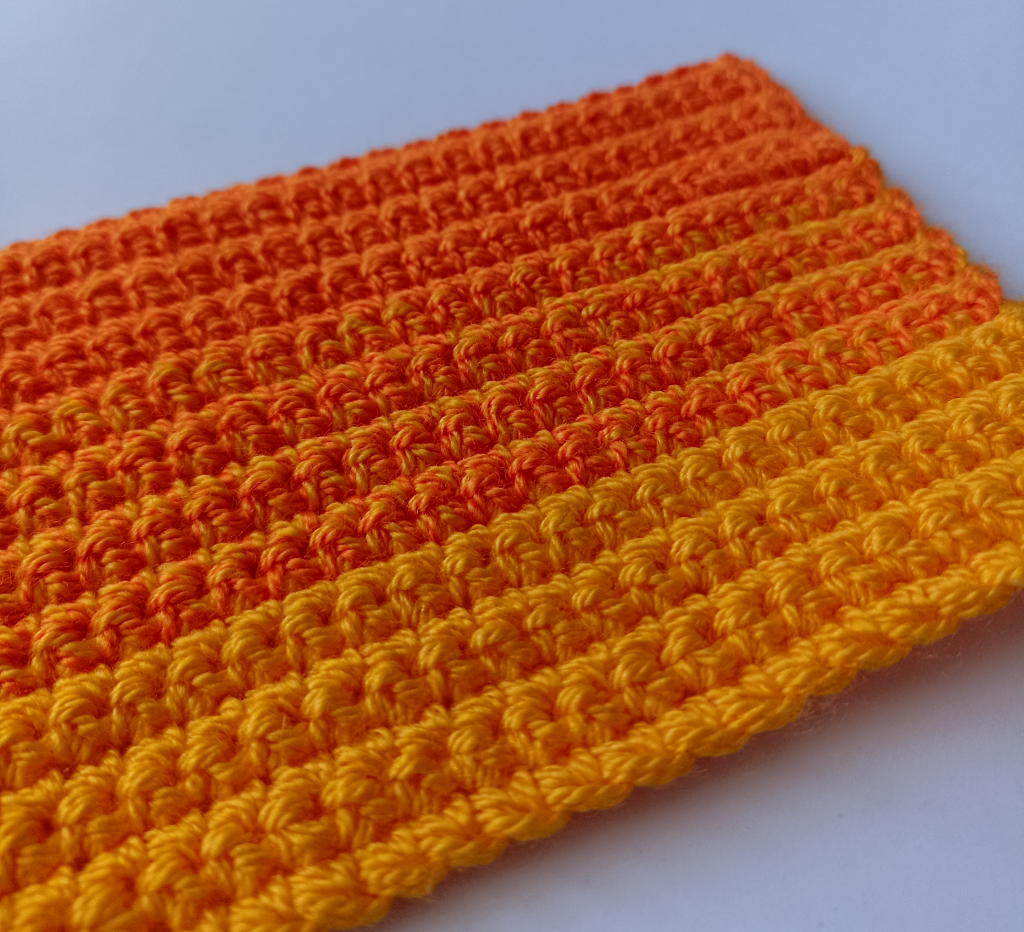
¡Claro! Dependiendo de la puntada que utilices, el fade tomará mayor o menor «naturalidad». Por ejemplo, hoy les enseñaré un proyecto con puntos bajos, y al ser puntos cortos, el fade tendrá mucho más realismo que si lo hacemos con puntos altos. Otro ejemplo es tejer un fade con punto  musgo (moss stitch). En este caso, no habría problema con utilizar incluso una sola hebra, ya que como se van intercalando las puntadas, el color en las puntadas dará un efecto de transición más natural.

STITCHES

Are stitches important when creating a fade?

Of course! Depending on the stitch you use, the fade will take on more or less «naturalness». For example, today I will show you a project with low stitches, and as they are short stitches, the fade will have much more realism than if we do it with double crochet stitches. Another example is to work a fade with moss stitch. In this case, there would be no problem with using even a single strand, because the colour in the stitches will give a more natural transition effect.

Cuéntame en los comentarios ¿Conocías esta técnica? ¿Te gustó? ¿qué colores usarás?

Tell me in the comments Did you know this technique, did you like it, what colours will you use?

BUCKET HAT PARTE 2

Hola Anandinis!
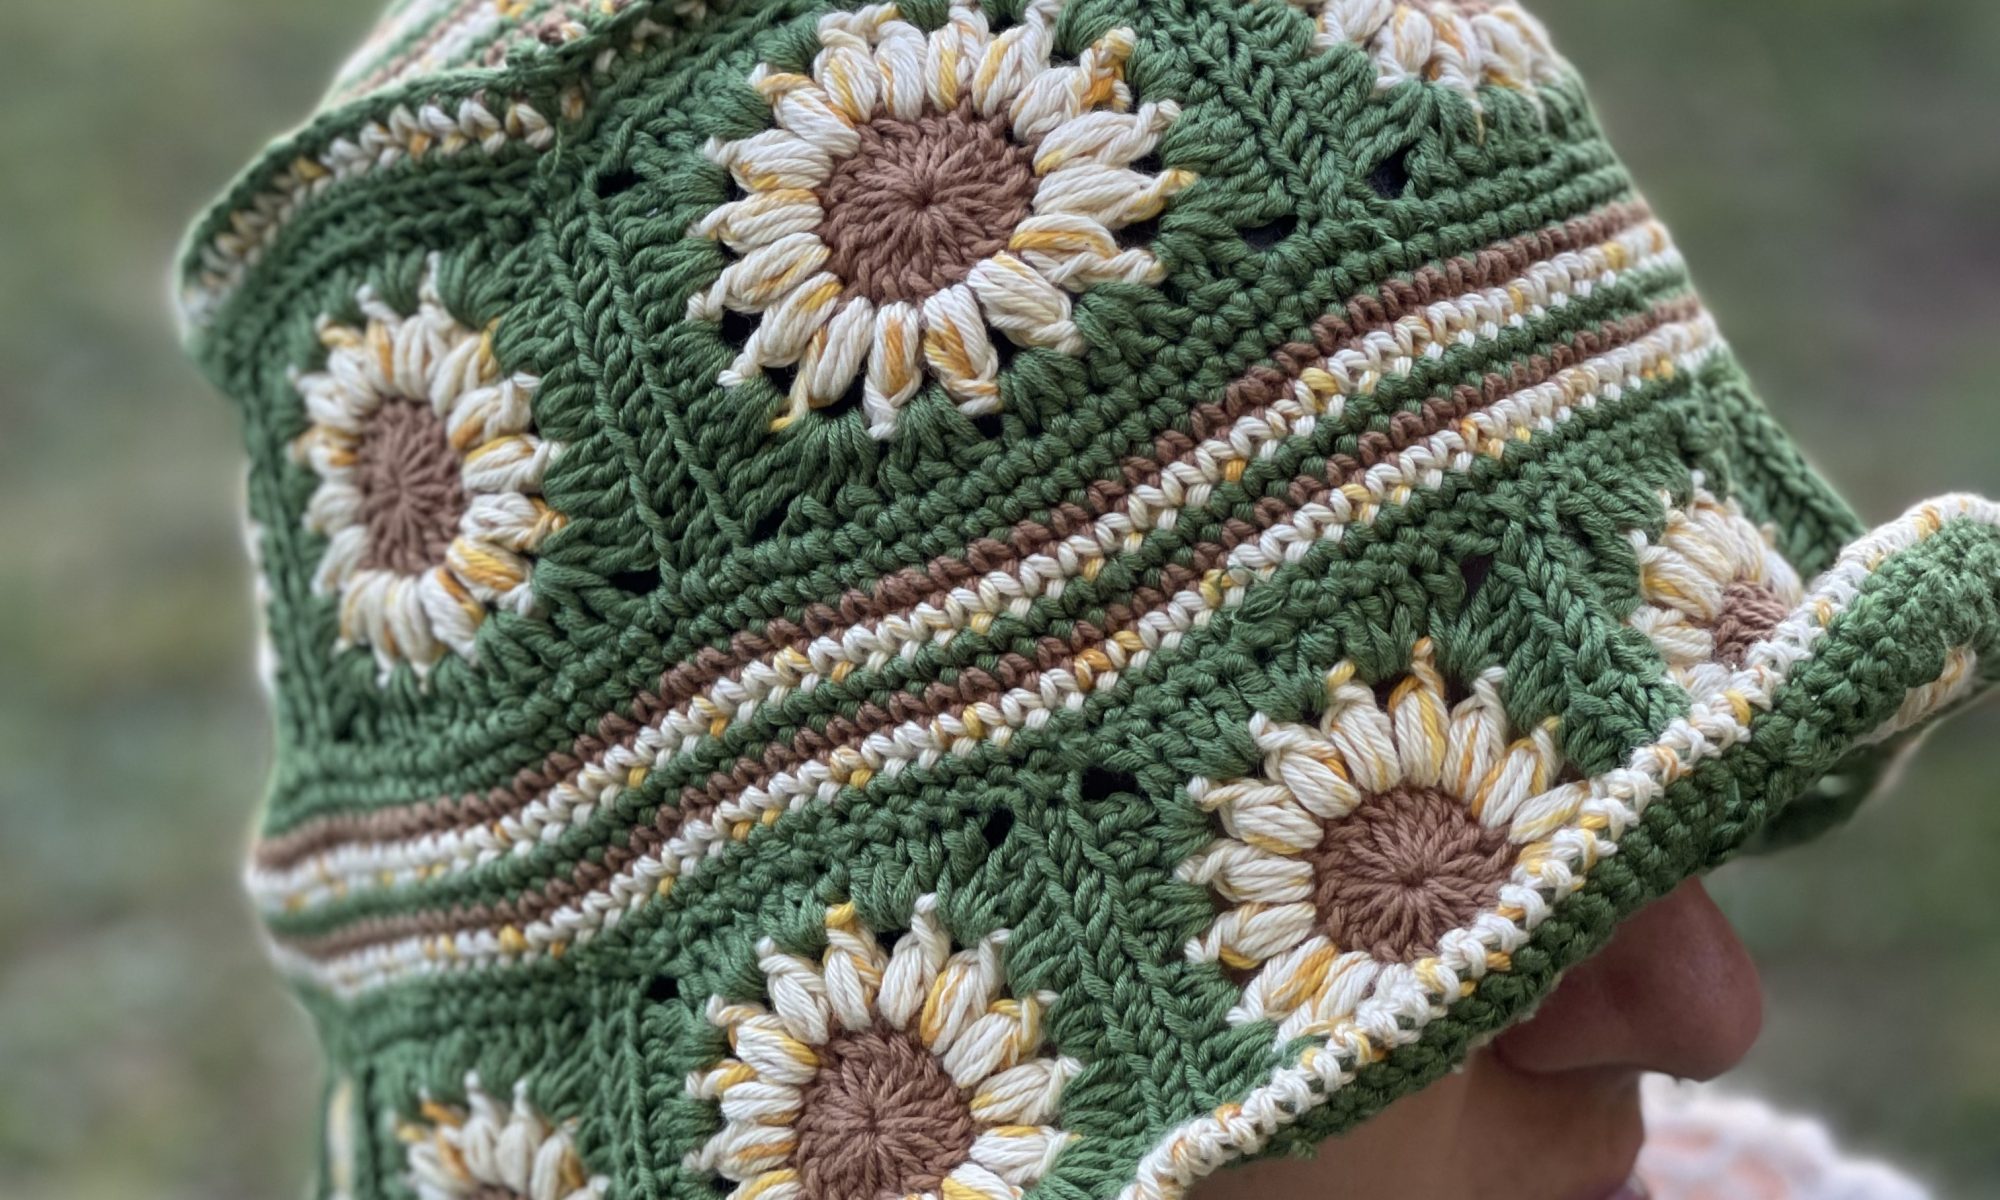
Ya estamos listas con las segunda parte y final del Bucket Hat 🙂 Estoy muy contenta de ver los avances que han compartido conmigo y si aún no lo tejes, no te preocupes que aún hay verano 🙂 Entonces sin más preámbulo, ¡Comencemos!

Hello Anandinis!
We are ready with the second and final part of the Bucket Hat 🙂 I’m very happy to see the progress you’ve shared with me and if you still don’t crochet it, don’t worry, there’s still summer 🙂 So without further ado, let’s get started!

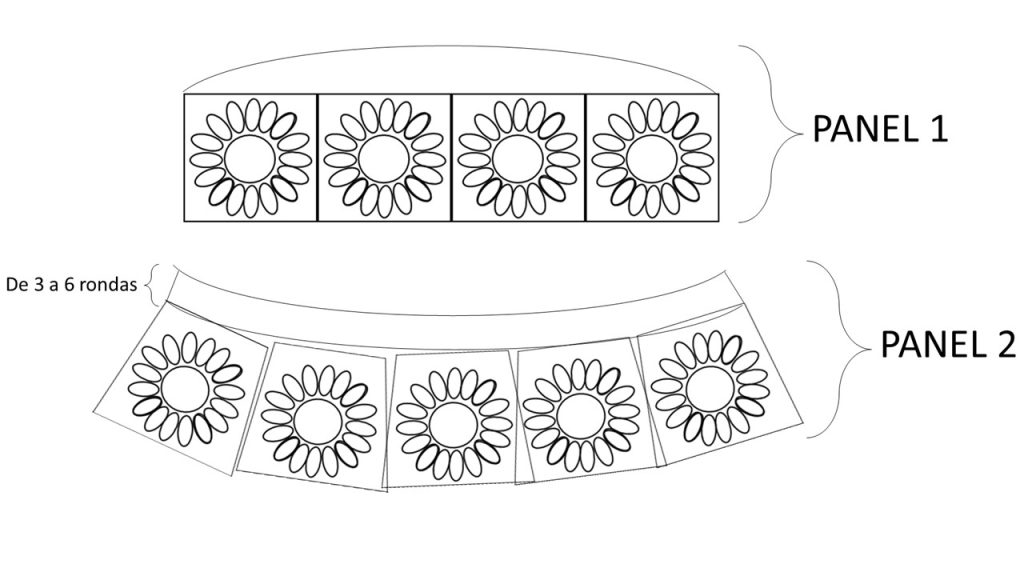
PANEL 2

2DO GRANNIE
Este grannies es bastante similar al anterior, sólo que aquí hacemos una pequeña modificación para darle amplitud al gorro

Rnd: Ronda
cad: cadeneta
pa: punto alto
pd: punto deslizado
mpa: medio punto alto
dpa: doble punto alto
PF: Punto puff (puedes ver cómo lo hice en mi perfil de ig)
esp-1cd: Debes tejer en el espacio que deja 1cad anterior

Rnd: Round
ch: chain
dc: double crochet
hdc: half double crochet
sl st: slip stitch
tr: treble crochet
CL: cluster st
ch-1sp: insert your hook into the space/hole/gap (underneath the chain) 

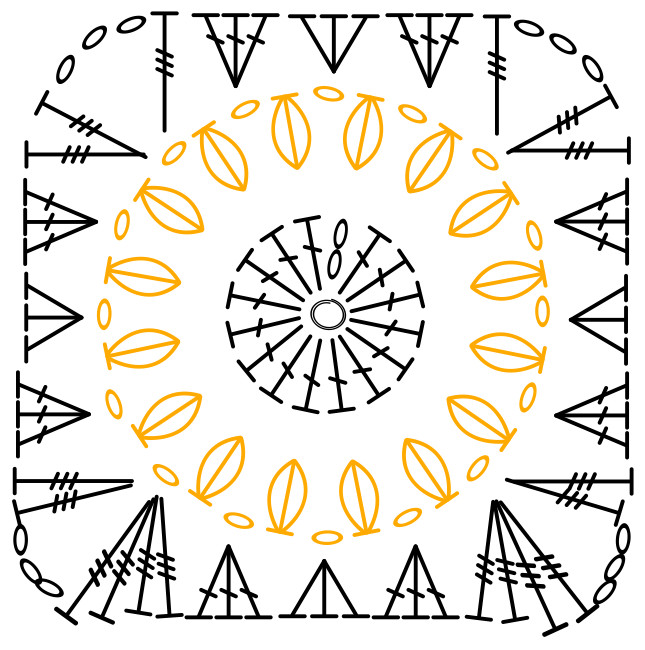
Rnd1: C1. doble anillo mágico, 2cad (cuentan como 1 pa), 15pa, tira, pd para unir, cierra y corta. [16pa]
Rnd2: C2. *1PF en pa, 1cad, rep desde* 16 veces, pd para unir, cierra y corta. [16PF, 16cad]
Rnd3: C3. 3pa en esp-1cd, 3mpa en esp-3cd, 3pa en esp-3cd, (1dpa, 3cad, 2dpa)en sig esp-1cd, 3pa en esp-1cd, 3mpa en esp-3cd, 3pa en esp-3cd, (2dpa, 3cad, 4dpa)en sig esp-1cd, 3pa en esp-1cd, 3mpa en esp-3cd, 3pa en esp-3cd, (4dpa, 3cad, 2dpa)en sig esp-1cd, 3pa en esp-1cd, 3mpa en esp-3cd, 3pa en esp-3cd, (2dpa, 3cad, 1dpa)en sig esp-1cd, pd para unir, cierra y corta. 

Rnd1: C1. double magic ring, ch2 (count as 1dc), 15dc, sl st to join, fasten off. [16dc]
Rnd2. C2: *1CL in dc, ch1, rep from* 16 times, sl st to join, fasten off. [16CL, 16ch]
Rnd3: C3. 3dc in ch-1sp, 3hdc in ch-1sp, 3dc in ch-1sp, (1tr, ch3, 2tr)in ch-1sp, 3dc in ch-1sp, 3hdc in ch-1sp, 3dc in ch-1sp, (2tr, ch3, 4tr)in ch-1sp, 3dc in ch-1sp, 3hdc in ch-1sp, 3dc in ch-1sp, (4tr, ch3, 2tr)in ch-1sp, 3dc in ch-1sp, 3hdc in ch-1sp, 3dc in ch-1sp, (2tr, ch3, 1tr)in ch-1sp, sl st to join, fasten off. 

ANTES DE SEGUIR TEJIENDO ¿Cuántos grannies hacer?

Aquí tienes total libertad de elegir, yo te recomiendo hacer sólo 2 más de los que hiciste en el primer panel (máximo 3), ya que si haces demasiados puede que quede demasiado «repolludo» y luego no tome forma de gorro.

CONTEO DE PUNTOS

Luego de haber hecho los grannies necesarios necesarios, únelos en los extremos de la derecha e izquierda. La parte más pequeña quedará hacia arriba y la parte más ancha hacia abajo. Cuenta cuántos puntos tienes alrededor de la circunferencia de la parte más pequeña, este número será muy importante ya que ahora tejeremos desde los grannies del panel 1.

BEFORE CONTINUE WORKING How many grannies do you want to make?

Here you have total freedom of choice, I recommend you to make only 2 more than you did in the first panel (maximum 3), because if you make too many you might get too «floppy» and then it won’t take the shape of a hat.

COUNTING THE STITCHES

After you have made the necessary grannies, join them at the left and right ends. The smaller part will face up and the wider part will face down. Count how many stitches you have around the circumference of the smaller part, this number will be very important as we’ll now work from the grannies in panel 1.

TEJAMOS

Desde los grannies hechos en el panel 1, vas a tejer de 3 a 6 rondas de puntos bajos aumentando los puntos necesarios que te lleven al mismo número de puntos que tiene la circunferencia de grannies del panel 2.

Es decir, si cuando terminaste los grannies del panel 1, su circunferencia te dió 112 puntos, y al terminar de unir los grannies del paneñ 2, la circunferencia de la parte más angosta te dió 130 puntos, quiere decir que tendrás que aumentar 18 puntos en esas rondas entre grannies. 

Te recomiendo hacer aumentos progresivos y no todos en una sola ronda. Por ejemplo, si debo aumentar 18 puntos, haré 3 aumentos en cada ronda (si hago 6 rondas). 

Luego unes los grannies desde su parte más angosta, a la última ronda hecha. Con esto ya tendrás el gorro casi listo.

LET’S CROCHET

From the grannies made in panel 1, you are going to work 3 to 6 rounds of single crochet increasing the stitches necessary to get  the same number of stitches as the circumference of the grannies in panel 2.

That is, if when you finished the grannies of panel 1, their circumference gave you 112 stitches, and when you finished joining the grannies of panel 2, the circumference of the narrowest part gave you 130 stitches, it means that you will have to increase 18 stitches in those rounds between grannies.

I recommend you to make progressive increases and not all in one round. For example, if I have to increase 18 sts, I´ll work 3 increases in each round (if I work 6 rounds).

Then you join the grannies from their narrowest part, to the last round done. With this you will have the cap almost ready.

TERMINACIONES

una vez unidos los grannies, sólo nos quedan los detalles.

Tejerás por toda la circunferencia más ancha del gorro, una ronda de punto cangrejo, que se trabaja de la misma forma que un punto bajo, pero hacia la derecha.

DETALLES

Si el bucket hat te queda hacia abajo y no tiene forma, puede que la causa se deba por dos razones:

  1. Haz hecho muchas rondas en la base y ésta te ha quedado más grande que la circunferencia de los grannies del PANEL 1
  2. Los grannies te quedaron muy grandes y eso le agrego mucha altura al tejido, por lo que se caerá en vez de tomar forma de gorro.
    ___________________________________________________

Once the grannies have been joined together, all that remains are the details.

You’ll work all around the widest circumference of the hat, a round of crab stitch, which is worked in the same way as a single crochet, but to the right.

DETAILS

If your bucket hat is down and out of shape, there may be two reasons for this:

  1. You have made too many rounds in the base and the base is larger than the circumference of the grannies in PANEL 1.
  2. The grannies were too big and that added a lot of height to the fabric, so it will fall down instead of taking the shape of a hat.

¿QUÉ PUEDES HACER?

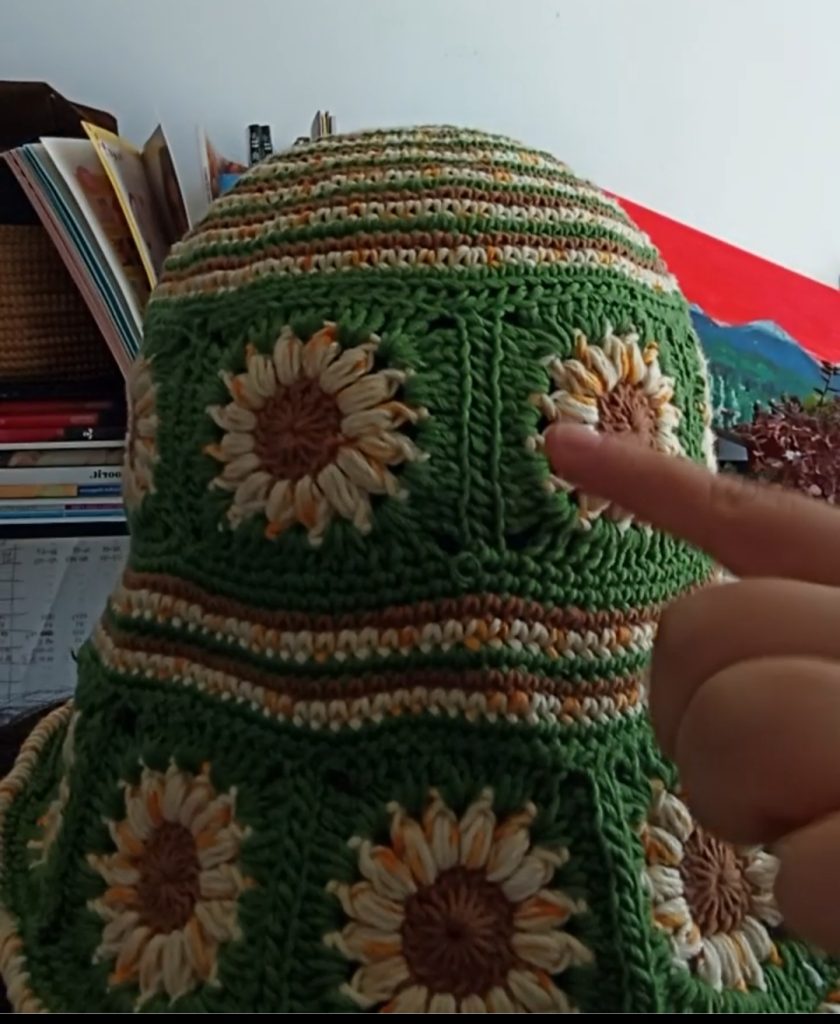
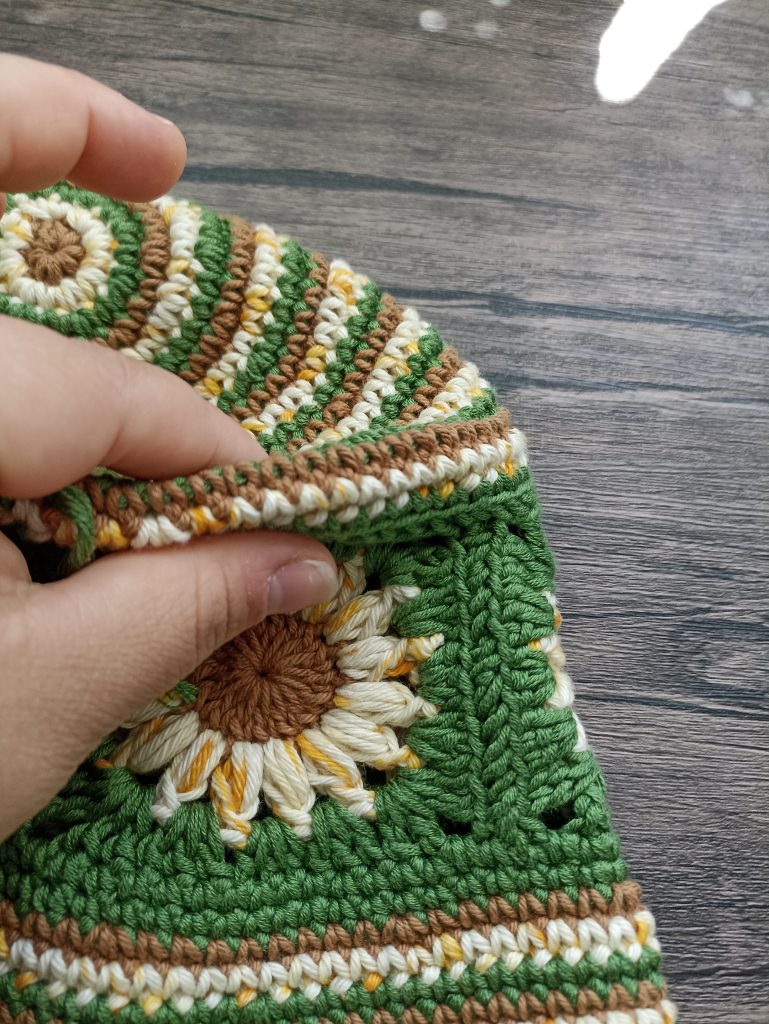
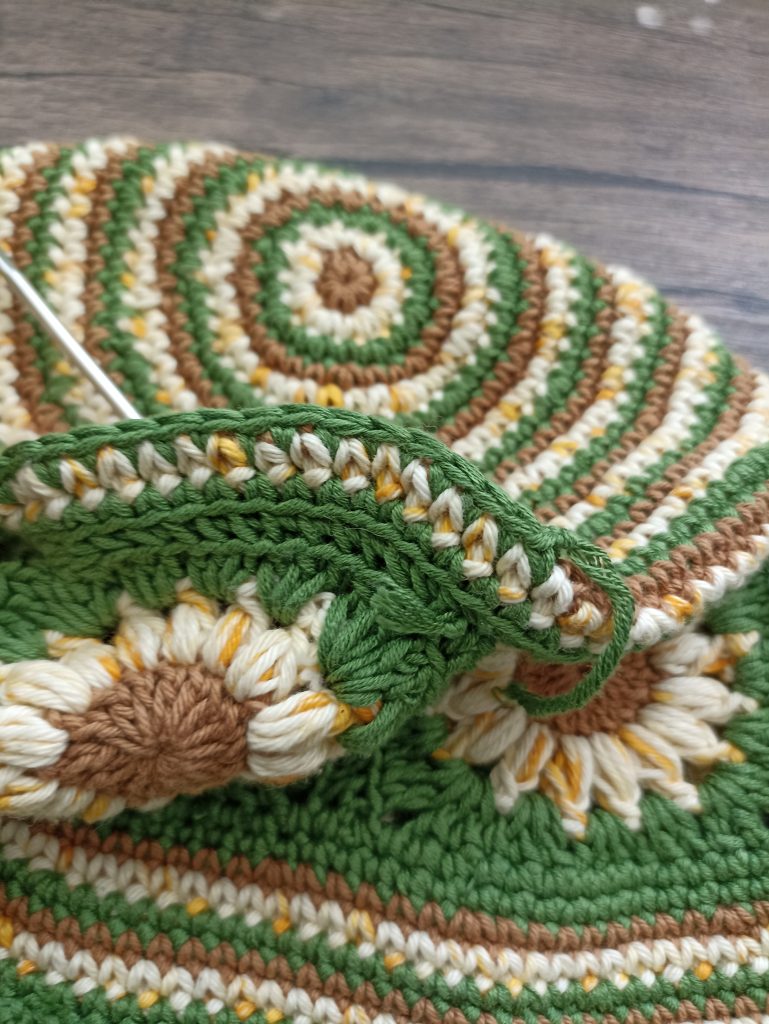
Podemos ajustarlo con un poco de trabajo en la zona de la base: Tomarás la punta de la base, en donde están los grannies del PANEL 1 y las últimas rondas de la base como se muestra en la foto de abajo. Comienza a tejer puntos bajos tomando de 2 a 3 filas a la vez, de esta manera podremos darle forma.

WHAT CAN WE DO?

We can adjust it with some work in the base area: You’ll take the tip of the base, where the grannies of PANEL 1 are and the last rounds of the base as shown in the picture below. Start working low stitches taking 2 to 3 rows at a time, this way we’ll be able to shape it.

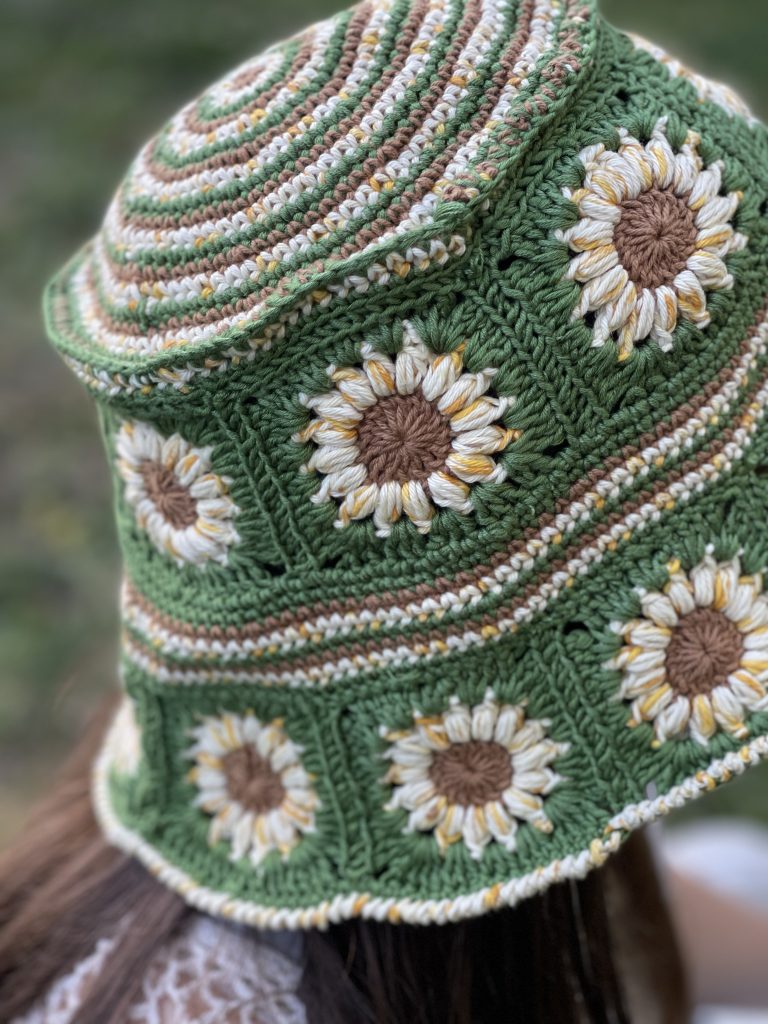
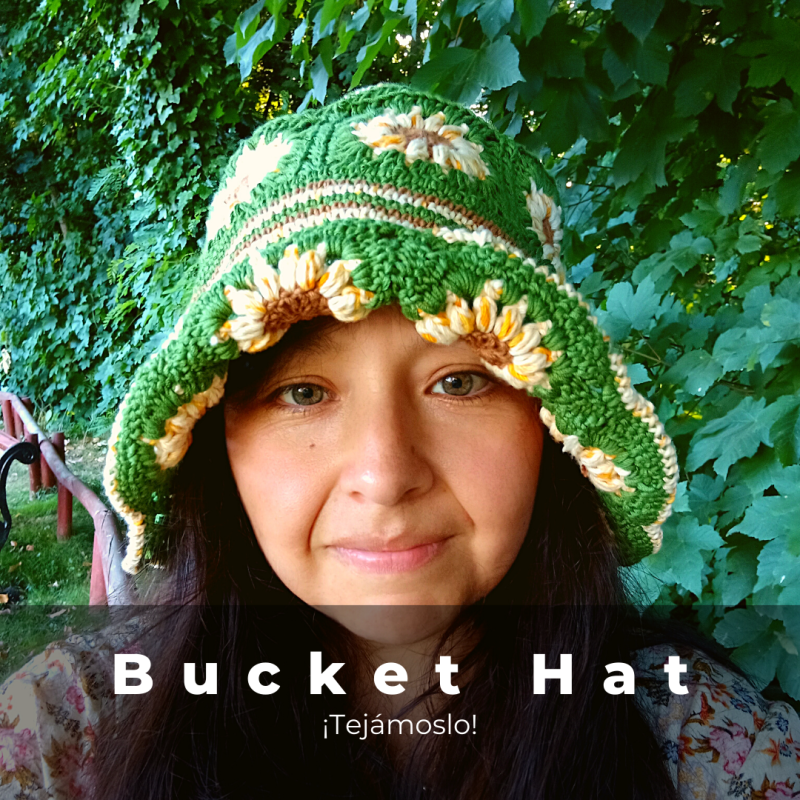
¡Y LISTO! YA TENEMOS NUESTRO BUCKET HAT

BUCKET HAT- CROCHET

Hola Queridxs Anandinis! 🙂

Estoy muy contentas de tenerles por aquí nuevamente. Hoy les comparto la primera parte para hacer el Bucket Hat para esta temporada de verano en este lado del mundo.

Antes de comenzar con las instrucciones quiero comentarles que este diseño es muy intuitivo, si bien tenemos algo de estructura, podemos ir cambiando y adaptándo las puntadas a nuestra cabeza y al material utilizado, así que no te preocupes si en algún lugar te sobran o faltan puntadas.

Hello Dear Anandinis! 🙂

I am very happy to have you here again. Today I share with you the first part to make the Bucket Hat for this summer season in this side of the world.

Before starting with the instructions I want to tell you that this design is very intuitive, although we have some structure, we can change and adapt the stitches to our head and the material used, so don’t worry if somewhere you have too many or too few stitches.

Material

Esta parte es muy importante ya que puedes utilizar lo que tengas (y en diferentes grosores! así que no, no hay estructura ni coherencia en este tejido jajajajja). Pero les compartiré en detalle qué hilado utilicé yo.

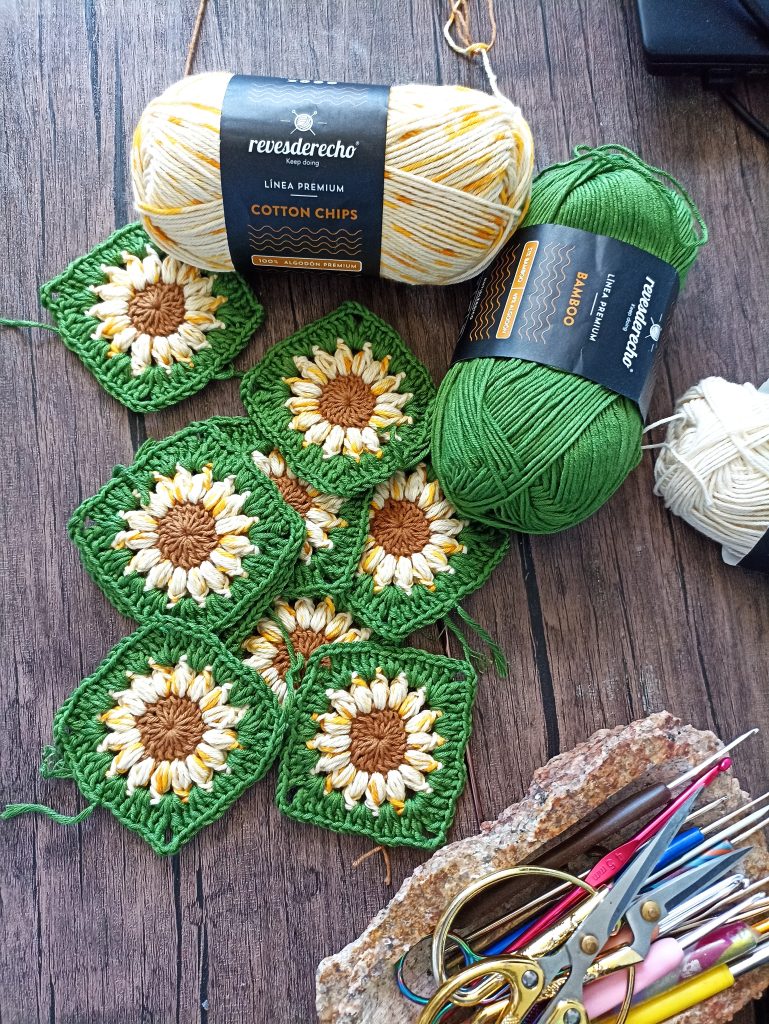
COTTON PREMIUM de RevésDerecho para la Ronda 1, el color es Avellana 0124, hilo de algodón grosor fingering casi sport diría yo. De una suavidad envidiable y muy fácil de trabajar.

COTTON CHIPS de RevesDerecho para la Ronda 2, color Honey Lemon 0107, de grosor DK, es igual de suave y fácil de trabajar que el cotton premium 

BAMBOO de RevesDerecho para la Ronda 3, color green 0108, de grosor DK. Este bambú es muy pero muy suave! como tiene hebras separadas es un poquitín rebelde y a veces se escapan algunas hebras por ahí pero nada del otro mundo (esas mismas hebras son las que hacen que sea tan suvae y tenga una caída maravillosa).

Como se dieron cuenta usé  fibras naturales que están ad hoc a esta temporada ya que las fibras naturales aportan suavidad y respirabilidad. Y además la combinación de bamboo y algodón dan como resultado un proyecto con una suavidad inigualable!

This part is very important since you can use whatever you have (and in different weights! so no, there is no structure or consistency in this fabric hahahahahahaha)

I used 3 weights
Round 1: Sport- Cotton
Round 2: DK- Cotton
Round 3: DK – Bamboo

I used natural fibers that are ad hoc for this season since natural fibers provide softness and breathability. And also the combination of bamboo and cotton results in a project with an unmatched softness!

LET´S START!

ABREVIACIONES

Rnd: Ronda
cad: cadeneta
pa: punto alto
pd: punto deslizado
mpa: medio punto alto
dpa: doble punto alto
PF: Punto puff (puedes ver cómo lo hice en mi perfil de ig)
esp-1cd: Debes tejer en el espacio que deja 1cad anterior

Rnd: Round
ch: chain
dc: double crochet
hdc: half double crochet
sl st: slip stitch
tr: treble crochet
CL: cluster st
ch-1sp: insert your hook into the space/hole/gap (underneath the chain) 

COMENCEMOS

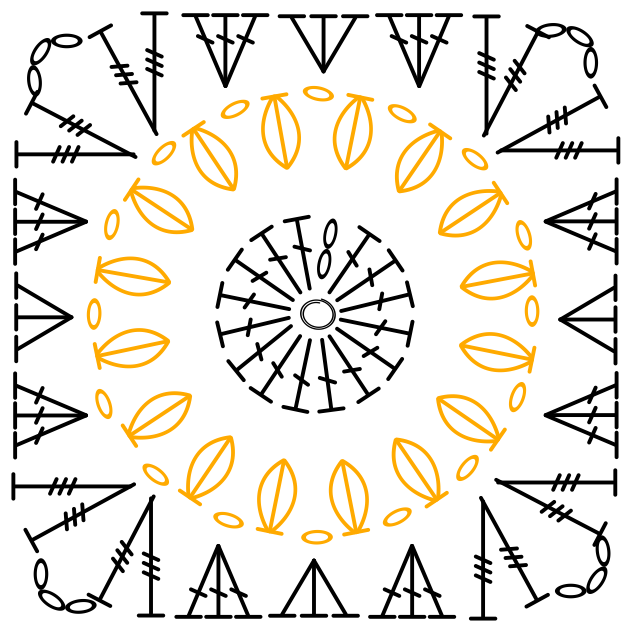
Rnd1: C1. Anillo mágico, 2cad (cuentan como 1pa), 15 pa, cierra el anillo, cierra y corta. [16pa]
Rnd2: C2. *(1PF, 1cad) en sig pa, rep desde* 16 veces, pd para unir, cierra y corta. [16PF, 16 cad]
Rnd3: C3. *3pa en sig esp-1cd, 3mpa en sig esp-1cd, 3pa en sig esp-1cd, (2dpa, 3cad, 2dpa)en sig esp-1cd; rep desde* 4 veces, cierra y corta. [24pa, 12cad, 12mpa, 16dpa]

Rnd1: C1. magic ring, ch2 (count as 1dc), 15dc, sl st in second ch to join, fasten off. [16dc]
Rnd2: C2. *1CL, ch1; rep desde* 16 times, sl st to join, fasten off. [16CL, 16ch]
Rnd3. C3. *3dc in next ch-1sp, 3hdc in next ch-1sp, 3dc in next ch-1sp, (2tr, ch3, 2tr)in next ch-1sp; rep desde* 4times, sl st to join, fasten off. [24dc, 12ch, 12hdc, 16tr]

¿Cuántos tengo que tejer?

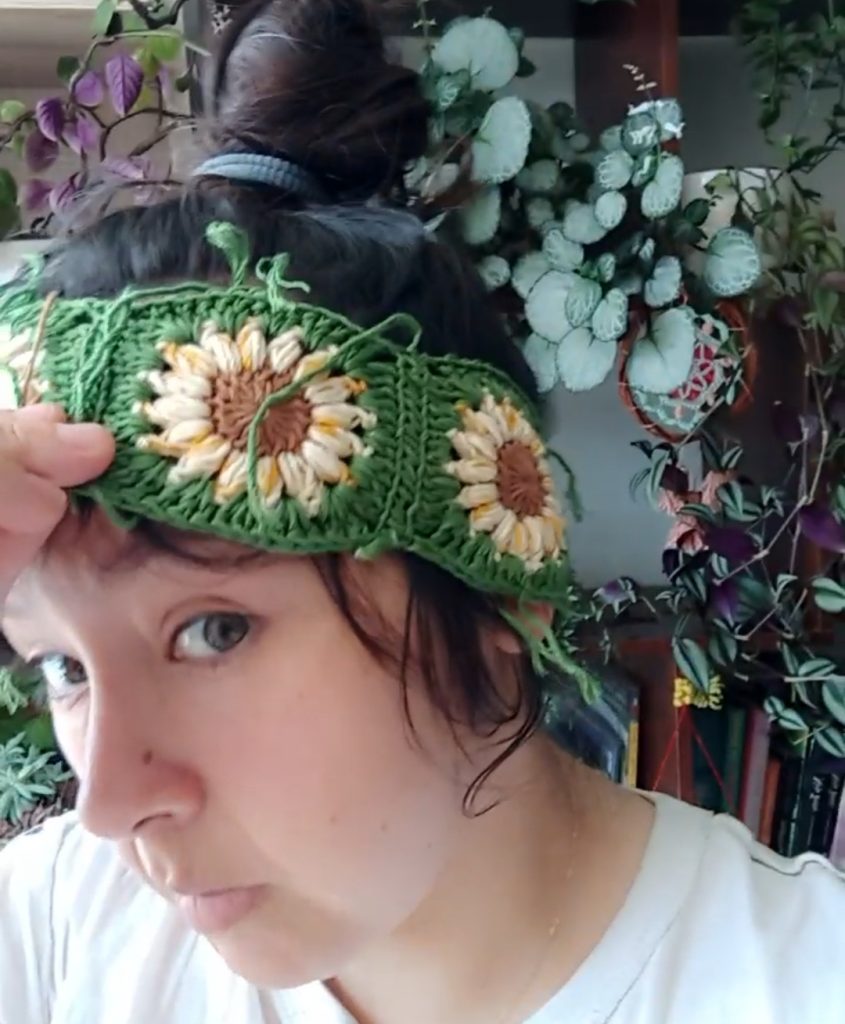
Eso va a depender del grosor de tu grannie (del material, grosor y medida de tu cabeza), así que te recomiendo medirte a medida que vayas tejiendo. Yo tejí 7. Una vez que tengas la cantidad necesaria que rodee tu cabeza, los unes a los lados, como en la foto. 

IMPORTANTE 

  • Al terminar de unirlos, debes contar cuántos puntos tienes en total, esto va a ser muy útil cuando tejamos la base
  • Intenta que no te queden sueltos, no importa si te quedan un poquitín apretados, ya que estos grannies van más cerca de la coronilla que del medio de la cabeza

How many do I have to work?

That will depend on the measure of your grannie (the material, weight and size of your head), so I recommend measuring as you work. I worked 7. Once you have the necessary amount to go around your head, you join them at the sides, as in the picture.

IMPORTANT: When you finish joining them, you must count how many stitches you have in total, this will be very useful when we work the base.

BASE

La base es muy fácil. Cada ronda la tejes de un color distinto, o puedes tejerla de un sólo color, aquí no hay reglas…. puedes trabajar de acuerdo a tus gustos.

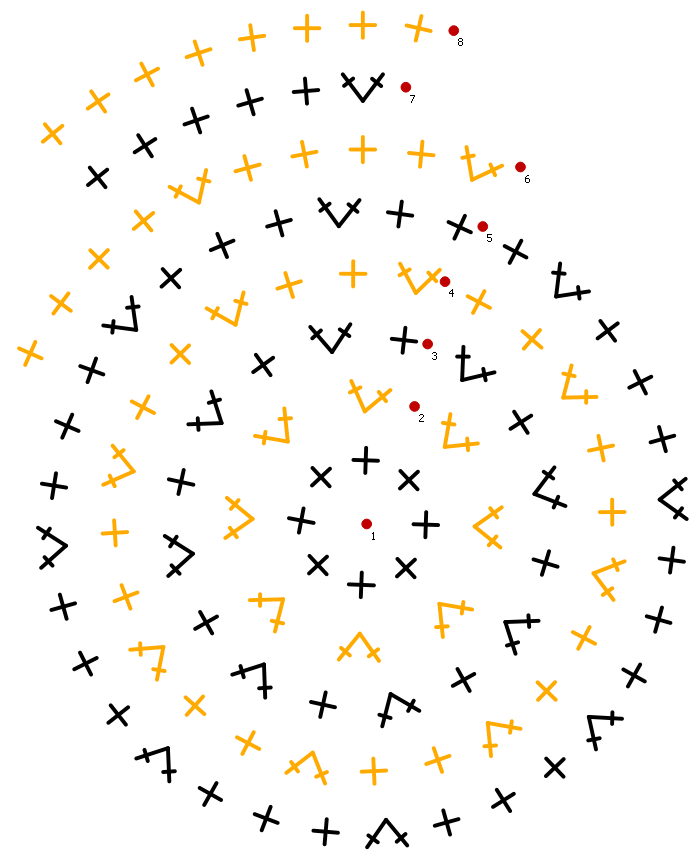
Comienza tejiendo 8 puntos bajos como en el gráfico de arriba. En la ronda 2 tejerás 8 aumentos de puntos bajos. En la 3 tejerás 1aumento cada 1 punto bajo, en la 4 tejerás 1 aumento cada 2 puntos bajos, en la 5 tejerás 1 aumento cada 3 puntos y así sucesivamente… Si te das cuenta, en la ronda 8 no hay aumentos, esto es porque el tejido se va agrandando demasiado y queda con ondulaciones, desde aquí en adelante tejeremos sólo algunas rondas sin aumentos para evitar tantas ondulaciones.

¿Cuántas Rondas debo tejer?

Dependerá del total de puntos que tengas en los grannies. Por ejemplo: Yo tuve 112 puntos alrededor de los grannies, entonces tejí hasta que en una ronda me dió 112 puntadas, de esta manera podría unir cada punto de la base con cada punto de los grannies. 

CONSIDERACIONES

  • Compara el diámetro de la base con el diámetro de los grannies unidos.
  • LA BASE NUNCA DEBE SER MÁS GRANDE QUE EL DIÁMETRO DE LOS GRANNIES
  • Si no te quedan números perfectos entre base y grannies, no te estreses, hazlos calzar a la fuerza jajajja Es un proyecto para disfrutar (no habrá policía tejeril) sólo ten en cuenta la consideración anterior.
  • No te preocupes si te queda corto, ya que aún falta mucho por trabajar, y es mejor que no nos quede hasta abajo (ya que después será difícil mantener la forma)

The base is very easy. Each round you work it in a different color, or you can work it in only one color, there are no rules here…. you can work according to your taste.

Start by crocheting 8 sc as in the chart above. In round 2 you will work 8 increases of sc In round 3 you will work 1 increase every 1 sc, in round 4 you will work 1 increase every 2 sc, in round 5 you will work1 increase every 3 stitches and so on… If you notice, in round 8 there are no increases, this is because the fabric is getting too big and there are ripples, from here on we will work only a few rounds without increases to avoid so many ripples.


How many Rounds should I work?

It will depend on the total number of stitches you have in the grannies. For example: I had 112 stitches around the grannies, so I worked until in the one I got 112 stitches, this way I could join each stitch of the base with each stitch of the grannies.

CONSIDERATIONS

  • Compare the diameter of the base with the diameter of the joined grannies.
  • THE BASE SHOULD NEVER BE LARGER THAN THE DIAMETER OF THE GRANNIES.
  • If you don’t have the numbers between the base and the grannies, don’t stress, make them fit together by force hahahaha It’s a project to enjoy (there will be no crocheting police) just keep in mind the above consideration.

Y HASTA AQUÍ LES DEJO HOY… ¿NOS VEMOS EN UNOS DÍAS?

¡Recuerda etiquetarme en tus avances!

XMAS Mystery CAL- Crochet Along

Hola Anandinis! Estoy tan emocionada de contarte que este año lanzaré mi primer Mystery CAL (¡y es navideño!)🤶🎄

Para quienes no saben qué es un Mystery CAL, les cuento que se trata de un proyecto (o unos cuántos en este caso) que son totalmente secretos, es decir que nadie los ha visto e incluso tú no sabrás que vas a tejer hasta el momento de comenzado el Mystery CAL!! 

En un MCAL confías en la diseñadora  y en su trabajo, te arriesgas a maravillarte con el trabajo a realizar y si ella tiene un estilo en particular, te podrás hacer una idea global de qué es lo que te espera, ¿No es emocionante?

Pués yo me he decidido, con muchos nervios pero muchas ganas a hacer mi primer MCAL: El Xmas Mystery CAL 

Hi Anandinis! I’m so excited to tell you that this year I’m launching my first Mystery CAL (and it’s Christmas!).

For those who don’t know what a Mystery CAL is, I tell you! it’s a project (or a few in this case) that are totally secret, meaning that no one has seen them and even you won’t know what you are going to work until the moment you start the Mystery CAL, wow!!! 

In a MCAL you trust the designer and her work, you risk to be amazed with the work to be done and if she has a particular style, you can get an overall idea of what awaits you, isn’t it exciting?

Well, I have decided, with a lot of nerves but a lot of desire to make my first MCAL: The Xmas Mystery CAL. 

Ok pero ¿de qué se trata este en particular? Sólo te puedo dar algunas pistas para que te animes a unirte y aquí van:

  • No es un proyecto, son 3 proyectos pequeños de decoración navideña
  • Cada proyecto se trabaja en base a una técnica distinta, de esas que sabes que me gustan trabajar
  • Estoy segura que te van a encantar

¿Cómo funciona?

El MCAL tendrá una duración de 3 semanas, en las cuales cada viernes les enviaré una actualización correspondiente a cada patrón misterioso, uno por semana.

VIERNES 02– 1er Patrón Misterioso
VIERNES 09– 2do Patrón Misterioso
VIERNES 16– 3er Patrón Misterioso

El patrón traerá un video tutorial, instrucciones punto a punto y algunas fotos de apoyo, y además tendremos un grupo de wsp para apoyarnos en estas 3 semanas.

Para participar sólo debes adquirir tu «patrón» que en realidad sólo contendrá un triptico con un poco de información y el acceso al grupo de wsp. Con esta compra podré ver tu correo y te enviaré por ahí el primer patrón misterioso que comienza el viernes 02 de diciembre

¿Dónde comprar?

SITIO WEB
Puedes hacerlo por mi web, pero debes asegurarte de haber ingresado bien tu correo, ya que lo enviaré de forma manual por este medio AQUÍ

RAVELRY
Puedes adquirirlo por Ravelry y la actualización te llegará automáticamente cada viernes, AQUÍ

Ok but what is this particular one about? I can only give you a few hints to encourage you to join and here they go:

  • It’s not one project, they´re 3 small Christmas decorating projects.
  • Each project is based on a different technique, one of those that you know I like to work with.
  • I’m pretty sure you will love them

How does it work?

The MCAL will last 3 weeks, in which every Friday I will send you an update corresponding to each mystery pattern, one per week.

FRIDAY 02- 1st Mystery Pattern
FRIDAY 09– 2nd Mystery Pattern
FRIDAY 16– 3rd Mystery Pattern

The pattern will bring a video tutorial, stitch by stitch instructions and some supporting photos, and we will also have a wsp group to support us in these 3 weeks.

To participate you only need to purchase your «pattern» which will actually only contain a trifold with a little information and access to the wsp group. With this purchase I will be able to see your email and I will send you the first mystery pattern that starts on Friday December 2.

Where to buy?

WEB SITE
You can do it through my website, but you must make sure you have entered your email address correctly, because I will send it manually through this way HERE

RAVELRY
You can buy it on Ravelry and the update will be sent to you automatically every Friday, HERE


Los 3 diseños estarán disponibles juntos a la vez sólo hasta que dure el MCAL, una vez terminado, éstos se venderán por separad


The 3 designs will be available together at the same time only for the duration of the MC
AL, once finished, they will be sold separately.

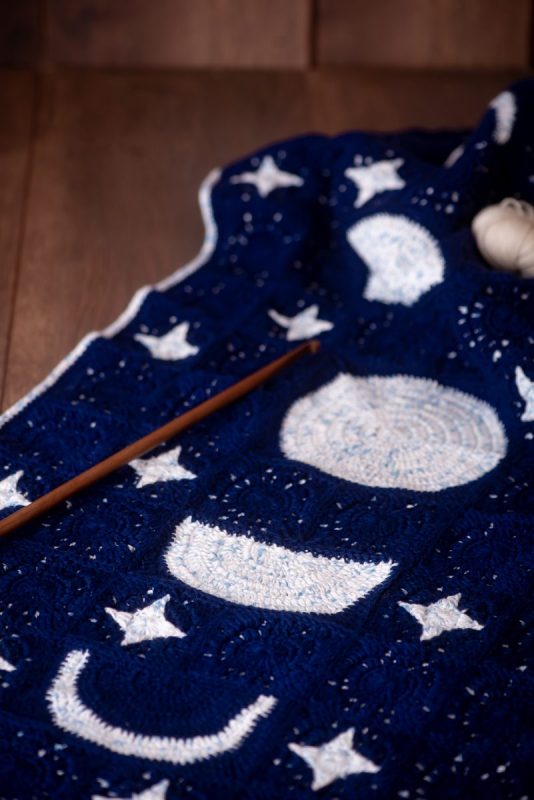
LUNAR BLANKET CAL- Week 3- Moon Phases

Nos encontramos otra semana y última! Sé que las había dicho 4 semanas, pero me atrasé una (por motivos personales) y decidií traerles las 3 fases lunar de una vez 🙂 
Esta fue una de mis partes favoritas cuando estaba tejiendo la manta… La Luna es una gran inspiración para mi. Todo en ella me mueve, me toca y me influencia 🙂
Pués ya vamos a crear!

Here we are another week and the last one! I know I said 4 weeks, but I was one week late (for personal reasons) and decided to bring you the 3 moon phases at once 🙂 

This was one of my favourite parts when I was crocheting the blanket…. The moon is a great inspiration for me. Everything about it moves me, touches me and influences me 🙂

So let’s create!

Para esta última parte, necesitarás:

  • 1 LUNA LLENA
  • 2 MEDIAS LUNAS
  • 2 LUNAS CRECIENTES

For this last part, you will need:

  • 1 FULL MOON
    2 HALF MOONS
    2 GROWING MOONS

Abreviaciones- abbreviations

Rnd: Ronda
F1: Fila 1
C1:Color 1 
pd:
punto deslizado
cad: cadeneta
pb: punto bajo
sht: sólo por la hebra trasera
shd: sólo por la hebra delantera
pa: punto alto
dpa: doble punto alto
tpa: triple punto alto (con 3 lazadas)
dtpa:
doble triple punto alto (con 4 lazadas)
ttpa:
triple triple punto alto (con 5 lazadas)

Rnd: Round
C1: Color 1
sl st: slip stitch
ch: chain
sc: single crochet
blo: back loop only
flo: front loop only
dc: double crochet
tr: treble crochet (with 2 loops on hook)
dtr: double treble crochet (with 3 loops on hook)
trtr: treble treble crochet (with 4 loops on hook)
dtrtr: double treble treble crochet (with 5 loops on hook)

LUNA LLENA / FULL MOON

Rnd1: Con C1 teje un doble anillo mágico, 2cad (cuenta como 1pa), 15 pa, aprieta y cierra el anillo, pd para unir. 16 pa
Rnd2: 2cad (cuenta como 1pa), 1pa en mismo p, 1aum pa por toda la ronda, pd para unir. 32pa
Rnd3: 2cad (cuenta como pa), 1pa en mismo p, *1pa, 1aum pa, rep desde * por toda a ronda, pd para unir. 48pa
Rnd4: 2cad (cuenta como *1pa),1pa, 1aum pa, rep desde* por toda la ronda, pd para unir. 64pa
Rnd5: 2cad (cuenta como *1pa), 1aum pa, 2pa, rep desde* por toda la ronda, pd para unir. 80pa
Rnd6: 2cad (cuenta como *1pa), 3pa, 1aum pa, rep desde* por toda la ronda, pd para unir. 96pa
Rnd7: 2cad (cuenta como *1pa),1pa, 1aum pa, 3pa rep desde* por toda la ronda, pd para unir, corta. 112pa
Rnd8: Con C2, comienza en cualquier punto con *5pb, 3mpa, 4pa, 3dpa, 1tpa, (1tpa, 1cad, 1tpa), 1tpa, 3dpa, 4pa, 3mpa, rep desde* hasta el final de ronda, pd para unir y corta.


Rnd1: With C1, make a double magic ring, ch2 (count as dc), 15dc, sl st to join. 15 sts
Rnd2: Ch2 (count as dc), 1dc in same st, 2dc in next st around, sl st to join. 32 sts
Rnd3: Ch2 (count as dc), 1dc in same st, *1dc in next st, 2dc in next st, rep from* around, sl st to join. 48 sts
Rnd4: Ch2 (count as *1dc), 1dc in next st, 2dc in next st, rep from* around, sl st to join. 64 sts
Rnd5: Ch2 (count as *1dc), 2dc in next st, 1dc in next 2sts, rep from* around, sl st to join. 80 sts
Rnd6: Ch2 (count as *1dc), 1dc in next 3sts, 2dc in next st, rep from* around, sl st to join. 96 sts
Rnd7: Ch2 (count as *1dc), 1dc in next st, 2dc in next st, 1dc in next 3sts, rep from* around, sl st to join, fasten off. 112 sts
Rnd8: With C2, start in any st, *sc in next 5sts, hdc in next 3sts, dc in next 4sts, tr in next 3sts, dtr in next st, (1dtr, ch1, 1dtr) in next st, 1dtr in next st, tr in next 3sts, dc in next 4ssts, hdc in next 3sts, rep from* to end, sl st to join, fasten off.

MEDIA LUNA/ HALF MOON

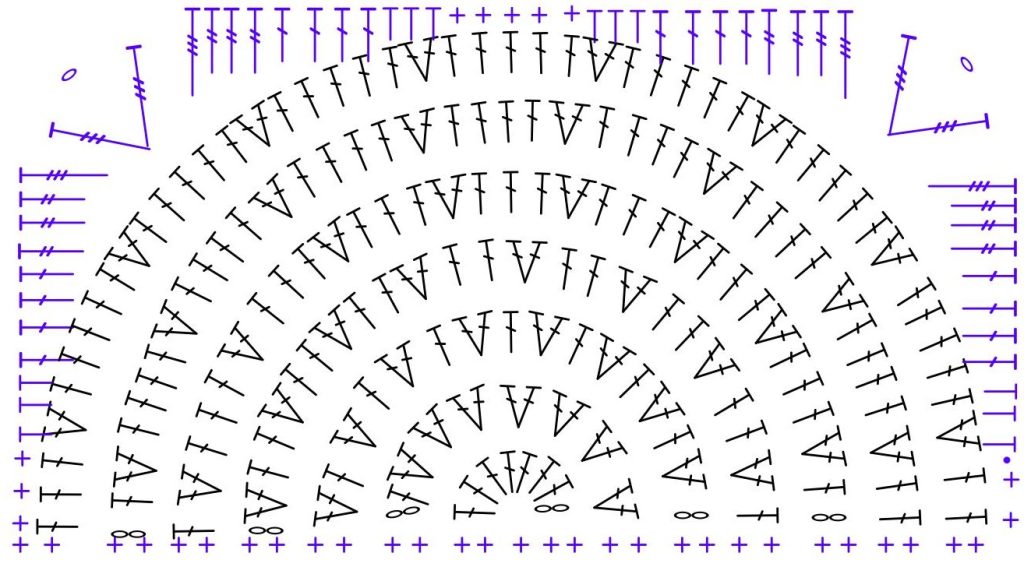
F1: Con C1 teje un doble anillo mágico, 2cad (cuenta como 1pa), 7 pa, aprieta y cierra el anillo, gira. 8 pa
F2: 2cad (cuenta como 1pa), 1pa en mismo p, 1aum pa por toda la ronda, gira. 16pa
F3: 2cad (cuenta como*1pa), 1aum pa, rep desde * por toda a ronda, gira.  24pa
F4: 2cad (cuenta como *1pa),1aum pa, 1pa, rep desde* por toda la ronda, gira. 32pa
F5: 2cad (cuenta como *1pa), 1pa, 1aum pa, 1pa, rep desde* por toda la ronda, gira. 40pa
Rnd6: 2cad (cuenta como *1pa), 1pa, 1aum pa, 2pa, rep desde* por toda la ronda, gira. 48pa
F7: 2cad (cuenta como *1pa),1pa, 1aum pa, 3pa rep desde* por toda la ronda, gira. corta. 56pa
F8: Con C2, comienza en el segundo punto del primer aumento de la Rnd7, 3mpa, 4pa, 3dpa, 1tpa, (1tpa, 1cad, 1tpa), 1tpa, 3dpa, 4pa, 3mpa, 5pb, 3mpa, 4pa, 3dpa, 1tpa, (1tpa, 1cad, 1tpa), 1tpa, 3dpa, 4pa, 3mpa, 3pb, 2pb a lo largo de cada pa (hasta que tengas 29 pb en total en el lado inferior), 2pb, cierra y corta.


Row1: With C1, make a double magic ring, ch2 (count as dc), 7dc, turn. 8 sts
Row2: Ch2 (count as dc), 1dc in same st, 2dc in next sts to end, turn. 16 sts
Row3: Ch2 (count as *1dc), 2dc in next st, rep from* to end, turn. 24 sts
Row4: Ch2 (count as *1dc), 2dc in next st, 1dc in next st, rep from* around, turn. 32 sts
Row5: Ch2 (count as *1dc), 1dc in next st, 2dc in next st,1dc in next st, rep from* around, turn. 40 sts
Row6: Ch2 (count as *1dc), 1dc in next st, 2dc in next st, 1dc in next 2sts, rep from* around, turn. 48 sts
Row7: Ch2 (count as *1dc), 1dc in next st, 2dc in next st, 1dc in next 3sts, rep from* around, turn, fasten off. 56 sts
Row8: With C2, start in second dc from first increase from rnd7, hdc in next 3sts, dc in next 4sts, tr in next 3sts, dtr in next st, (1dtr, ch1, 1dtr) in next st, 1dtr in next st, tr in next 3sts, dc in next 4ssts, hdc in next 3sts, sc in next 5sts, hdc in next 3sts, dc in next 4sts, tr in next 3sts, dtr in next st, (1dtr, ch1, 1dtr) in next st, 1dtr in next st, tr in next 3sts, dc in next 4ssts, hdc in next 3sts, sc in next 3sts, 2sc in each dc (until you have 29 sc on bottom side), sc in next 2sts, sl st to join, fasten off.

LUNA CRECIENTE/ GROWING MOON

F1: Con C1 teje un doble anillo mágico, 2cad (cuenta como 1pa), 7 pa, aprieta y cierra el anillo, gira. 8 pa
F2: 2cad (cuenta como 1pa), 1pa en mismo p, 1aum pa por toda la fila, gira. 16pa
F3: 2cad (cuenta como*1pa), 1aum pa, rep desde * por toda a fila, gira.  24pa
F4: 2cad (cuenta como *1pa),1aum pa, 1pa, rep desde* por toda la fila, gira. 32pa
F5: 2cad (cuenta como *1pa), 1pa, 1aum pa, 1pa, rep desde* por toda la fila, gira. 40pa
F6: Con C2, 1cad (cuenta como *1pb), 1pb, 1aum pb, 3pb,1mpa, 1aum mpa, 3mpa, 1pa, [1aum pa, 4pa] 3 veces, 1aum pa, 1pa, 3mpa, 1aum mpa, 1mpa, 3pb, 1aum pb, 2pb, gira. 48pts
F7: 1cad (cuenta como *1pb),1pb, 1aum pb, 5pb,1aum pb, 1pb, 4mpa, 1aum mpa, 2mpa, 3pa, 1aum pa, 5pa, 1aum pa, 3pa, 2mpa, 1aum mpa, 4mpa, 1pb, aum pb, 5pb, 1aum pb, 3pb, cierra y corta. Gira. 56pa
F8: Con C1, comienza en primer pb hecho de la F7, 3pa, 3dpa, 3tpa, 4dtpa, (1qpa,1cad, 1qpa), 2dtpa, 2dpa, 4pa, 3mpa, 5pb, 3mpa, 4pa, 2dpa, 2dtpa, (1qpa,1cad, 1qpa), 4dtpa, 3dtpa, 3dpa, 3pa, 29 pb, pd para unir, corta.

Row1: With C2, make a double magic ring, ch2 (count as dc), 7dc, turn. 8 sts
Row2: Ch2 (count as dc), 1dc in same st, 2dc in next sts to end, turn. 16 sts
Row3: Ch2 (count as *1dc), 2dc in next st, rep from* to end, turn. 24 sts
Row4: Ch2 (count as *1dc), 2dc in next st, 1dc in next st, rep from* around, turn. 32 sts
Row5: Ch2 (count as *1dc), 1dc in next st, 2dc in next st,1dc in next st, rep from* to end, turn. 40 sts
Row6: With C1, Ch1 (count as *1sc), 1sc in next st, 2sc in next st, 1sc in next 3sts, 1hdc in next st, 2hdc in next st, hdc in next 3sts, 1dc in next st, [2dc in next st, dc in next 4 sts] thrice, 2dc in next st, 1dc in next st, hdc in next 3sts, 2hdc in next st, 1hdc in next st, sc in next 3sts, 2sc in next sts, sc in next 2sts, turn. 48 sts
Row7: Ch1 (count as *1sc), 2sc in next st, sc in 5next sts, 2sc in next st, sc in next st, hdc in next 4 sts, 2hdc in next st, hdc in next 2sts, 1dc in next 3sts,2dc in next st, dc in next 5sts, 2dc in next st, dc in next 3sts, hdc in next 2sts, 2hdc in next st, hdc in next 4sts, sc in next st, 2sc in next st, sc in next 5sts, 2sc in next st, sc in next 3sts, turn, fasten off. 56 sts
Row8: With C2, start in first sc made from F7, dc in next 3sts, tr in next 3sts, dtr in next 3sts, trtr in next 4sts, (1dtrtr, ch1, 1dtrtr) in next st, 1trtr in next st, 1dtr in next st, tr in next 2sts, dc in next 4sts, hdc in next 3sts, sc in next 5sts, hdc in next 3sts, dc in next 4sts, tr in next 2sts, dtr in next st, 1trtr in next st, (1dtrtr, ch1, 1dtrtr) in next st, 1trtr in next 4sts, 1dtr in next 3sts, tr in next 3sts, dc in next 3sts, 2sc in each dc until you have 29 sc, sl st to join, fasten off.

BLOQUEO- BLOCKING

El bloqueo es parte fundamental en la manta, ya que esto te dará la posibilidad de dejar los grannies con terminaciones prolijas y te ayudará a definirlos mejor. Muchas veces me preguntan si es mejor bloquear después de unir la manta o antes de unirla. Yo bloqueo los grannies antes, ya que esto me ayuda a definir cada uno y el espacio que se ocupa para eso es menor. Personalmente utilizo la técnica de bloqueo de rociador y quedan super bien ( no sumergo completamente los grannies en agua)

Blocking is a fundamental part of this proyect, as this will give you the possibility to leave the grannies with neat ends and will help you to define them better. I am often asked if it is better to block after joining the blanket or before joining it. I block the grannies before, as this helps me to define each one and the space taken up for this is less. Personally I use the mist blocking technique and they look great (I don’t completely submerge the grannies in water).

UNIÓN / TO JOIN

La unión de grannies es un mundo lleno de técnicas y posibilidades, es un tema que podríamos tocar en más detalle más adelante. Tú puedes unirlos con el método que quieras. Puede ser con aguja de lana o con tu mismo crochet, lo importante es tener un trabajo terminado, no?

La forma en que yo uní los grannies fue muy sencilla: Alineé todos los grannies, y con un crochet fui tomando SÓLO LA HEBRA TRASERA de cada punto y fui pasando el hilo, tomando un punto de un grannie y tomando el que está exactamente en frente, en el otro grannies, como un espejo.

The joining of grannies is a world full of techniques and possibilities, a subject we could go into in more detail later on.
You can join them with any method you like. It can be with a wool needle or with your own crochet hook, the important thing is to have a finished work, isn’t it?
The way I joined the grannies was very simple: I lined up all the grannies, and with a crochet hook I took BACK LOOP ONLY of each stitch and passed the yarn through, taking a stitch from one grannie and taking the one that is exactly in front, in the other grannie, like a mirror.

Bueno, y hasta aquí llegó nuestro CAL, espero que si tejiste este gran proyecto (que necesita mucha paciencia por cierto), hayas aprendido muchas cosas nuevas y te hayas gustado el diseño, por otro lado si no lograste tejerlo esta vez; este tutorial estará aquí por siempre para que puedas tejerlo en otro momento quizás  y la luna te acompañe, te proteja y te guíe en la manta. Nos vemos en otra publicación!

**Recuerda que este diseño NO ha sido testeado, así que si encuentras alguna errata, déjamelo saber de inmediato 🙂

Well, so much for our CAL, I hope that if you workted this great project (which needs a lot of patience by the way), you’ve learned a lot of new things and you’ve liked this design, on the other hand if you didn’t manage to work it this time; this tutorial will be here forever so you can crochet it another time maybe and the moon will be with you, protect you and guide you in the blanket. See you in another post!

**Remember that this design has NOT been tested, so if you find any mistakes, let me know right away 🙂


LUNAR BLANKET CAL- Week 2: SKY

Hola Anandinis! 
Nos encontramos nuevamente en la semana númeor 2 de nuestro CAL. Espero que muchas de ustedes ya tenga muchas estrellitas hechas. Recuerda que para ver el tutrorial, patrón y diagrama de la semana 1 puedes ir aqui MANTA LUNAR SEMANA 1.

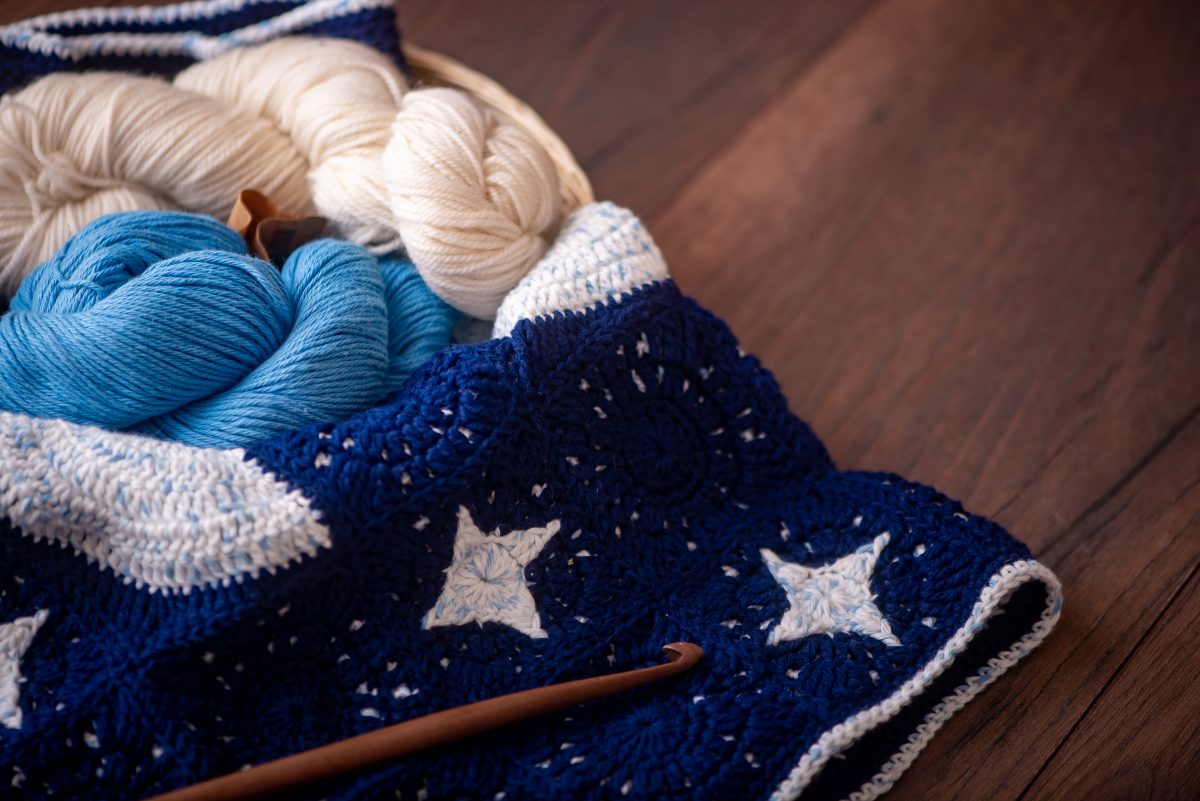
Esta semana veremos los grannies del cielo, los cuales son azules y no llevan un gran diseño que resalte pero sí tiene estas «manchas» blanquedas que simbolizan estrellas muchos más lejanas. Quería mencionar esto ya que muchas personas me escribieron preguntándome si esto debía quedar así o estaban cometiendo algún tipo de error… y no, ustedes lo están haciendo grandioso!

Hello Anandinis! 
We are once again in week 2 of our CAL. I hope that many of you already have a lot of stars made. Remember that to see the tutorial, pattern and chart of week 1 you can go here LUNAR BLANKET WEEK 1.

This week we will be looking at the grannies in the sky, which are blue (in my project) . It does not have a big design that stands out but it do have these white «spots» that symbolise stars much further away. I wanted to mention this as many people wrote to me asking if this should stay like this or if they were making some kind of mistake… and no, you guys are doing great!

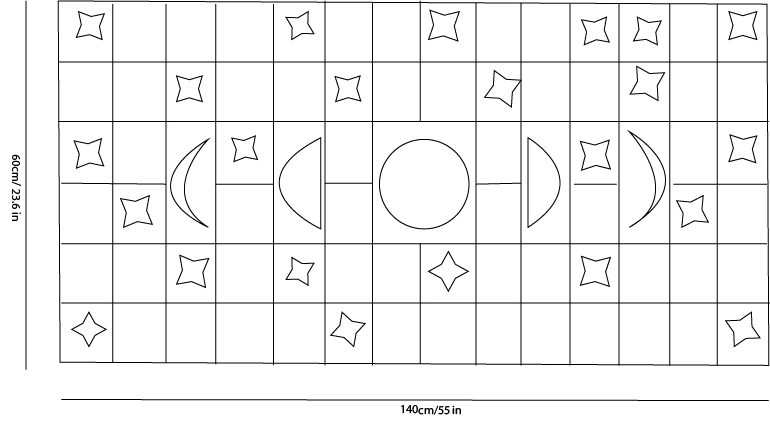
En el diagrama anterior, los grannies del cielo están representados por los cuadrados en blanco, sin diseño. Los grannies del cielo necesarios son 49, pero ya sabes que esto es sólo una guía y tu puedes armar tu propia combinación de diseño usar el número que gustes.

In the diagram above, the sky grannies are represented by the blank, unpatterned squares. The sky grannies needed are 49, but you know this is only a guide and you can put together your own design combination using any number you like.

let's start!

Abreviaciones/Abbreviations US terms

Rnd: Ronda
C1:Color 1 
pd:
punto deslizado
cad: cadeneta
pb: punto bajo
sht: sólo por la hebra trasera
shd: sólo por la hebra delantera
pa: punto alto
dpa: doble punto alto
pard: punto alto en relieve por delante
dims: disminución
salt 1p: salta 1 punto.

Rnd: Round
C1: Color 1
sl st: slip stitch
ch: chain
sc: single crochet
blo: back loop only
flo: front loop only
dc: double crochet
tr: treble crochet
FPdc: front post double crochet
dc2tog: double crochet 2 together
skp 1st: skip 1 st

NOTAS:

  • Esta manta está hecha en mosaico overlay, trabajando en lagunas rondas por le hebra trasera de los puntos y otras veces trabajando por la hebra delantera.
  • Los puntos altos, dism y punto en relieve son enganchado siempre en la ronda que es de su mismo color
  • En cada ronda terminarás con un cierre especial que les muestro en el video tutorial

NOTES:

  • This blanket is made in overlay mosaic, working in some rounds through back loop only and sometimes working through front lopp only.
  • The double crochet, dc3tog and FPdc stitches are always hooked in the round that is of the same colour.
    in each round
  • You will end up with the special join that I show you in the video tutorial.

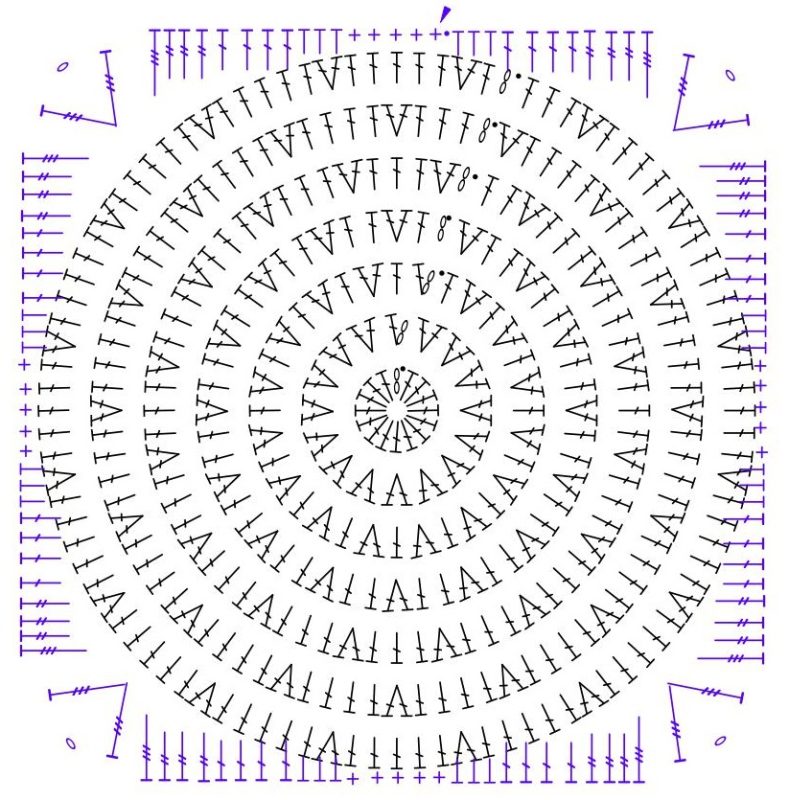
COMIENZO

Con C1 doble anillo mágico
Rnd1: C1. 2cad (cuenta como pa), 15 pa, apreta el anillo y une. 16pa
Rnd2: C1. 1cad (no cuenta como p), *1aum pb sht, 1pb sht, rep desde* hasta el final, une.
Rnd3: C2. 1cad (no cuenta como p), *1pb sht, 1aum pb sht, 1pb sht, rep desde* hasta el final, une.
Rnd4: C1.  1cad (no cuenta como p), *1pa shd en pb justo abajo de la rnd2, 1pa shd en sig pb justo abajo en la rnd2, slat 1p, 1pb sht, 1pa shd en pb justo abajo en la rnd2, salt 1p, rep desde* hasta el final, une.
Rnd5: C2. 1cad (no cuenta como p), pb sht por toda la ronda, une.
Rnd6: C1. 1cad (no cuenta como p), *1pa shd en pb justo abajo en la rnd4, salt 1p, 1pb sht, 1dism pa shd en cada pa de la rnd4, 1pb shd, 1pa shd en pb justo abajo en la rnd4, salt 1p, 1pb shd, 1pa shd en pb justo abajo en la rnd4, 2pdard shd en sig pa de la rnd4, 1cad, 2pdard shd en el sig pa de la rnd4, 1pa shd en el sig pb de la rnd4, salt pts, 1pb sht, rep desde* 4 veces, une y corta.

START

With C1 make a double magic ring
Rnd1: C1. ch2 (count as dc), 15dc, pull  te magic ring tight and join.
Rnd2: C1. ch1 (does not count as st), *2sc blo in next st, 1sc blo in next st, rep from* to end, join.
Rnd3: C2. ch1 (does not count as st), *1sc blo in next st, 2sc blo in next st, 1sc blo in next st, rep from* to end, join.
Rnd4: C1. ch1 (does not count as st), *dc flo in next 2dc below from rnd2, sk 1st, 1sc blo in next st, 1dc flo in next sc below from rnd2, sk 1st, rep from* to end, join.
Rnd5: C2. ch1 (does not count as st), sc blo around, join.
Rnd6: C1. ch1 (does not count as st), 1dc flo in sc below from rnd4, sk 1st, 1sc blo in next st, 1dc2tog flo in next 2dc below from rnd4, 1sc blo in next st, 1dc flo in next sc below from rnd4, sk 1st, 1sc blo in next st, 1dc flo in sc below from rnd4, 2tr flo in next dc below from rnd4, ch1, 2tr flo in next dc below from rnd4, 1dc flo in next dc below from rnd4, sk 4sts, 1sc blo in next st,  rep from* to end, join and fasten off.

Espero ver pronto los avances de sus lindas mantas! este es un diseño que me entusiasma muchisimo compatir con ustedes, como un bello regalo de navidad. Recuerda que este patrón no está testeado así que si encuentras alguna errata, hazmela saber de inmediato!

I hope to see the progress of your beautiful blankets soon! This is a pattern that I’m very excited to share with you, as a beautiful Christmas present. Remember that this pattern is not tested so if you find any typos, let me know right away!

LUNAR BLANKET CAL- Week 1 : STAR

Comenzamo un nuevo CAL, uno especial para las festividades de fin de año, se acerca navidad y este puede ser ese esperado regalo tan especial que te hará quedar como reina o rey, quién sabe.
Estaremos 4 semanas tejiendo esta hermosa manta inspirada en las fases de la Luna. Cada semana les traeré una parte de la manta para que la tejan. Entonces, comencemos!

We are starting a new CAL, a special one for the end of the year festivities, Christmas is coming and this could be that long awaited special gift that will make you look like a queen or a king, who knows.

We will be 4 weeks crocheting this beautiful blanket inspired by the phases of the moon. Each week I will bring you a part of the blanket for you to work. So, let’s get started!

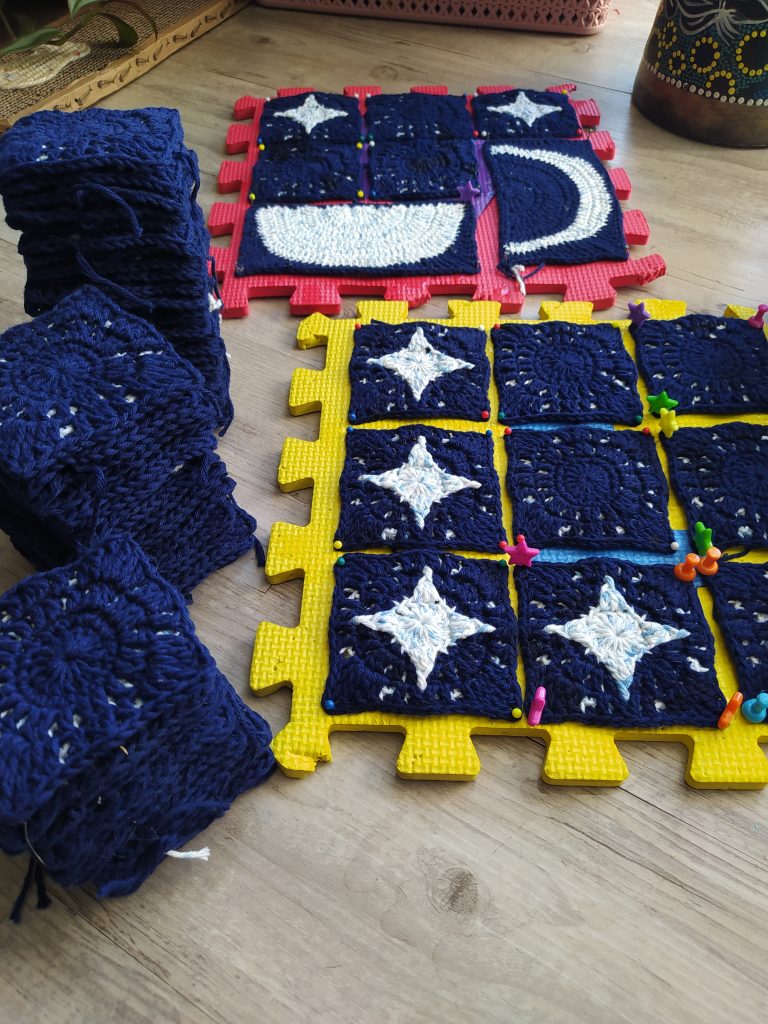
como puedes ver, la manta está hecha con 72 grannies squares, de los cuales 23 son con motivo de estrella. Sin embargo, tú puedes tejer los que gustes y armar tu propia combinación de estrellas. Con las medidas pasa lo mismo, este manta fue hecha con un grosor DK, pero puedes hacerla perfectamente en un grosor sport y agregar unos cuantos grannies más… en realidad puedes hacerla del tamaño que quieras! imagina! entre más grande puedes hasta agregar la cosntelación de tu propio signo zodiacal 🙂

Juega!

As you can see, the blanket is made with 72 grannies squares, of which 23 are star motifs. However, you can work as many as you like and make your own star convination. With the measurements it’s the same, this blanket was made with a DK weight, but you can make it perfectly in a sport weight and add a few more grannies… actually you can make it any size you want! imagine! the bigger you get, the more you can even add your own zodiac sign cosntelation 🙂
Play around!

Materials

  • 4 madejas de color 1: 1024m/ 1119 yds
  • 2 madejas de Color 2: 512 m/ 559 yds
  • 4 skeins of colour 1: 1024m/ 1119 yds
  • 2 skeins of colour 2: 512 m/ 559 yds

Muestra/ Gauge

1 granny square= 10cm/ 4in using a crochet hook of 3mm or any to obtain the gauge

Abreviaciones/Abbreviations US terms

Rnd: Ronda
C1:Color 1 
pd:
punto deslizado
cad: cadeneta
pb: punto bajo
sht: sólo por la hebra trasera
shd: sólo por la hebra delantera
pa: punto alto
dpa: doble punto alto
pard: punto alto en relieve por delante
dims: disminución
salt 1p: salta 1 punto.

Rnd: Round
C1: Color 1
sl st: slip stitch
ch: chain
sc: single crochet
blo: back loop only
flo: front loop only
dc: double crochet
tr: treble crochet
FPdc: front post double crochet
dc3tog: double crochet 3 together
skp 1st: skip 1 st

NOTAS:

  • Esta manta está hecha en mosaico overlay, trabajando en lagunas rondas por le hebra trasera de los puntos y otras veces trabajando por la hebra delanteras.
  • Los puntos altos, dism y punto en relieve son enganchado siempre en la ronda que es de su mismo color
  • En cada ronda termnarás con cierre especial que les muestro en el video tutorial

NOTES:

  • This blanket is made in overlay mosaic, working in some rounds through back loop only and sometimes working through front lopp only.
  • The double crochet, dc3tog and FPdc stitches are always hooked in the round that is of the same colour.
    in each round
  • You will end up with the special join that I show you in the video tutorial.

COMIENZO/START

Rnd1: C2. doble anillo mágico, 2cad (cuentan como pa), 15 pa, une. 16pa.
Rnd2: C1. 1cad (no cuenta como p), 1aum pb sht en cada pa de la ronda, une. 32 pb.
Rnd3: C2. 1cad (no cuenta como p), 1pb sht en primer pb, 1dism de 3pa shd en: último pa hecho en la rnd1 y en el primer y segundo pa hecho en la rnd1 por sht, *salt 1pb sht, 1pb sht por 7p más, salt 1 hebra delantera de la rnd1, dism de 3pa en los sig 3 loops de la rnd1, rep desde* 2 veces más, 8pb sht hasta el final, une. 
Rnd4: C1. 1cad (no cuenta como p), 1pb sht en primer p, 1pa shd en último pb hecho en la rnd2, 1pa shd en tercer pb hecho en la rnd2, *salt 1dism de 3pa, 1pb sht en el sig p, 1pa shd en sig pb de la rnd2, salt 1pb sht, 1pb sht en sig p, 1pa shd en los sig 2pb de la rnd2, salt 1pb sht, 1pb sht en sig p, 1pa shd en sig pb de la rnd2, salt 1pb sht, 1pb sht en el sig p, 1pa shd en sig pb de la rnd3, rep desde*2 veces más, salt 1dism de 3pa, 1pb sht en el sig p, 1pa shd en sig pb de la rnd2, salt 1pb sht, 1pb sht en sig p, 1pa shd en los sig 2pb de la rnd2, salt 1pb sht, 1pb sht en sig p, 1pa shd en sig pb de la rnd2, salt 1pb sht
Rnd5: C2. 1cad (no cuenta como p), 1pb sht en primer pb, pb sht en pa, *1pard en dism de 3pa, pb sht por 10 puntos más, rep desde* 2 veces más, 1pard en dism de 3pa, pb sht por 8 puntos más, une.
Rmd6: C1. 1cad (no cuenta como p), 1pa shd en pb justo abajo en rnd3, salt 1pb, 1pb sht en sig p, *1dism de 2pa en pa que están debajo en la rnd3, salt 1pard, 1pb sht en sig p, 1pa shd en pb justo abajo en la rnd3, salt pb, 1pb sht en el sig p, 1pa shd en pb justo abajo en la rnd3, 2dpa shd en el sig pa de la rnd3, 1cad, 2dpa shd en el sig pa de la rnd3, 1pa shd en el sig pb de la rnd3, alt 4pb, 1pb sht en el sig p, 1pa shd en pb justo abajo en la rnd3, salt 1pb, 1pb sht en el sig p, rep desde* 2 veces más, 1dism de 2pa en pa que están debajo en la rnd3, salt 1pard, 1pb sht en sig p, 1pa shd en pb justo abajo en la rnd3, salt pb, 1pb sht en el sig p, 1pa shd en pb justo abajo en la rnd3, 2dpa shd en el sig pa de la rnd3, 1cad, 2dpa shd en el sig pa de la rnd3, 1pa shd en el sig pb de la rnd3, alt 4pb, 1pb sht en el sig p, 1pa shd en pb justo abajo en la rnd3, salt 1pb, une.

Rnd1: C2. double magic ring, ch2 (count as dc), 15dc, join. 16dc.
Rnd2: C1. ch1 (does not count as st), 2sc blo in each dc around, join. 32sc.
Rnd3: C2. ch1 (does not count as st), 1sc blo in first sc, dc3tog flo in: last dc made from rnd 1, in first and second dc made from rnd1, skp 1sc blo, *sc blo in next 7sts, skp 1flo from rnd1, dc3tog flo in next 3 flo from rnd1, rep from* 2 more times, 6sc blo to end, join.
Rnd4: C1. ch1 (does not count as st), 1sc blo in first st, 1dc flo in last sc blo made in rnd2, 1dc flo in third sc blo made in rnd2, *skp 1dc3tog, 1sc blo in next st, 1dc flo in next sc from rnd2, sk 1sc blo, 1sc blo in next st,1dc flo in next 2sc from rnd2, sk 1sc blo, 1sc blo in next st, 1dc flo in next sc from rnd2, skp 1sc, 1sc blo in next st, 1dc flo in next sc from rnd2, rep from* 2 more times, skp 1dc3tog, skp 1dc3tog, 1sc blo in next st, 1dc flo in next sc from rnd2, sk 1sc blo, 1sc blo in next st,1dc flo in next 2sc from rnd2, sk 1sc blo, 1sc blo in next st, 1dc flo in next sc from rnd2, skp 1sc, join.
Rnd5: C2. ch1 (does not count as st), 1sc blo in first st, 1sc blo in dc flo, *1FPdc in dc3tog, sc blo in next 10 sts, rep from* 2 more times, 1FPdc in dc3tog, sc blo in next 8 sts.
Rnd6: C1. ch1 (does not count as st), 1dc in first sc blo right below from rnd3, skp 1sc, 1sc blo in next st, *1dc2tog in dc right below from rnd3, skp FPdc, 1sc blo in next st, 1dc flo in sc below from rnd3, skp 1sc blo, 1sc blo in next st, 1dc flo in sc right below from rnd3, 2tr flo in next dc below from rnd3, ch1, 2tr flo in dc below from rnd3, 1dc flo in next sc from rnd3, skp 4sc blo, 1sc blo in next sc, 1dc flo in sc below from rnd3, skp 1sc blo, 1sc blo in next sc, rep from* 2more times, 1dc2tog in dc right below from rnd3, skp FPdc, 1sc blo in next st, 1dc flo in sc below from rnd3, skp 1sc blo, 1sc blo in next st, 1dc flo in sc right below from rnd3, 2tr flo in next dc below from rnd3, ch1, 2tr flo in dc below from rnd3, 1dc flo in next sc from rnd3, skp 4sc blo, 1sc blo in next sc, join.

cuéntame si te unirás al CAL, recuerda que puedes unirte a mi grupo de facebook para compartir avances y dudas, aunque no soy muy activa en facebook, prometo estar más presente para ayudarles en todo lo que pueda!
https://www.facebook.com/groups/3656588917720408/

Recuerda que este patrón NO está testeado, así que si encuentras alguna errata hazmelo saber para corregirlo de inmediato
A tejer!

let me know if you will join the CAL, remember you can join my facebook group to share progress and doubts, although I’m not very active on facebook, I promise to be more present to help you as much as I can!
https://www.facebook.com/groups/3656588917720408/

Remember that this pattern is NOT tested, so if you find any mistake let me know to correct it immediately.
Let’s crochet!

ANANDA COLLAR- TUTORIAL

ANANDA COLLAR

Hola Anandinis!
Hoy les traigo un entretenido tutorial de collar muy fácil de hacer. Como saben, siempre me gusta hacer accesorios que utilicen muy poco material y con los que pueden utilizar los restos que quedan de proyectos grandes.

Siempre me ha gustado hacer «Joyas» a crochet. Si ya me siguen hace un tiempo saben que tengo un par de tutoriales de joyas a crochet en mi canal de Youtube.
Y es que las joyas han formado parte de la historia de la humanidad desde sus inicios. En algunas culturas se cree que llevar un collar atrae inconscientemente la “Conciencia Divina”, que es a su vez transmitida a través de todo el cuerpo. Esta “conciencia” nos protegería de la energía negativa. También por ello existe la creencia de que hay colgantes que dan suerte o aportan cierta protección a la persona. Sin mencionar que el collar va en la zona de cuello, el lugar físico donde se produce el sonido y por donde comunicamos.

Hello Anandinis!
Today I bring you a fun and easy to make necklace tutorial. As you know, I always like to make accessories that use very little material and with which you can use leftovers from big crochet projects.

I have always liked to crochet «jewellery». If you have been following me for a while you know that I have a couple of crochet jewellery tutorials on my Youtube channel.
Jewellery has been part of human history since the beginning. In some cultures it is believed that wearing a necklace unconsciously attracts the «Divine Consciousness», which is in turn transmitted through the whole body. This «consciousness» would protect us from negative energy. This is also why there is a belief that there are pendants that bring luck or bring a certain protection to the person. Not to mention that the necklace goes on the neck area, the physical place where sound is produced and where we communicate.

Estuve leyendo que el hombre prehistórico descubrió en su entorno diferentes materiales, los cuales modificó convirtiéndolos en ornamentos que le permitieron simbolizarse dentro de su grupo social. Hoy la sociedad moderna aún hace uso de dichos ornamentos, los usa como emblema, como distintivo o como signo de poder y jerarquía, o hasta como simple adorno. En este sentido, usar collares tejidos creo que le dicen al mundo:»¡Hey! ¡soy tejedora y me hago mis propias joyas»!


I was reading about prehistoric man discovered different materials in his environment, which he modified by turning them into ornaments that allowed him to symbolise himself within his social group. Today modern society still makes use of such ornaments, using them as emblems, as badges or as signs of power and hierarchy, or even as simple ornaments. In this sense, wearing crochet necklaces I think says to the world: «Hey, I’m a crocheter and I make my own jewellery»!

Entonces, no hay nada mejor que usar tu propio collar tejido. Puedes también regalarlo a alguien especial. 
¿Qué necesitarás?
-10 gr Color 1
-10 gr Color 2
-8 cuentas

Then, there is nothing better than wearing your own crocheted necklace. You can also give it as a gift to someone special. 
What will you need?
-10 gr Colour 1
-10 gr Colour 2
-8 beads

El paso a paso, está en el video tutorial que les preparé con mucho cariño y podrán ver al final de este post
CONSIDERACIONES ANTES DE TEJER
Hice dos muestras: 1 de color rosa con morado la cuál trabajé con un hilado grosor sport y otra verde limón con morado (que es la que ustedes verán en el video) la cuál trabajé con hilado grosor fingering.

The step by step is in the video tutorial that I prepared with much love and that you can see at the end of this post.
CONSIDERATIONS BEFORE CROCHETING
I made two samples: 1 pink with purple which I worked with a sport weight and another one lemon green with purple (which is the one you will see in the video) which I worked with a fingering weight.

Como pueden ver en la foto, aunque el collar rosado se hizo con un grosor más grande, el collar quedó más pequeño. Esto es porque utilicé un crochet un poco más pequeño que el recomendado para este grosor, y en consecuencia, el tejido quedó más apretado. Por el contrario, el verde limón que fue tejido con un grosor de hilado más pequeño, quedó más grande y alargado, esto fue porque utilicé un ganchillo más grande del recomendado para este grosor. Quize hacer estas pruebas para notar la diferencia entre uno y otra. Sabiendo esto, puedes eligir el que más te guste.

As you can see in the photo, although the pink necklace was made with a larger weight, the necklace is smaller. This is because I used a slightly smaller crochet hook than the one recommended for this weight, and consequently, the project was tighter. On the contrary, the lime green one , which was crocheted with a smaller weigth, is bigger and longer, this was because I used a bigger crochet hook than the recommended one for this weight. I wanted to do these tests to see the difference between one and the other. Knowing this, you can choose the one you like the most.

ABREVIATURAS QUE ENCONTRARÁS EN EL VIDEO/ ABBREVIATIONS YOU WILL FIND IN THE VIDEO

F1: Fila 1
LD: Lado derecho del tejido
LR: lado revés del tejido
C1/C2: Color 1/2
cad: cadeneta
pb: punto bajo
pa: punto alto
salt 1p: salta 1p

R1: Row 1
WS: Wrog side
RS: Right side
C1/C2: Colour 1/2
ch: chain
sc: single crochet
dc: double crochet
sk 1st: skip 1 st

Cuéntame qué te pareción este tutorial! ¿Lo tejerás?

Tell me what you think about this new tutorial!