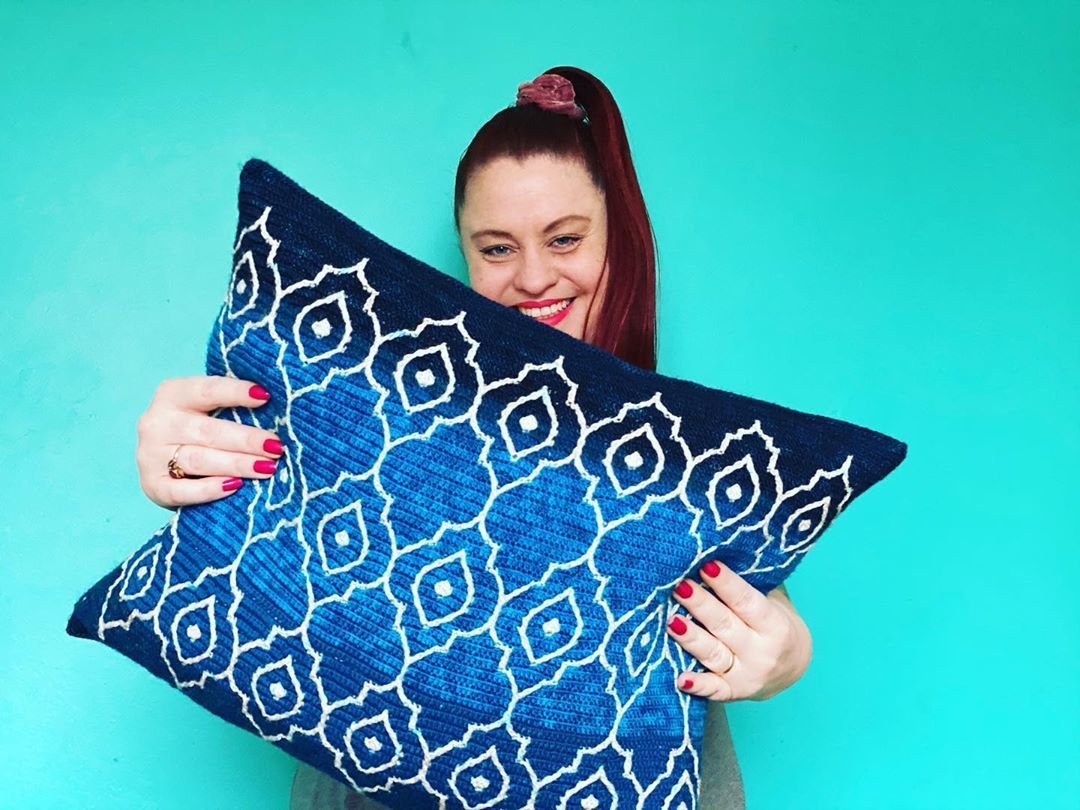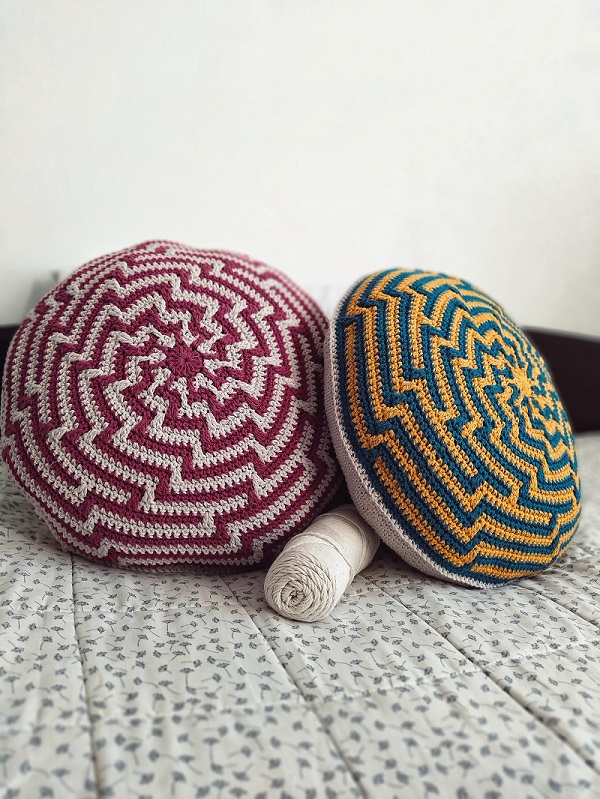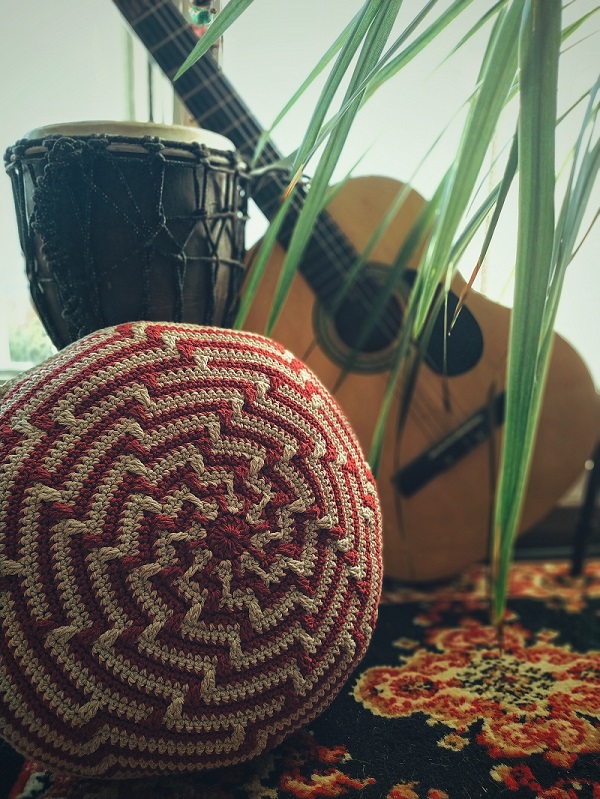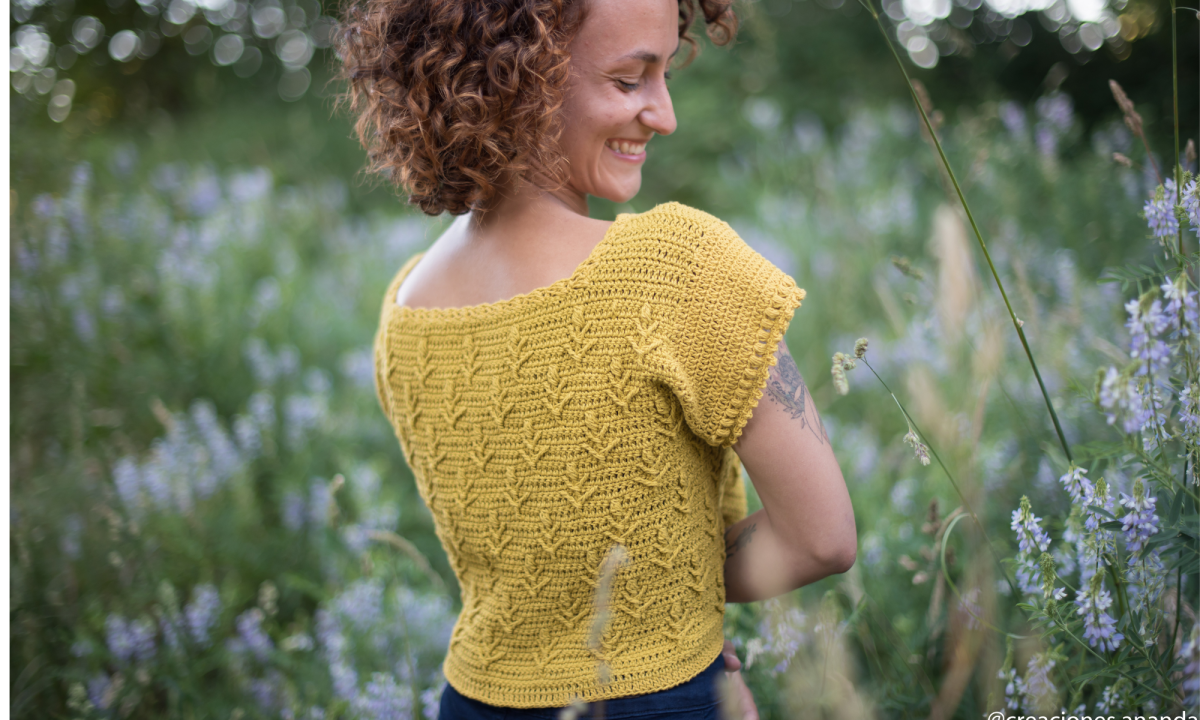
Hola nuevamente querida comunidad! Vuelvo una vez con un entretenido, adorable y rápido tutorial con una de las técnicas que amo: Overlay crochet. Pero, en un tejido plano.
Quienes me siguen desde mis inicios en instagram sabrán que este fue un diseño gratuito que lancé hace unos 3 años aproximadamente.
Hello again dear community! I’m back once again with an entertaining, lovely and quick tutorial with one of the techniques I love: Overlay crochet. But, in a flat way.
Those who follow me since my very beginnings on instagram will know that this was a free design that I launched about 3 years ago.
Hay tantas cosas que recuerdo de esto, como por ejemplo que fue mi primero primerisimo patrón escrito (mucho antes de escribir un patrón de pago oficial), me enfrentaba con lo que vendría a ser los primeros pasos de mi trabajo: Cómo escribir un patrón… uf!… fue toda una odisea el comienzo de escribir un patrón (y bien mal escrito, a propósito). Recuerdo que pasé días escribiendolo porque no sabía por dónde empezar, cómo explicar ciertas cosas que eran díficiles de ver si no eran con fotos, etc. Luego de estar unos cuántos días escribiéndolo, perdí todo el progreso porque mi computador falló. Lloré , realmente. Sentí que todo mi trabajo se había ido a la basura. Es casi tragicómico, porque ahora lo pienso y escribir un patrón tan corto sería super fácil (en comparación a lo largo de algunos que son diseños grandes). Me hace pensar en lo lindo del desarrollo y autogestión por el que transitamos las tejedoras. Esas ganas de superación es lo que nos hace avanzar y ser «expertas» cada vez más.
Finalmente lo terminé, lo guardé en google drive y muy pocas personas tuvieron acceso a él y quedó olvidado 🙁
y quedaron todas mis muestras en casa, decorando mis tazas y maceteros
There are so many things I remember from this, for example that it was my first ever written pattern (long before writing an official paid pattern), I was facing what would become the first steps of my work: How to write a pattern… phew!…. it was quite an odyssey to start writing a pattern (and a badly written one, by the way). I remember I spent days writing it because I didn’t know where to start, how to explain some things that were difficult to see if they weren’t with pictures, etc. After a few days of writing it, I lost all progress because my computer crashed. I cried, I really did. I felt that all my work had gone down the drain. It’s almost tragicomic, because now I think about it and writing such a short pattern would be super easy (compared to the length of some of the larger designs). It makes me think about the beauty of the development and self-management that we crocheters and knitters go through. That desire for self-improvement is what makes us advance and become «experts» more and more.
I finally finished it, saved it on google drive and very few people had access to it and it was forgotten about 🙁
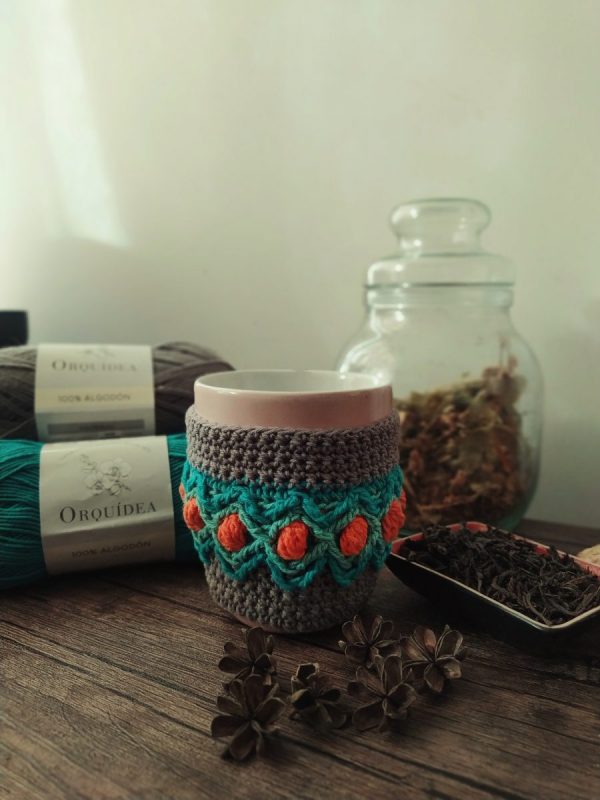
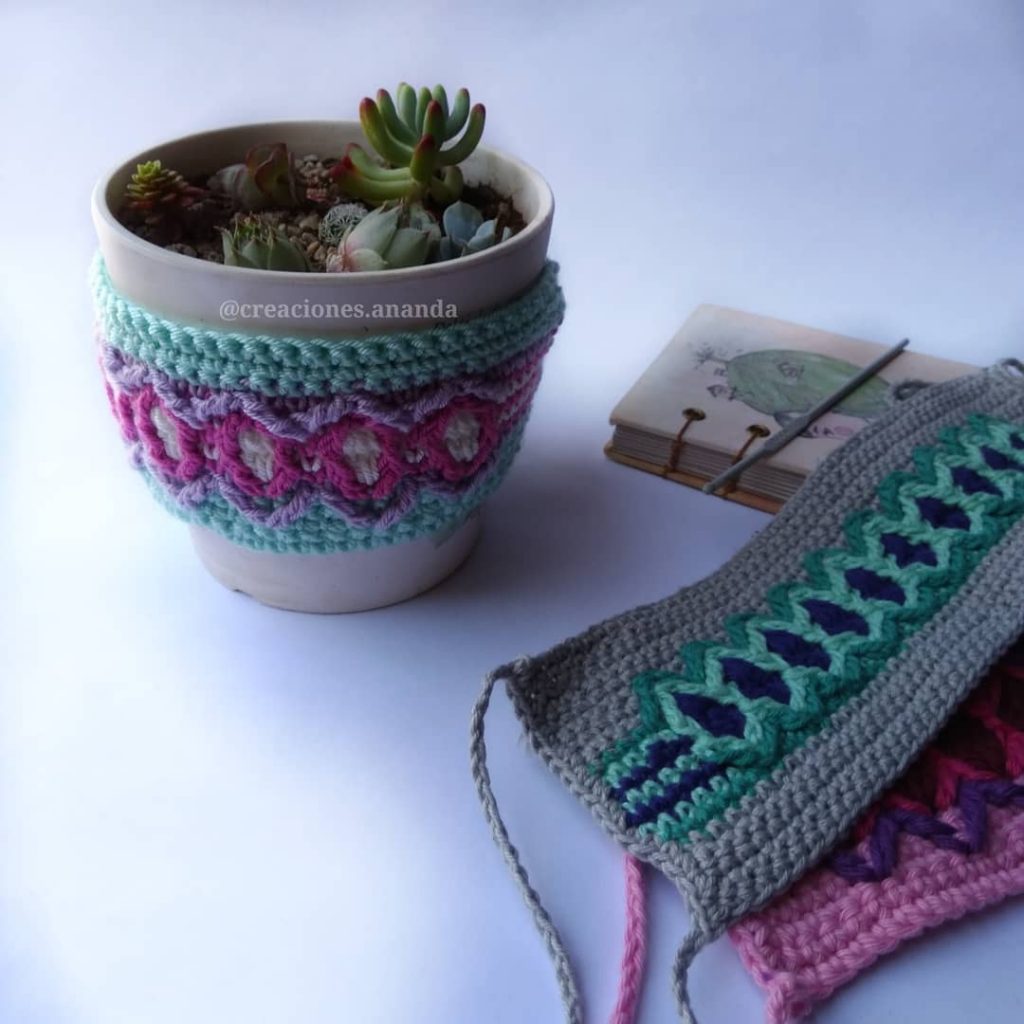
and all my samples were left at home, decorating my mugs and flower pots.
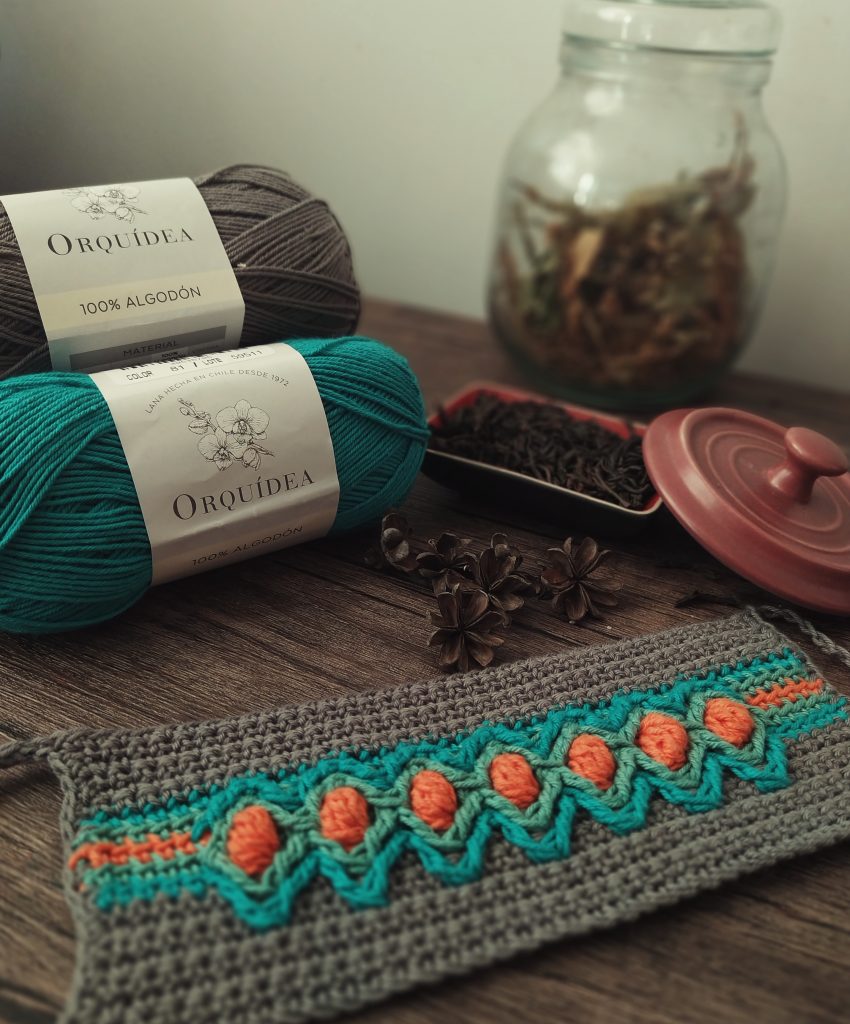
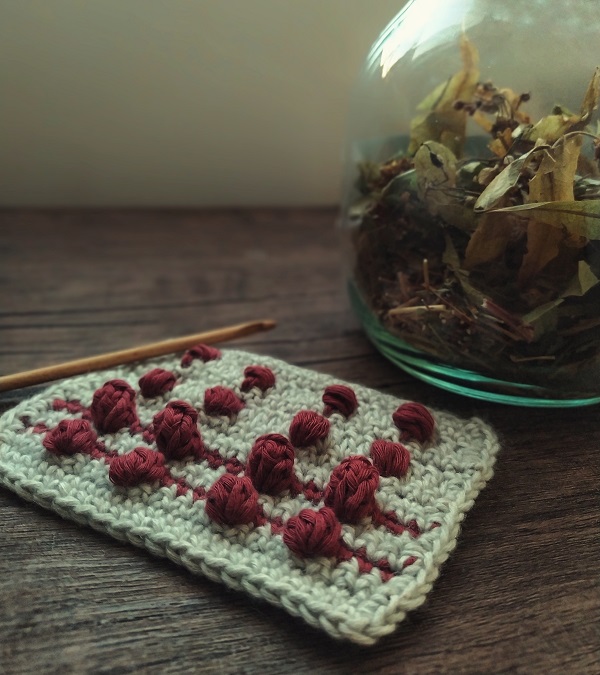
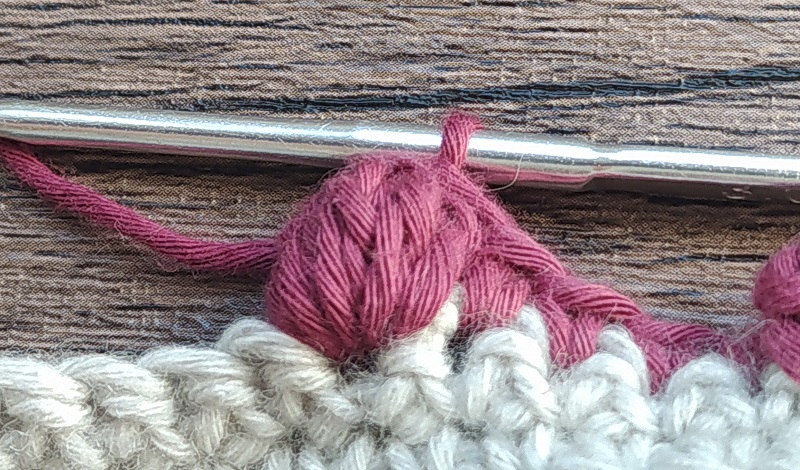
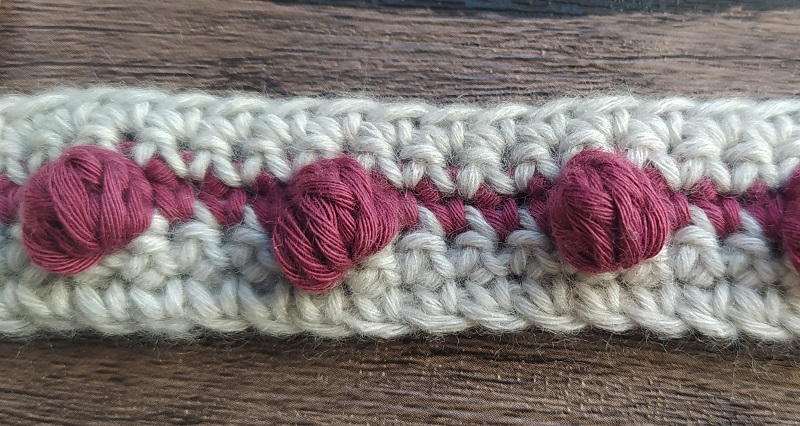
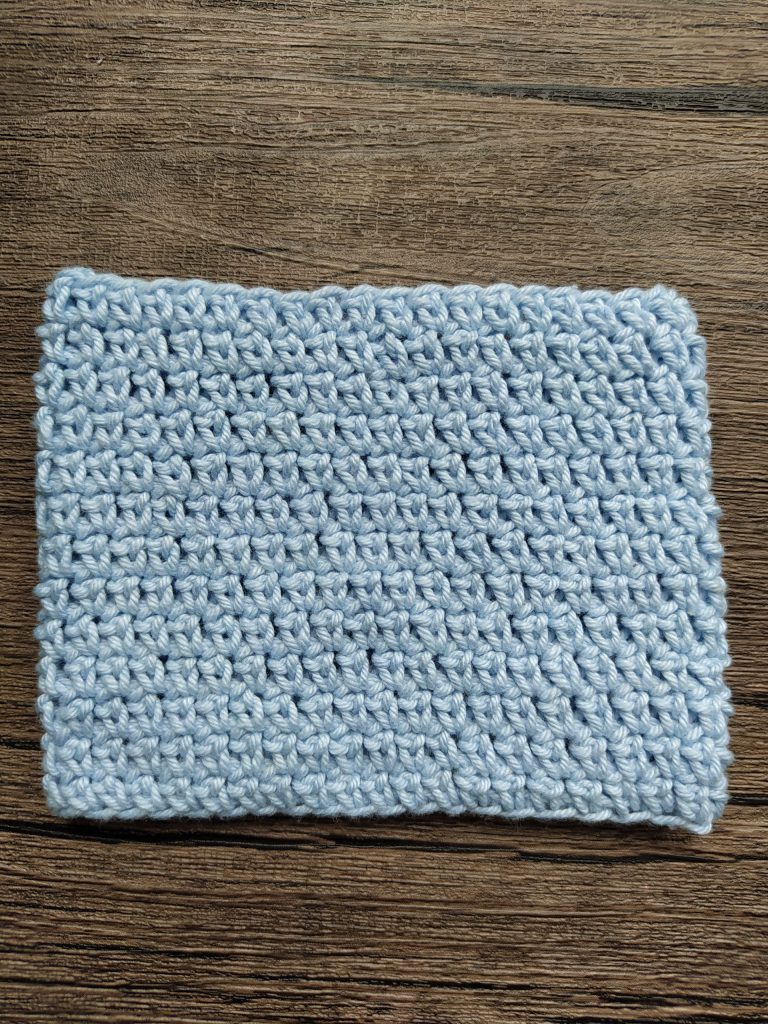
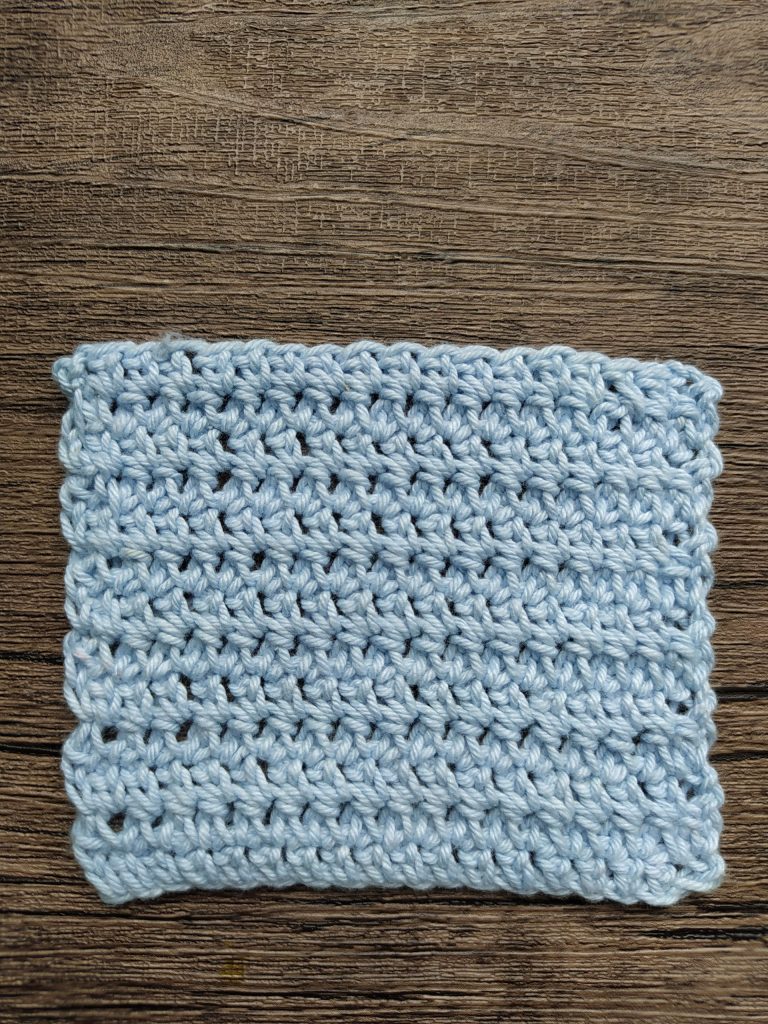
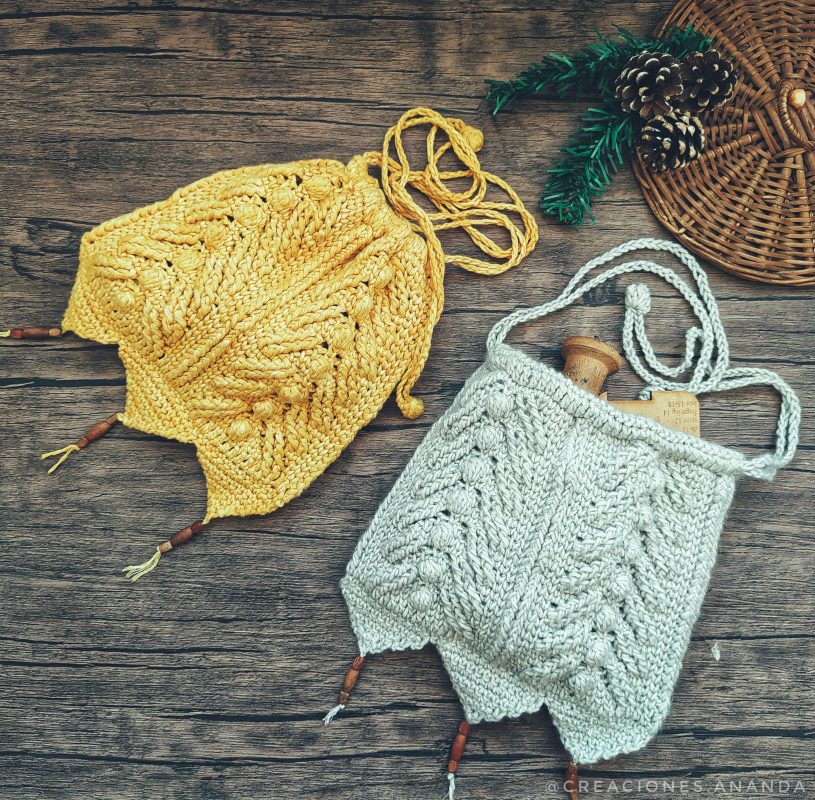
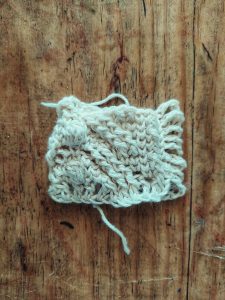
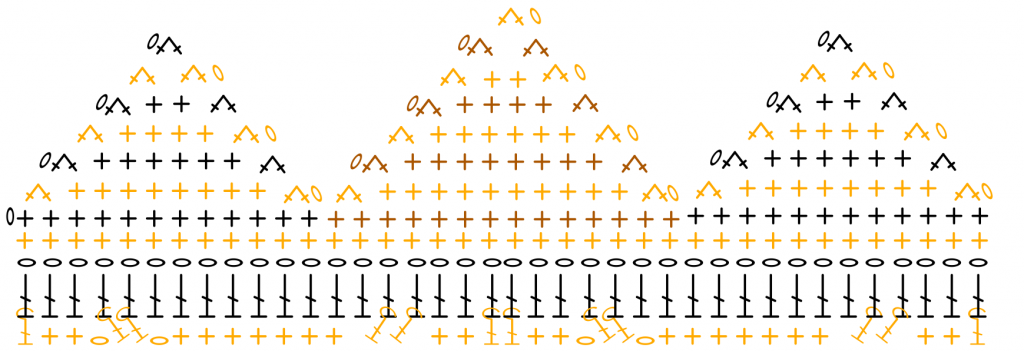
Hace unos días encontré unos de estos cubre taza y pensé: debería publicarlo esta, pero ahora como corresponde! jejejje y me puse manos a la obra. Como se darán cuenta, he modificado un poco el diseño del original y le agregué puntos «gorditos» (creo que se ve aún más adorable). Pero sigue teniendo la misma esencia.
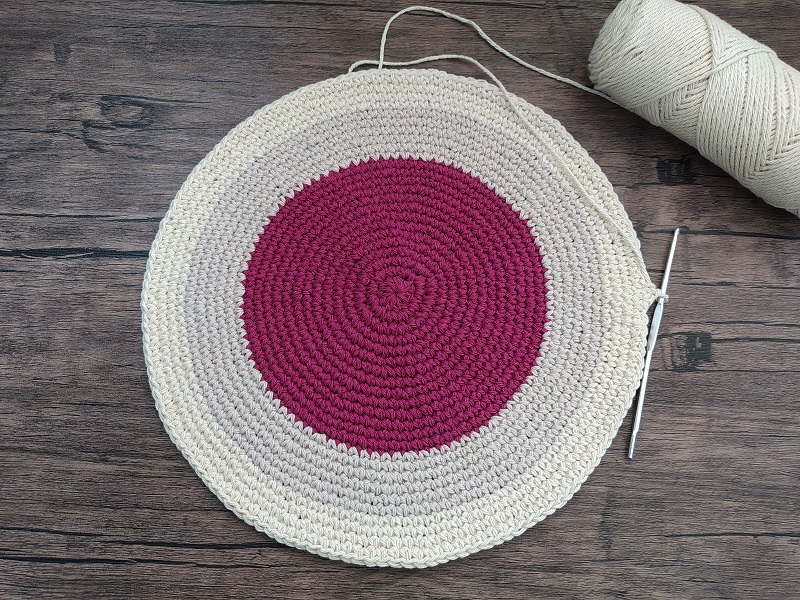
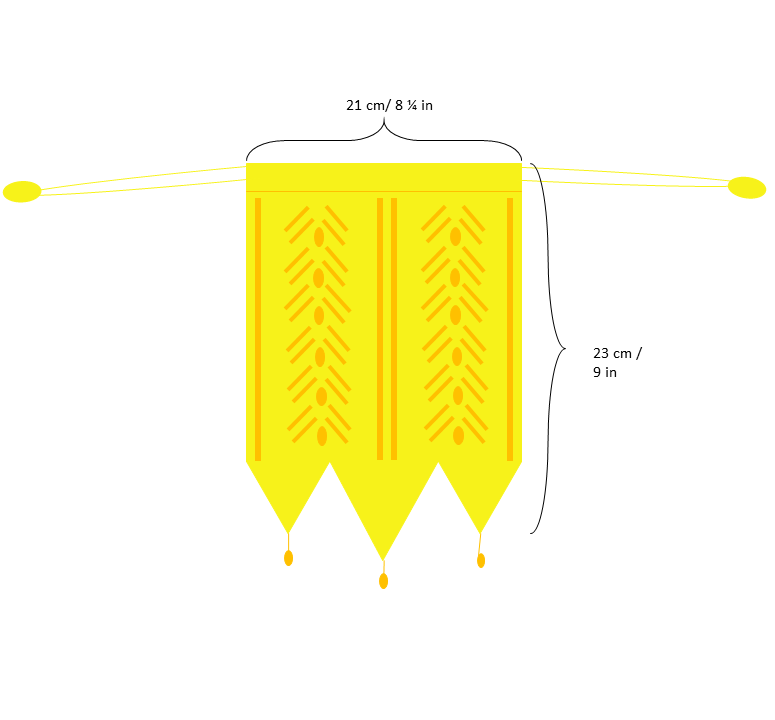
¿Los materiales? Bueno, los materiales los amé, utilicé algodón 100% de Orquídea y la verdad es que la suavidad y la facilidad con la que se teje es inmejorable. Los puntos se definen super bien y además tienen una vasta paleta de colores. Ahora, tu puedes utilizar cualquier fibra de cualquier grosor, sólo debes calcular que los puntos a urdir serán multiplo de 4+11 y con eso buscar una medida acorde a tu propia taza y material.
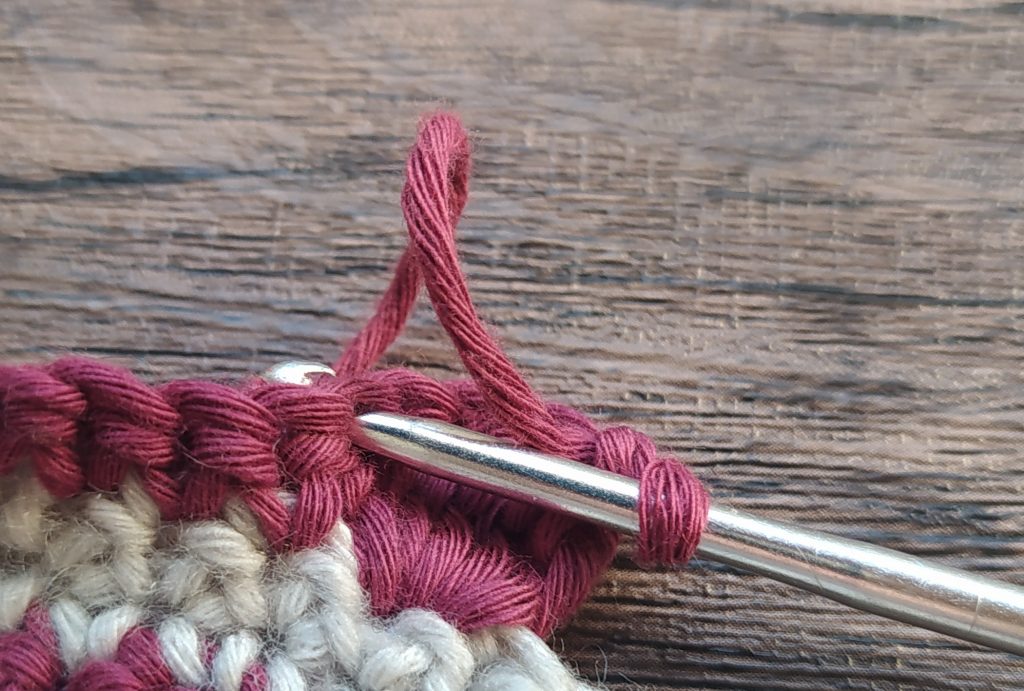
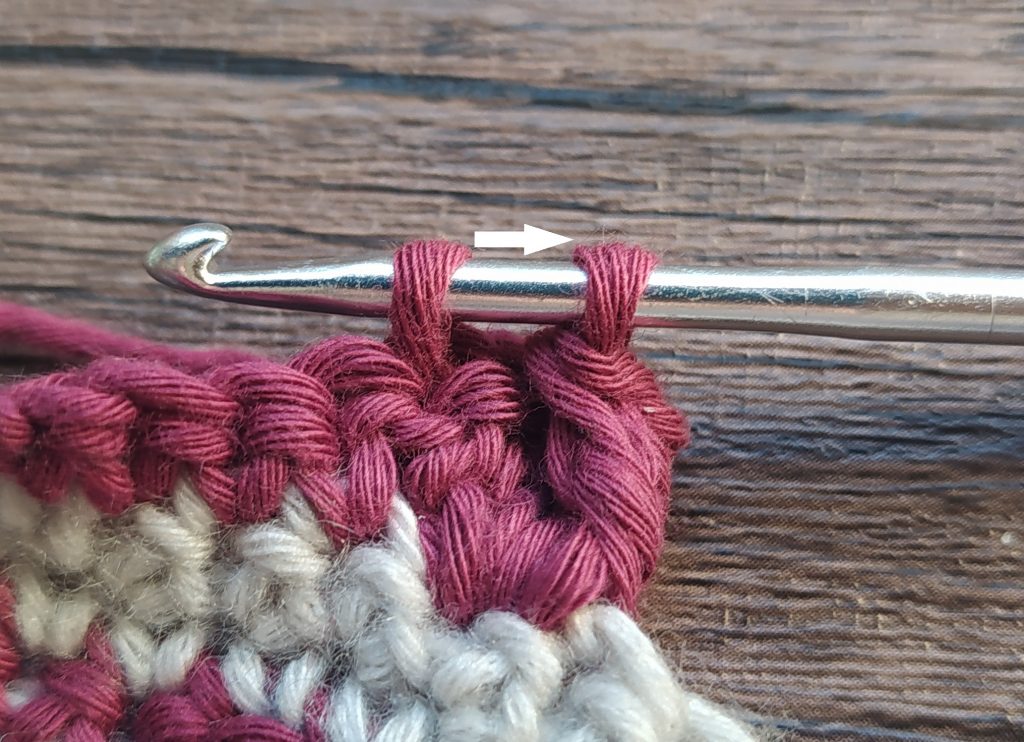
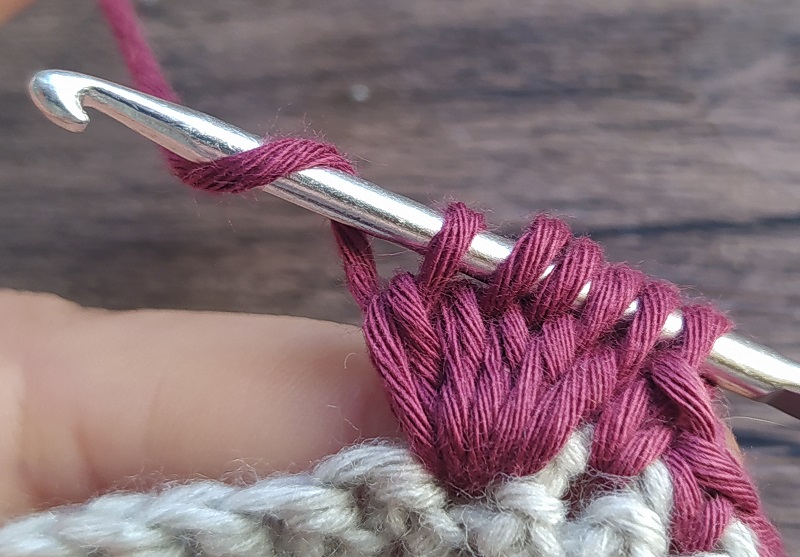
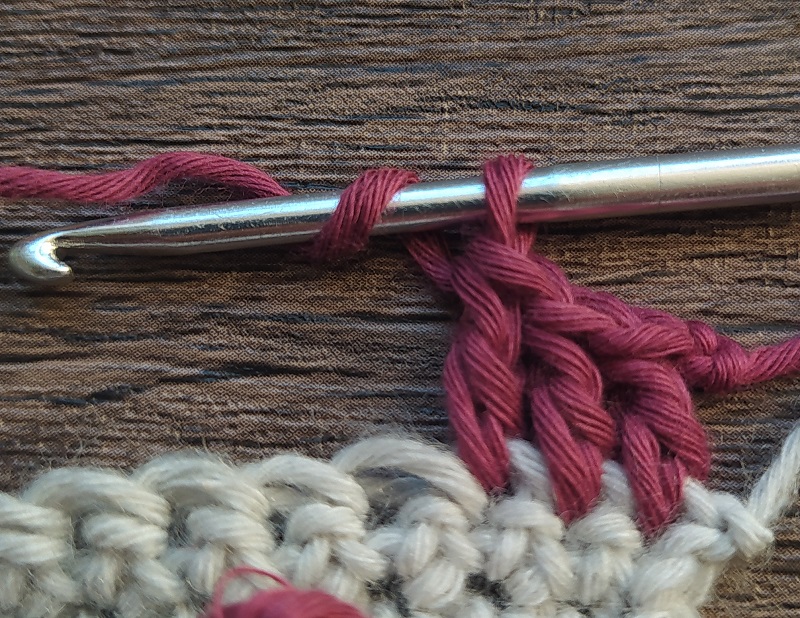
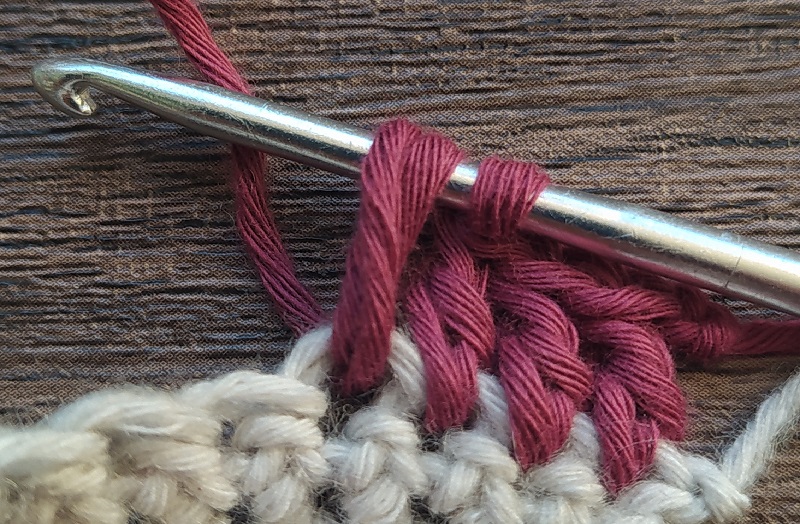
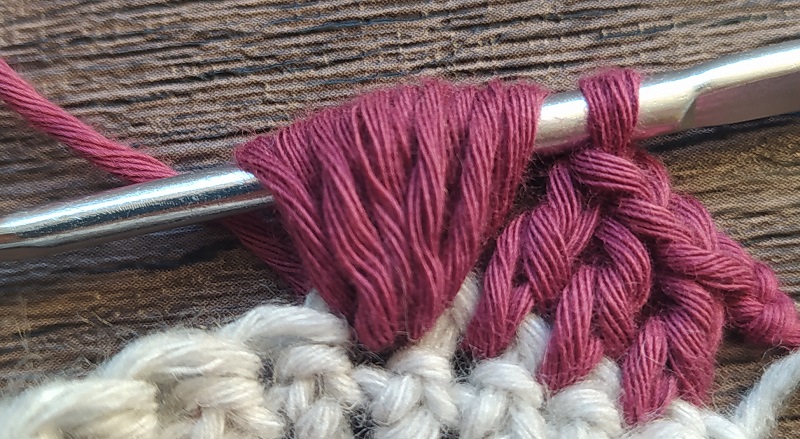
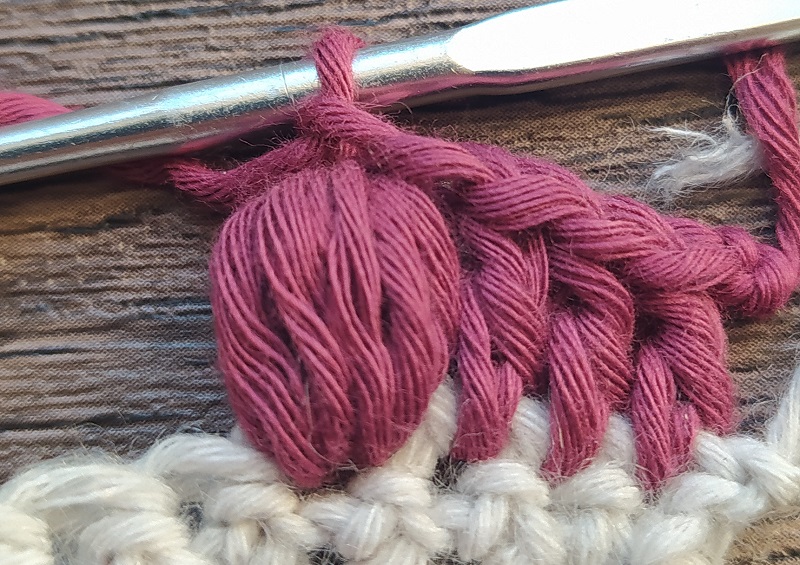
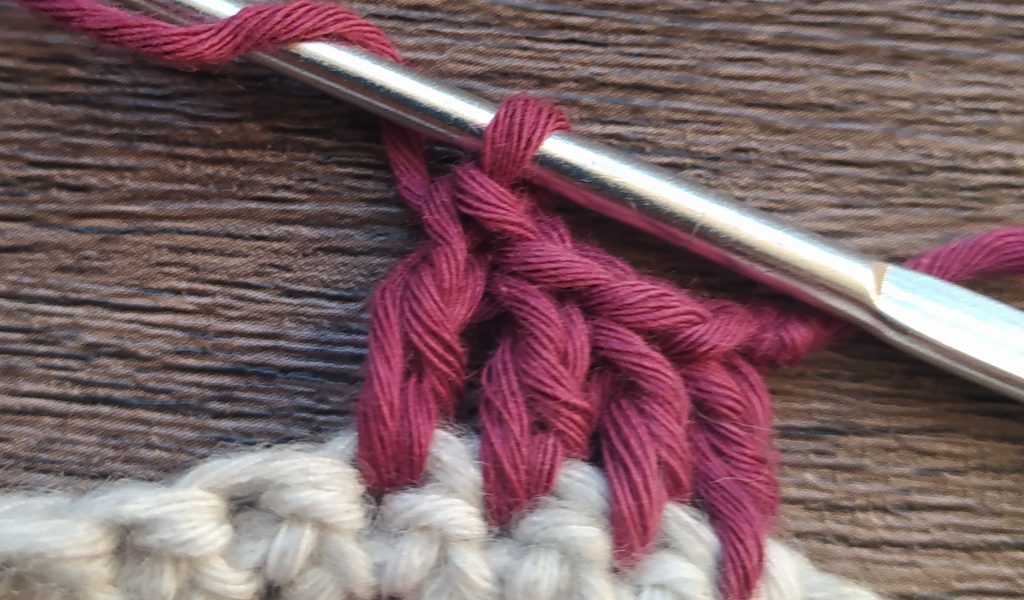
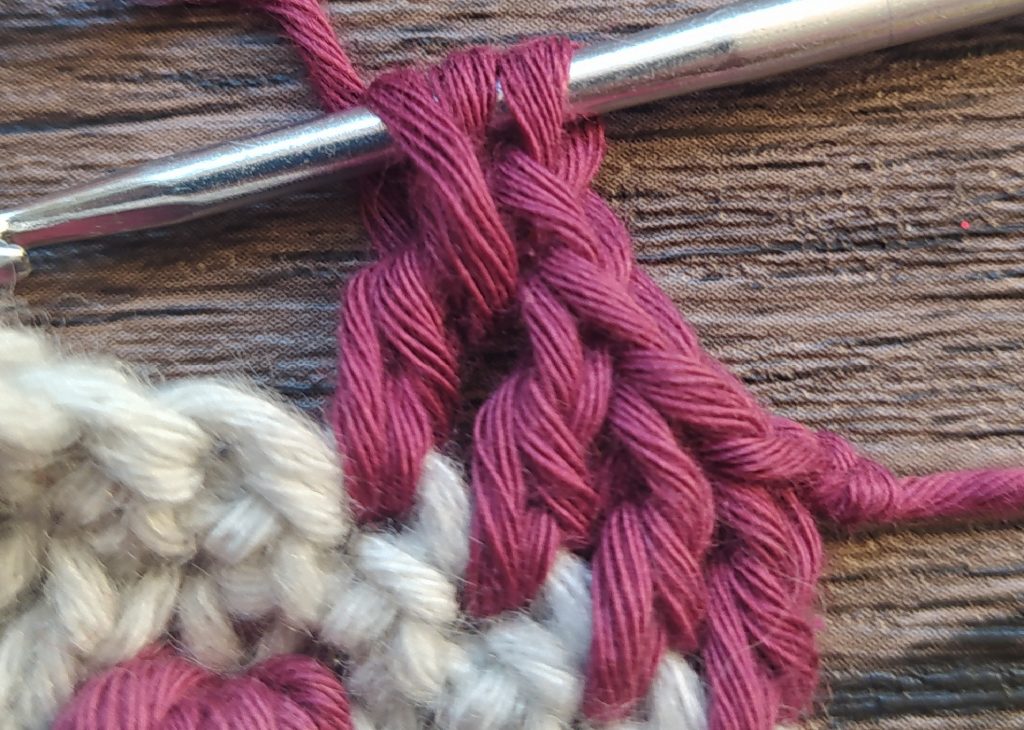
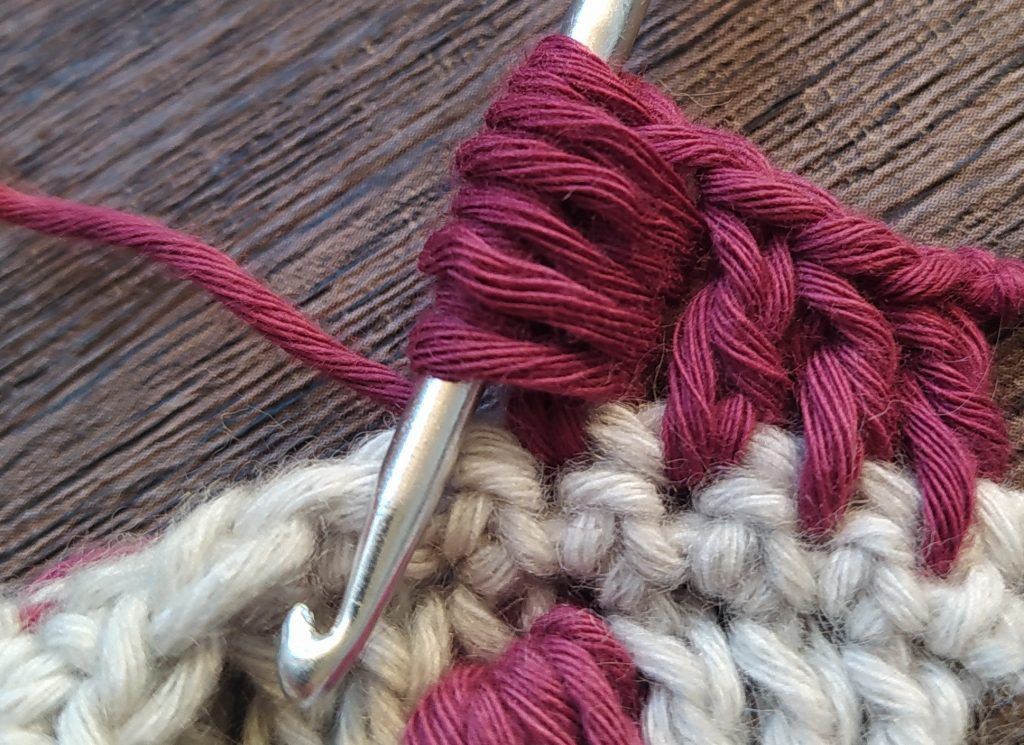
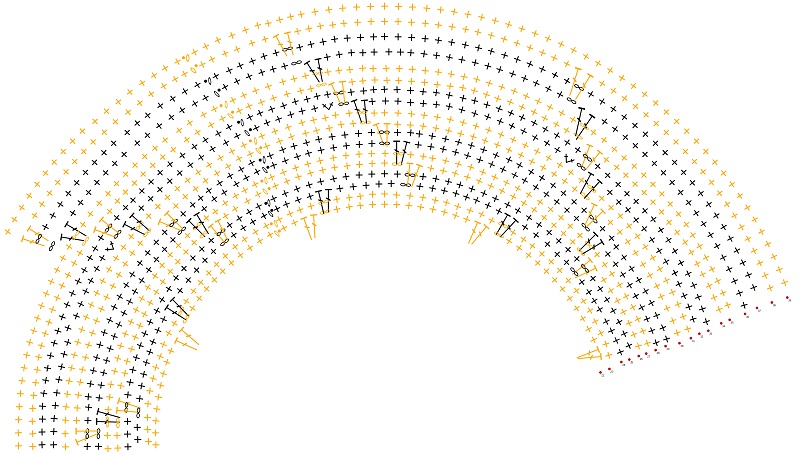
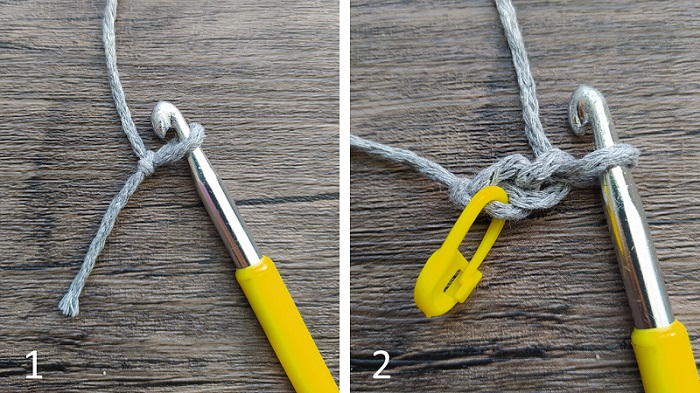
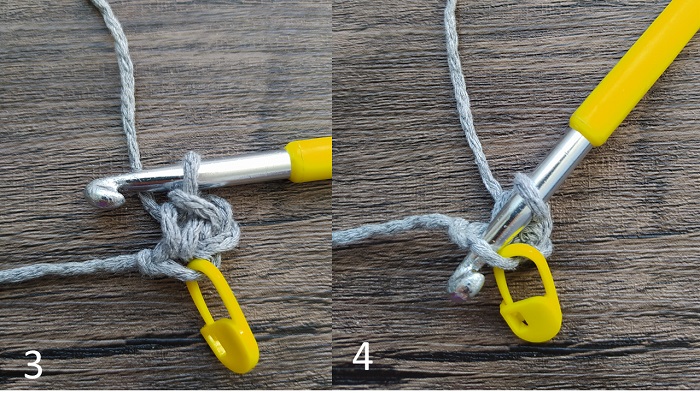
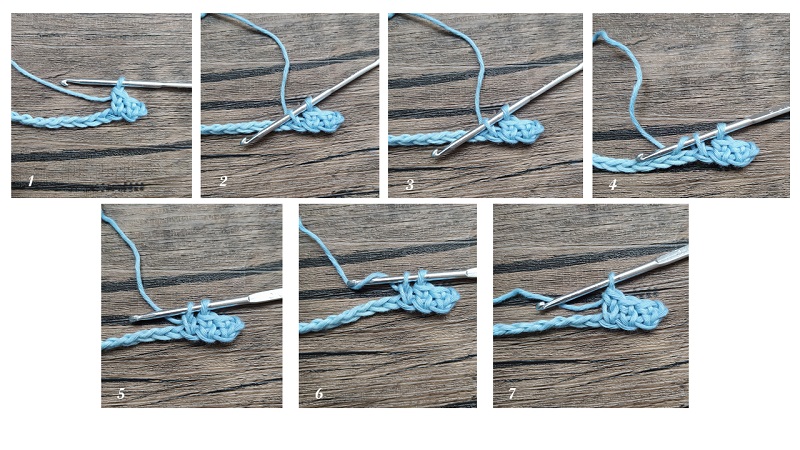
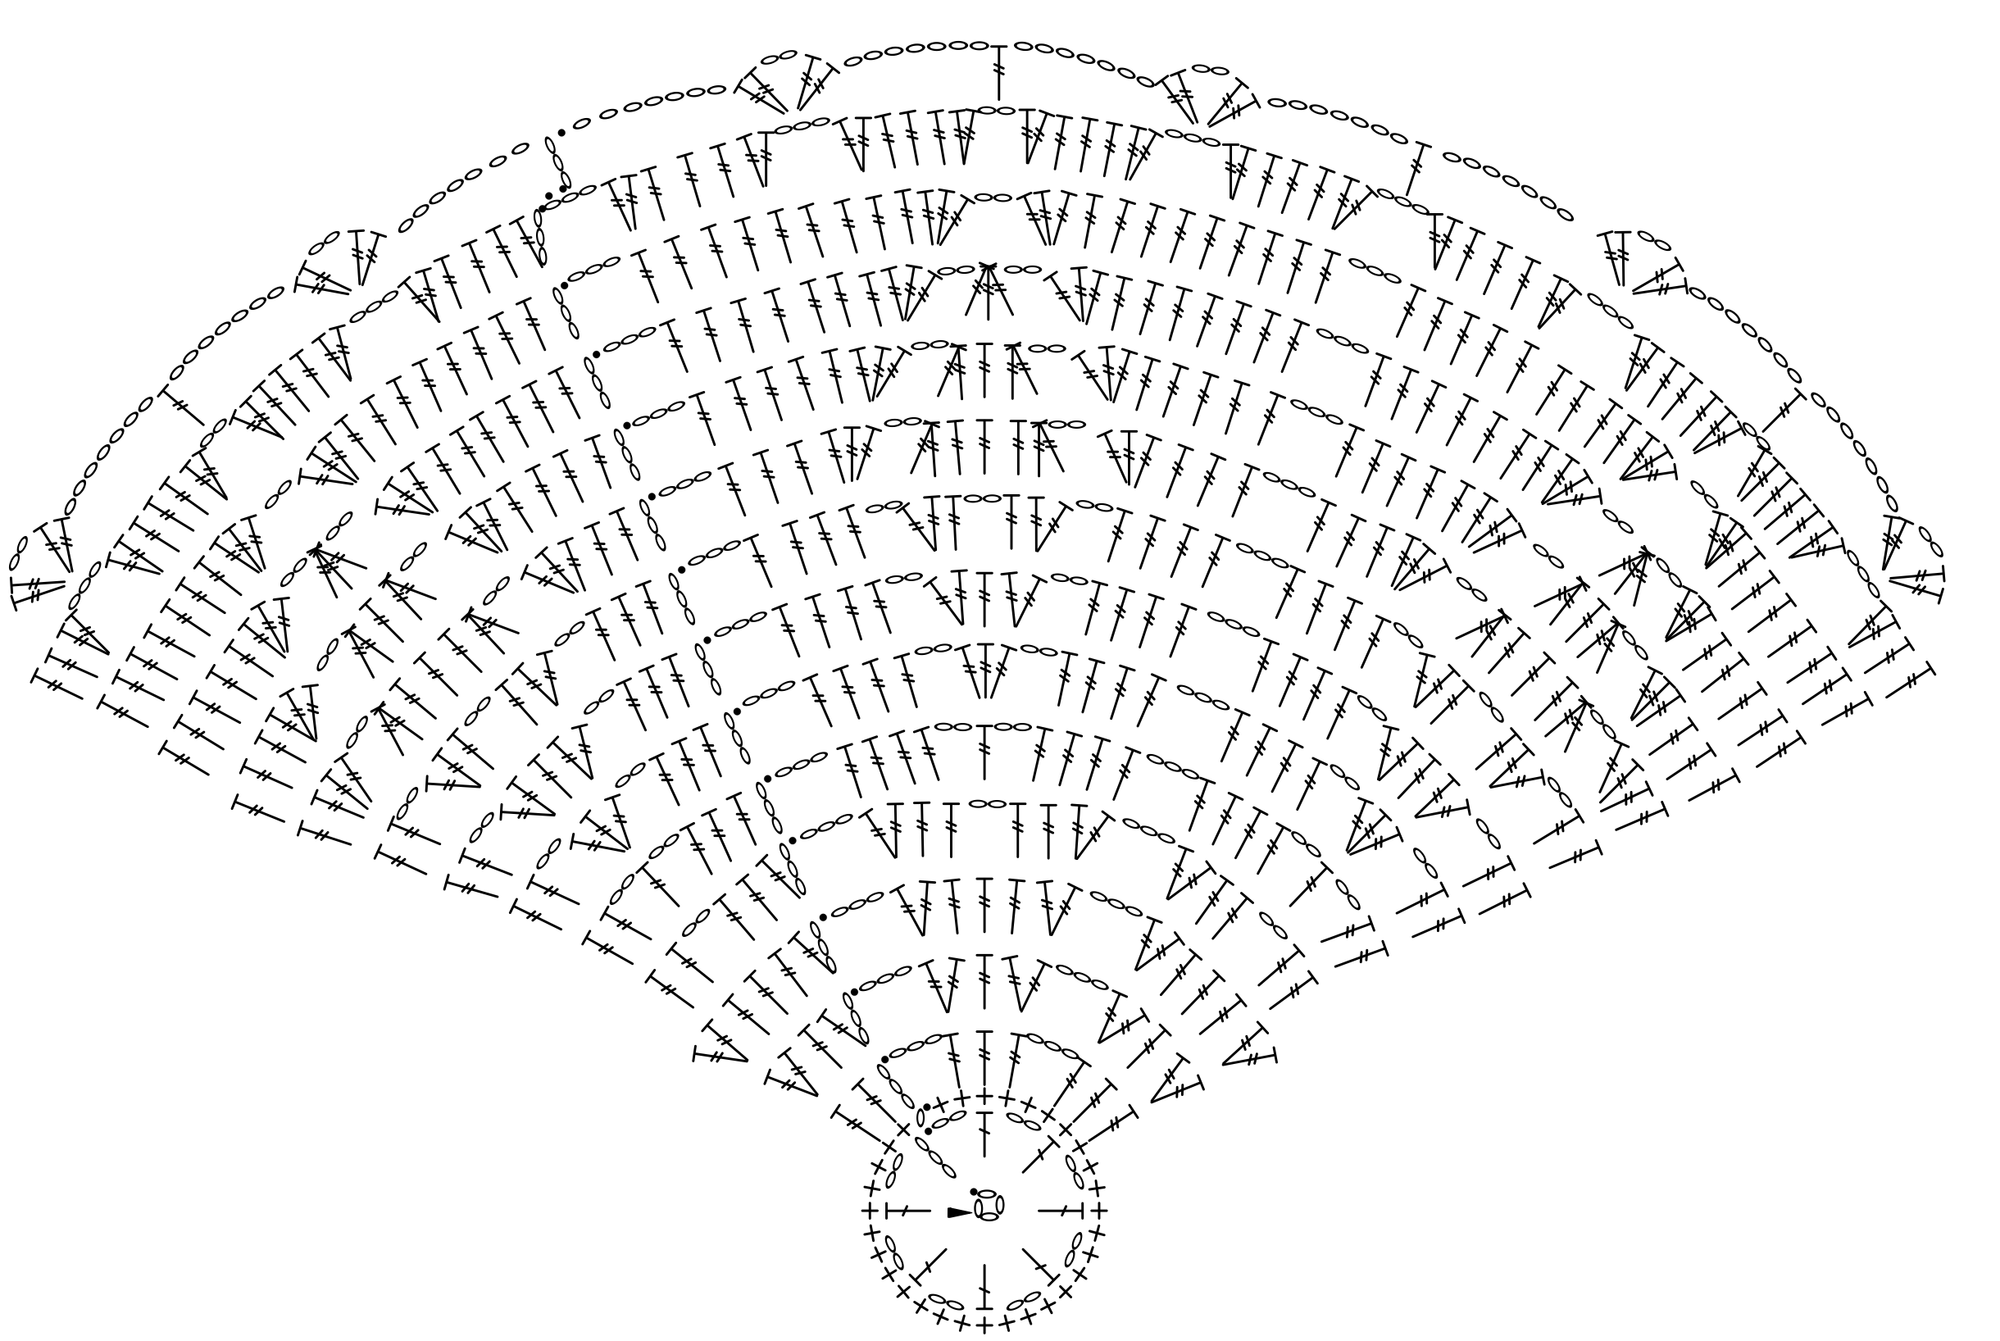
En cuanto al patrón, no quise escribir otra vez ni sacar fotos del proceso, preferí hacerles un videito donde ustedes fueran viendo el punto a punto. Los hago sin hablar porque no me daría el tiempo para hacer un video en español y otro en inglés. Además creo que con la comunicación kinésica podemos desarrollar bastante nuestra comprensión y entendimiento de los procesos <3 . Encontrarás ciertas abreviaturas escritas en el video que te dejaré a continuación, en caso que no sepas de qué se tratan. Siempre puedes bajarle la velocidad al video si crees que va muy rápido.
A few days ago I found some of these cup covers and I thought: I should publish this one, but now properly! hehehehe and I got to work. As you can see, I’ve modified a bit the design of the original and added «chubby» stitches (I think it looks even more adorable). But it still has the same essence.
The materials? Well, I loved the materials, I used 100% cotton. Now, you can use any fibre of any weight, you just have to calculate that the stitches to be worked will be multiplo of 4+11 and with that look for a size according to your own cup and material.
As for the pattern, I didn’t want to write again or take pictures of the process, I preferred to make a little video where you could see the stitch by stitch. I make them without speaking because I wouldn’t have the time to make a video in Spanish and another one in English. Besides, I believe that with kinesic communication we can develop our understanding and comprehension of the processes <3 . You will find some abbreviations written in the video, in case you don’t know what they are I’m going to leave them below. You can always slow down the video if you think it’s going too fast.
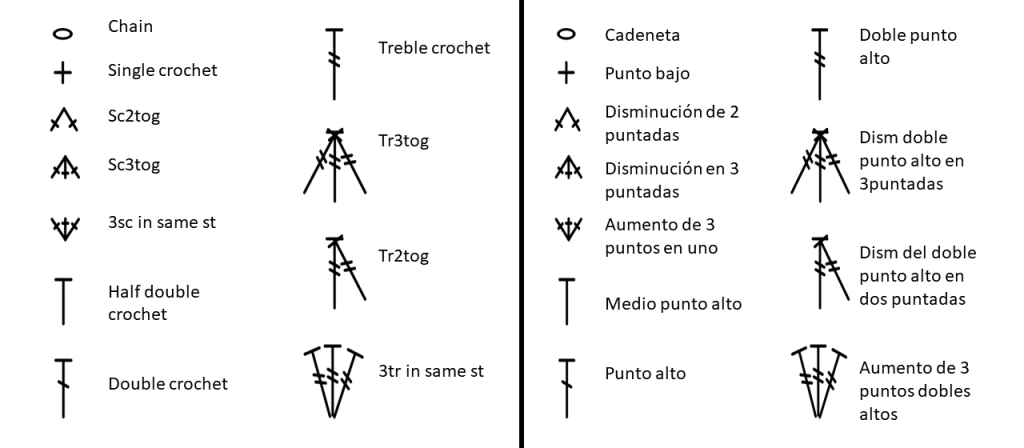
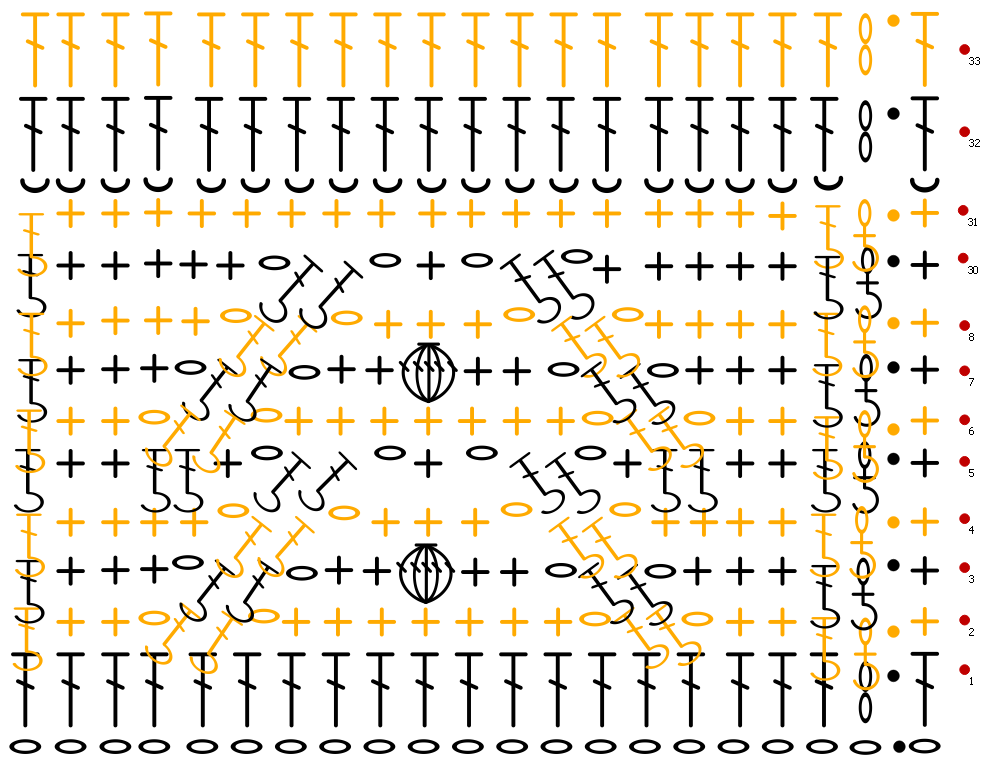
Abreviaturas / Abbreviations
F1: Fila 1
LD: Lado derecho del tejido
LR: Lado revés del tejido
C1: Color 1
Nc: nudo corredizo
Pb: Punto bajo
dpard: doble punto alto en relieve por delante
sht: sólo por la hebra trasera
C1: Color 1
ch: chain
sc: single crochet
blo: back loop only
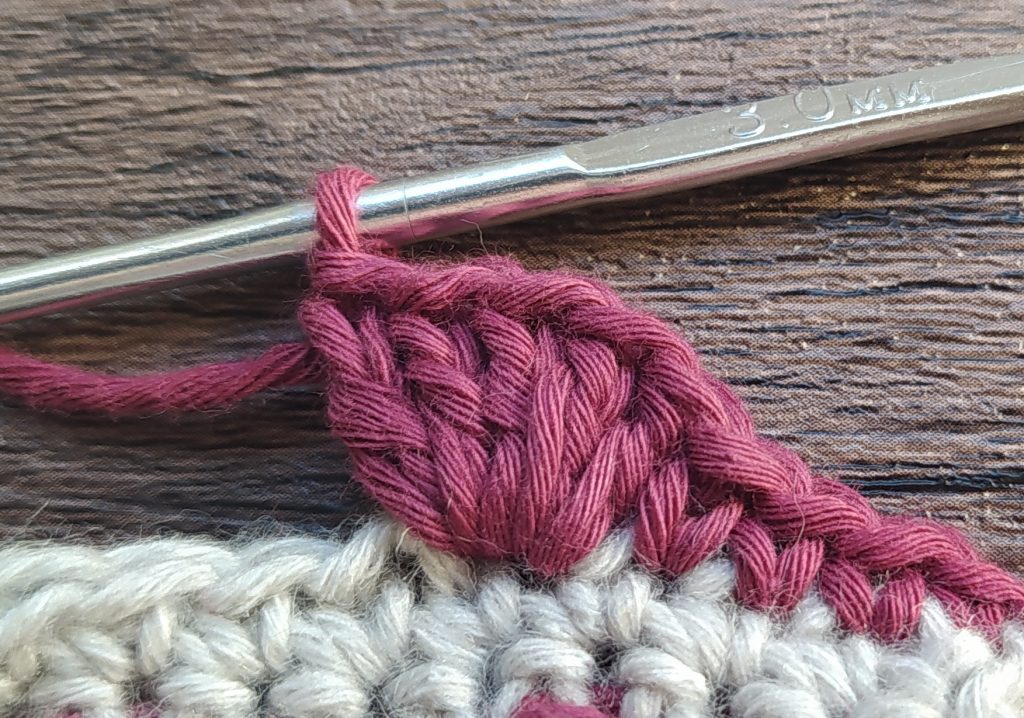
PC: popcorn stitch
FPtr: Front post treble crochet
FPtr2tog: Front post treble crochet 2 together
skp: skip 1 sts
sl knot: slip knot
Muchas gracias por venir a leer, cuéntame qué te pareción el tutorial y si ya habías tejido el primero que hice hace unos años 🙂
Thank you very much for coming to read, let me know what you thought of the tutorial and if you have already crocheted the first one I made a few years ago 🙂
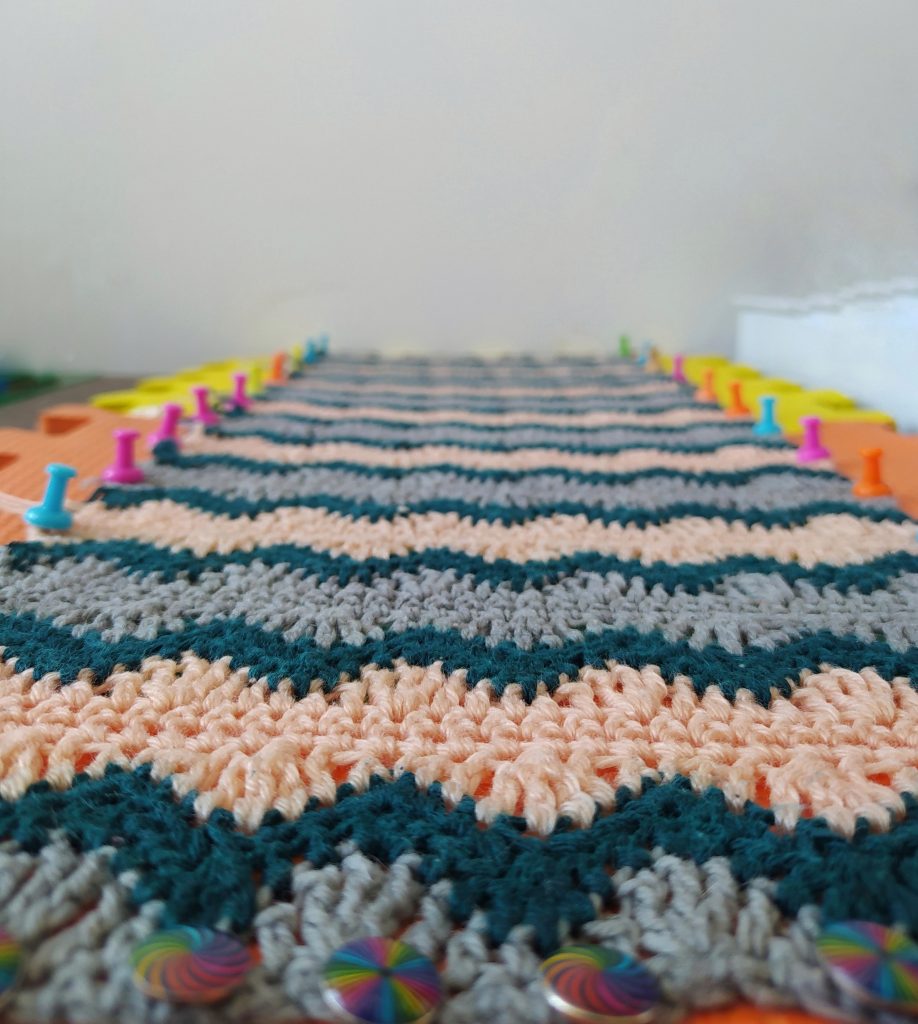
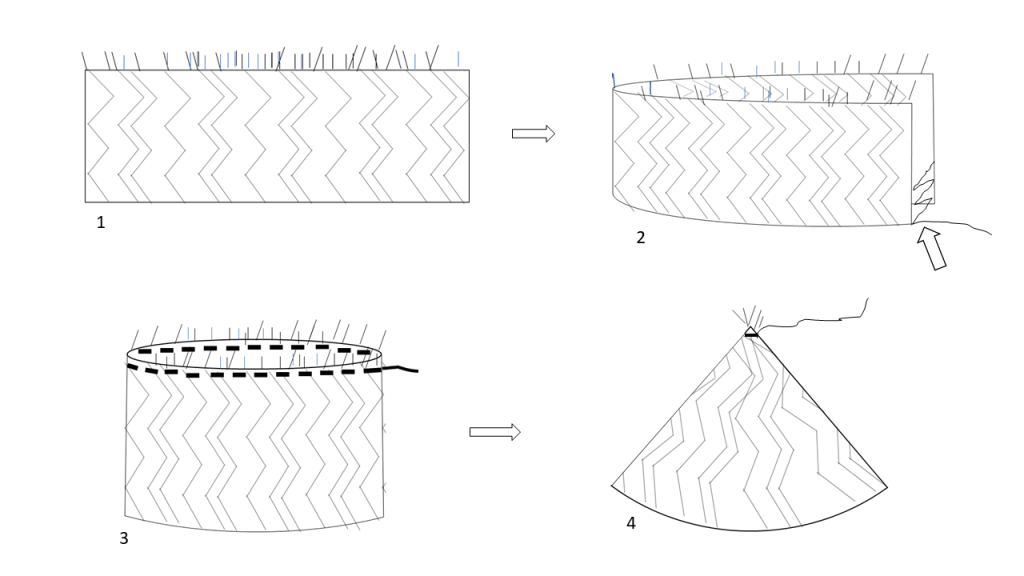
 Claro que también podrías encontrar este tipo de mosaico en un tejido plano, pero tendrías que cortas la hebra cada vez que termines un fila.