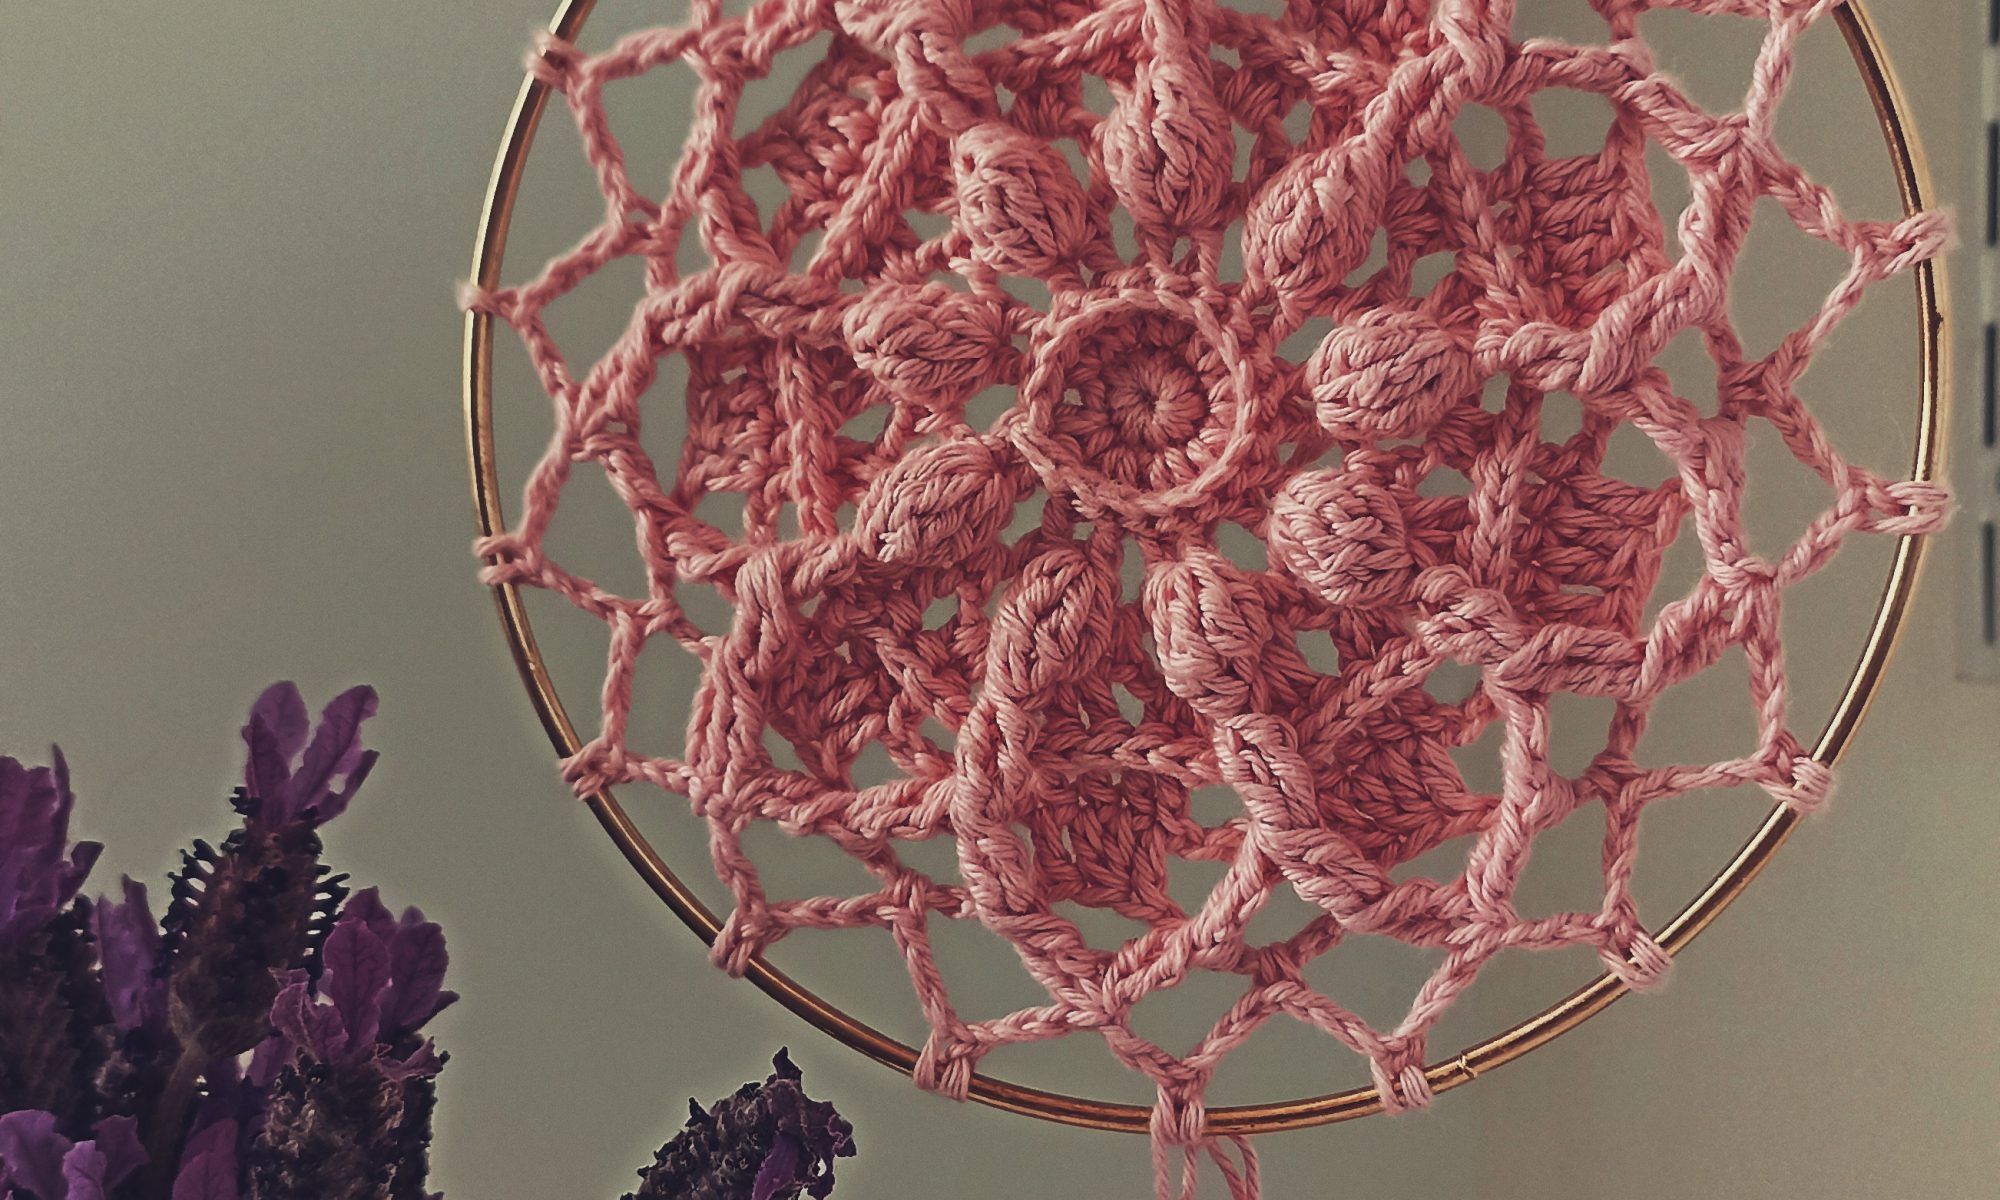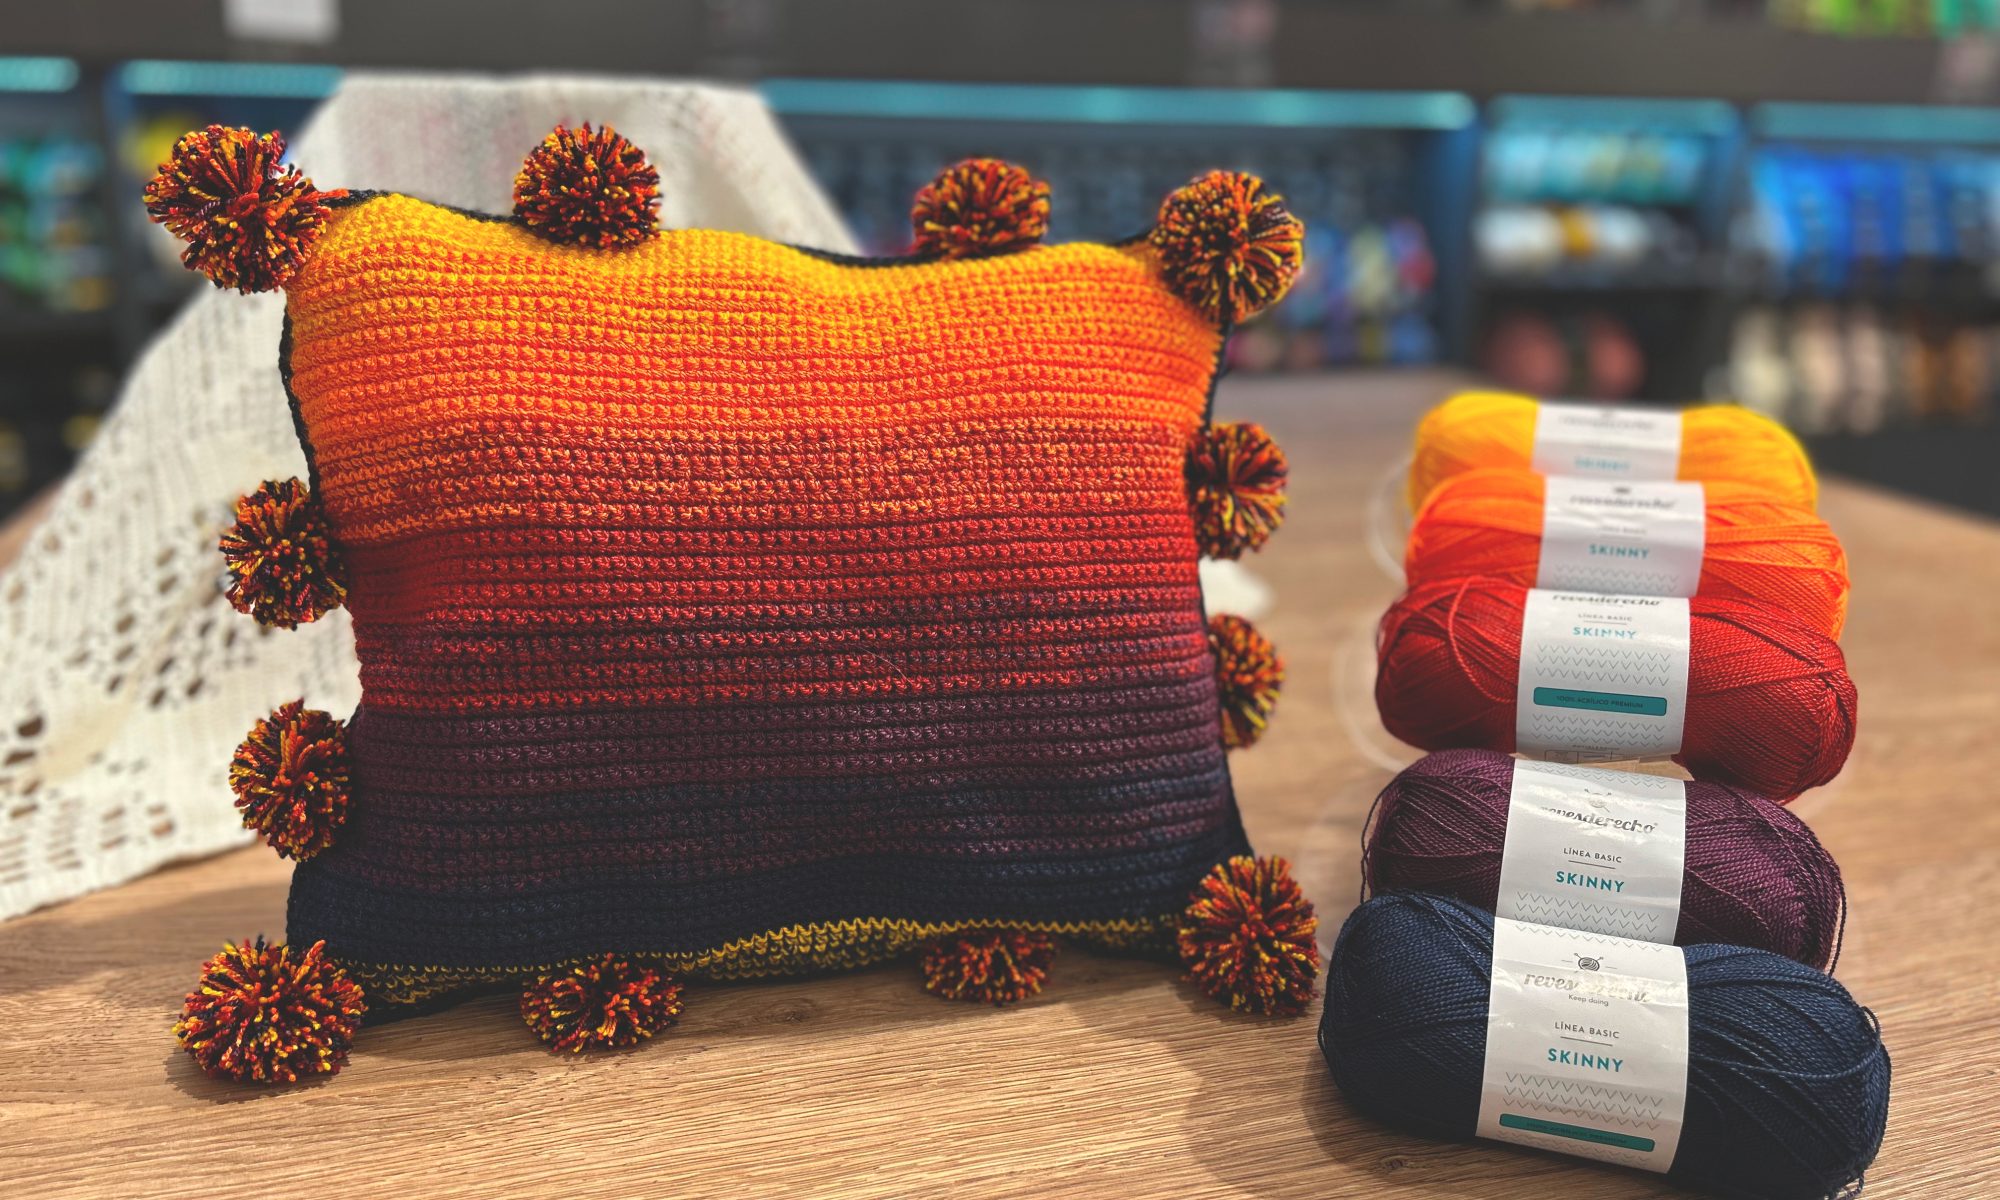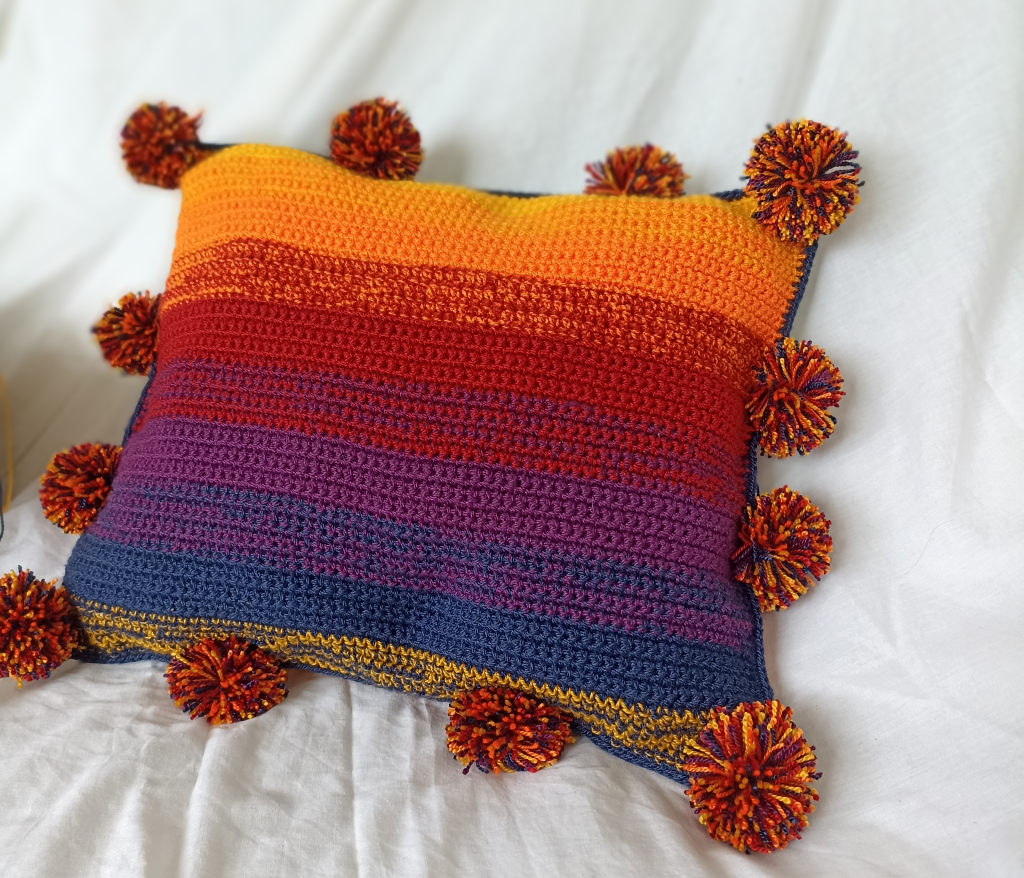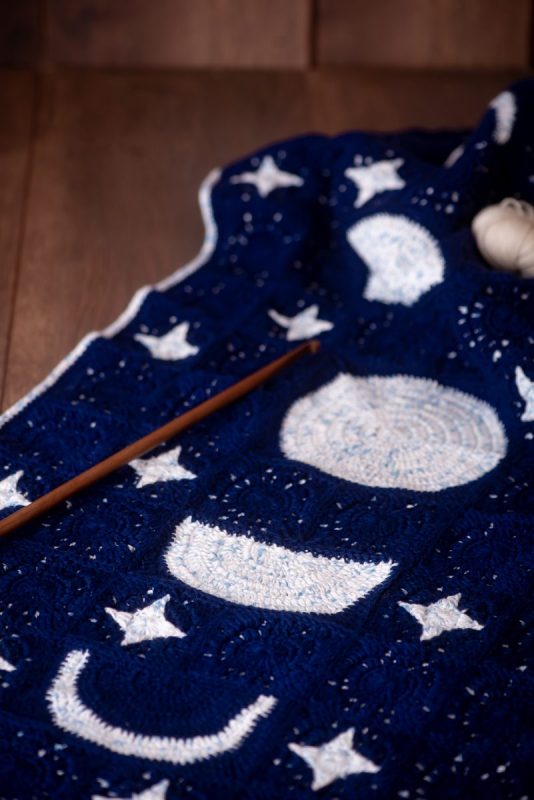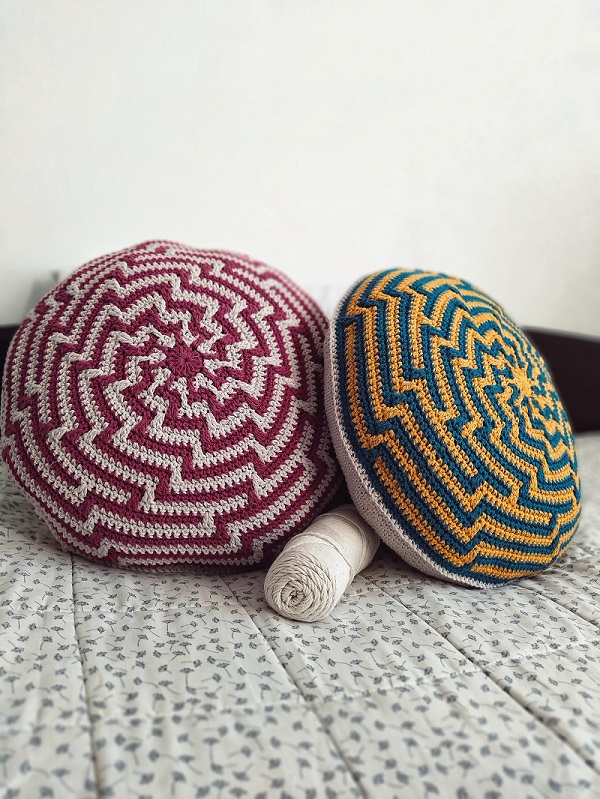
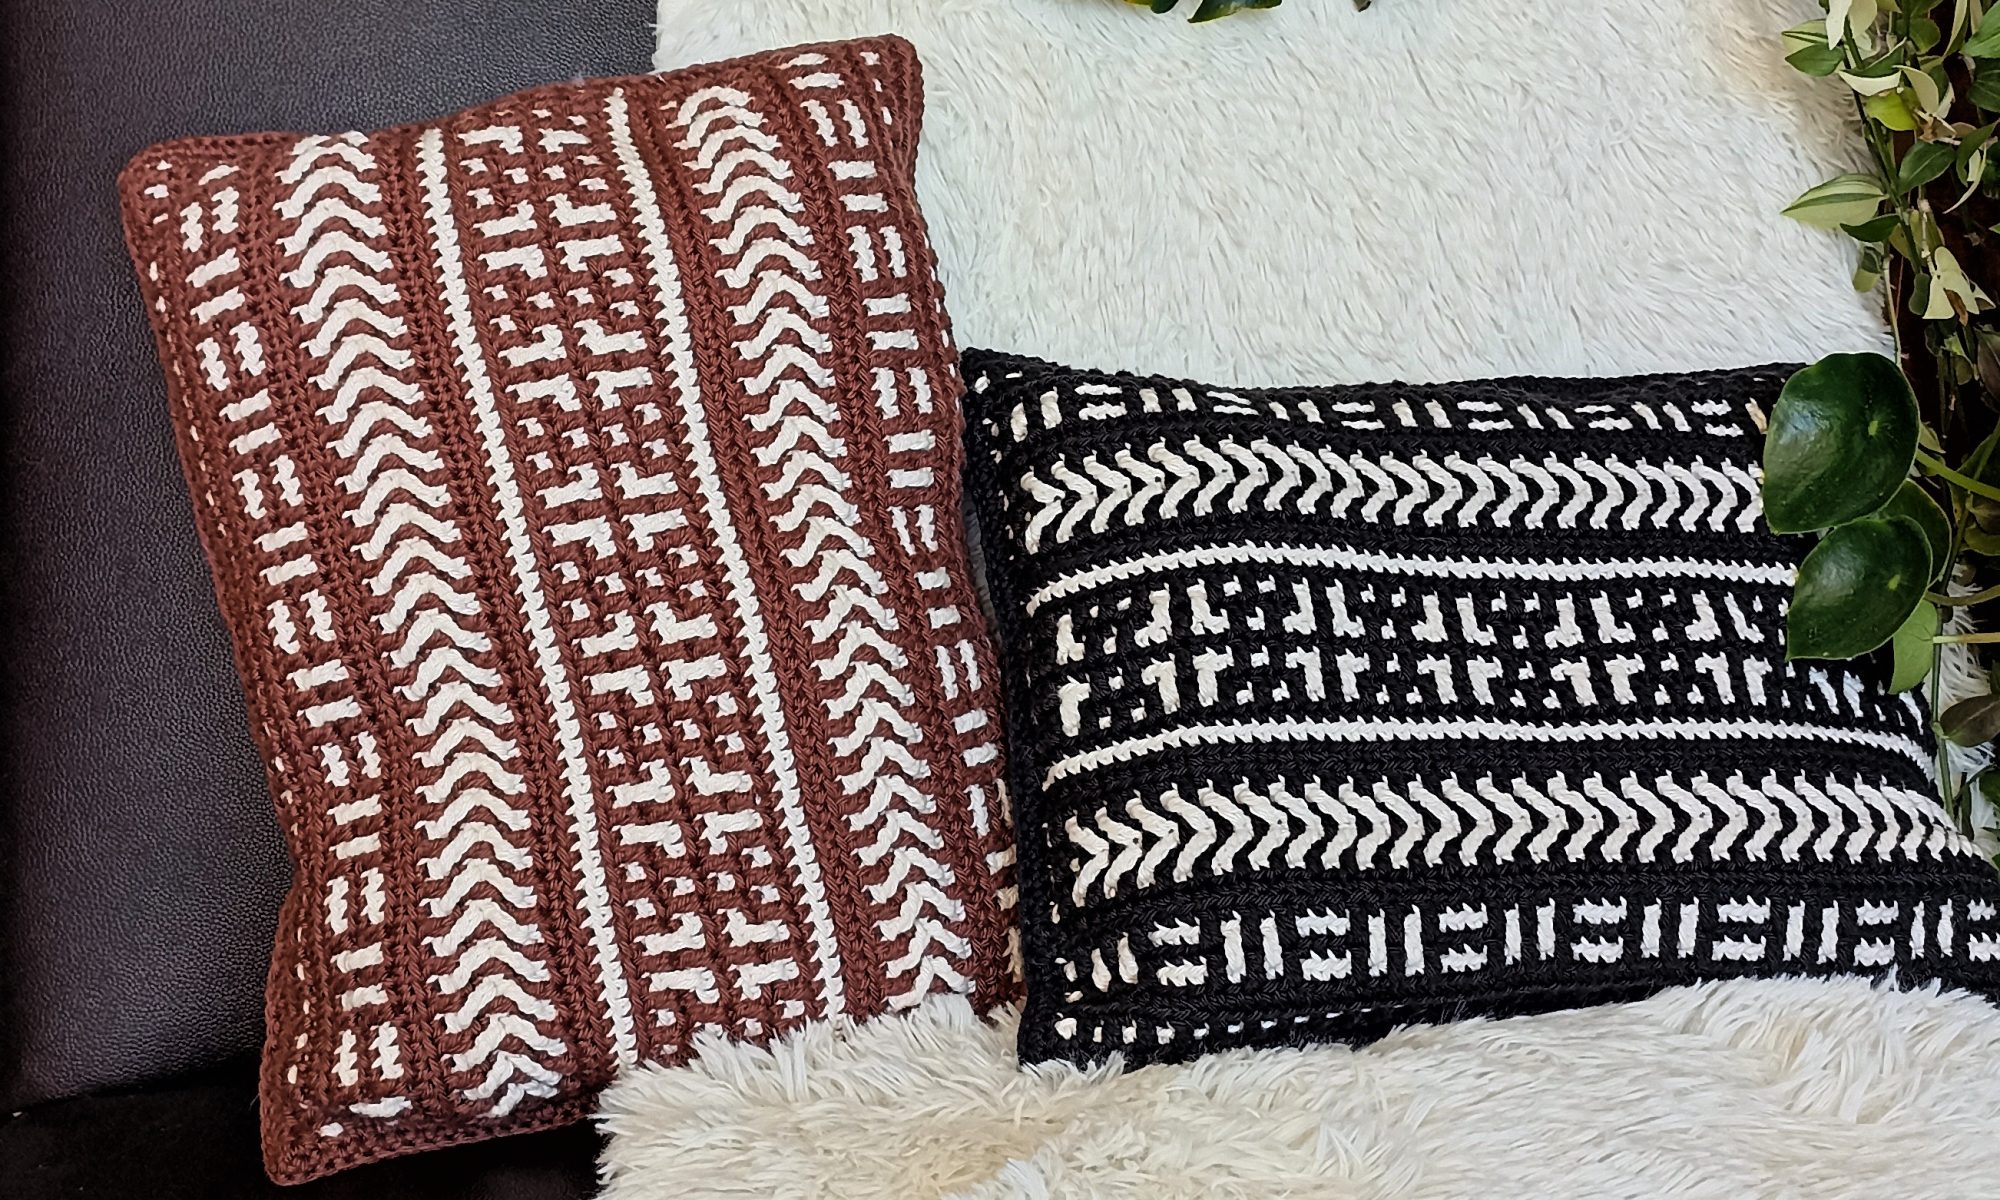
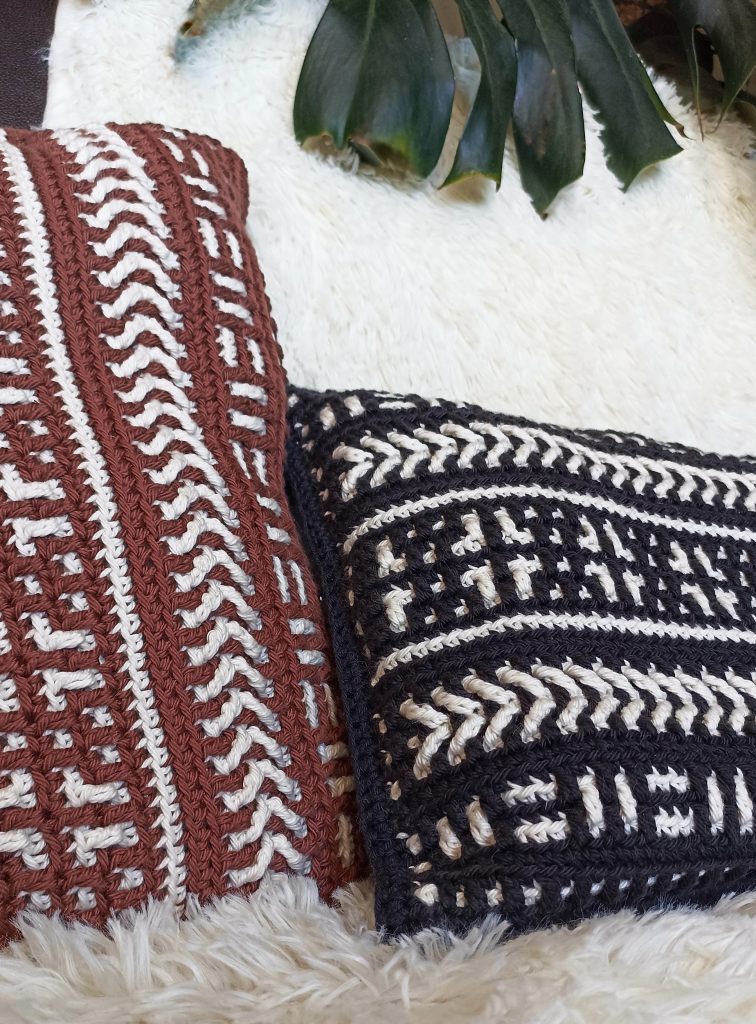
Hola queridxs Anandinis! Hace un tiempo que nos les traía un diseño gratuito, así que hoy les traigo AUTÓCTONO CUSHION (ya saben que amo el mosaico y los cojines). Es un diseño rápido, fácil y muy entretenido de tejer!
Hello dear Anandinis! It’s been a while since I brought you a free design, so today I bring you AUTÓCTONO CUSHION (you know I love mosaic and cushions). It’s a quick, easy, and very entertaining design to crochet!
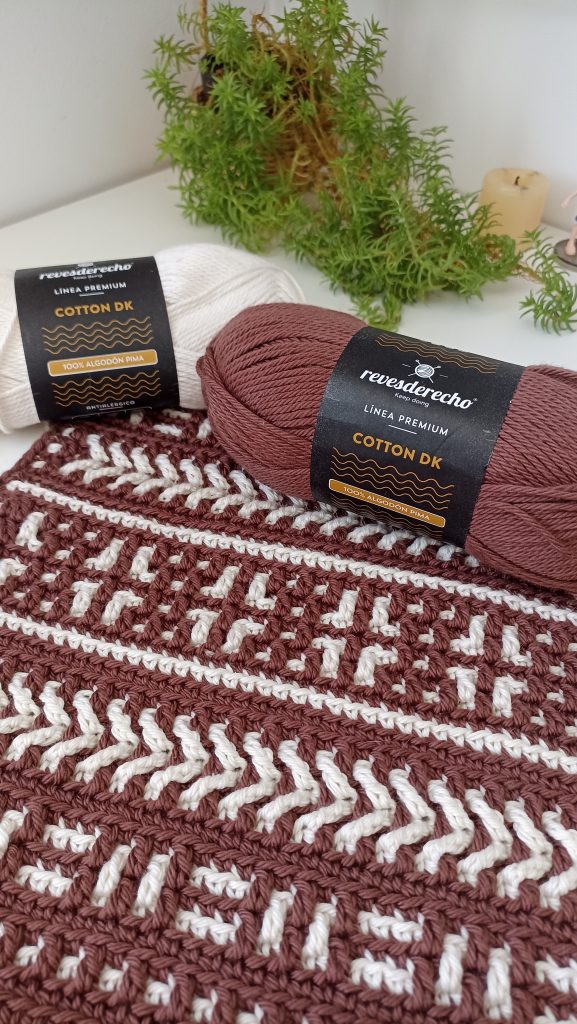
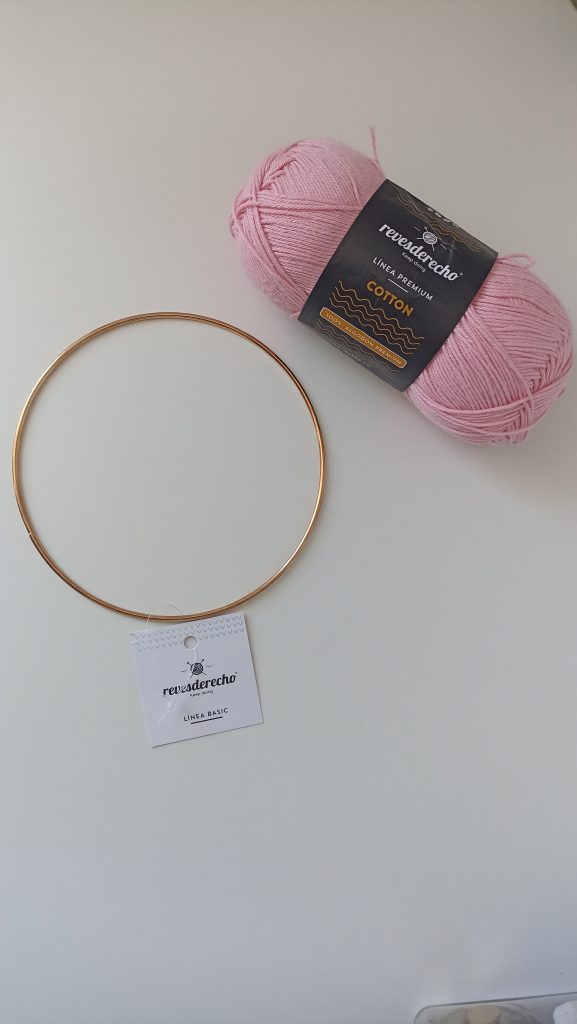
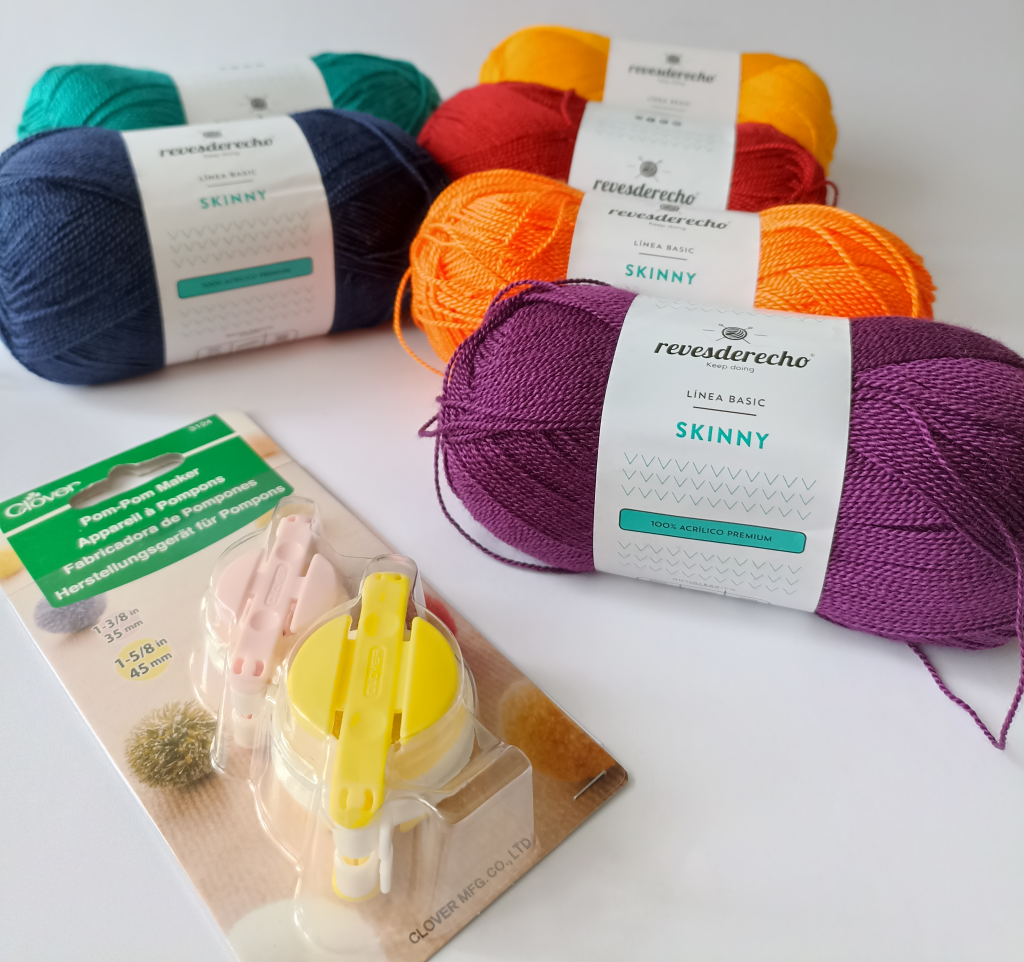
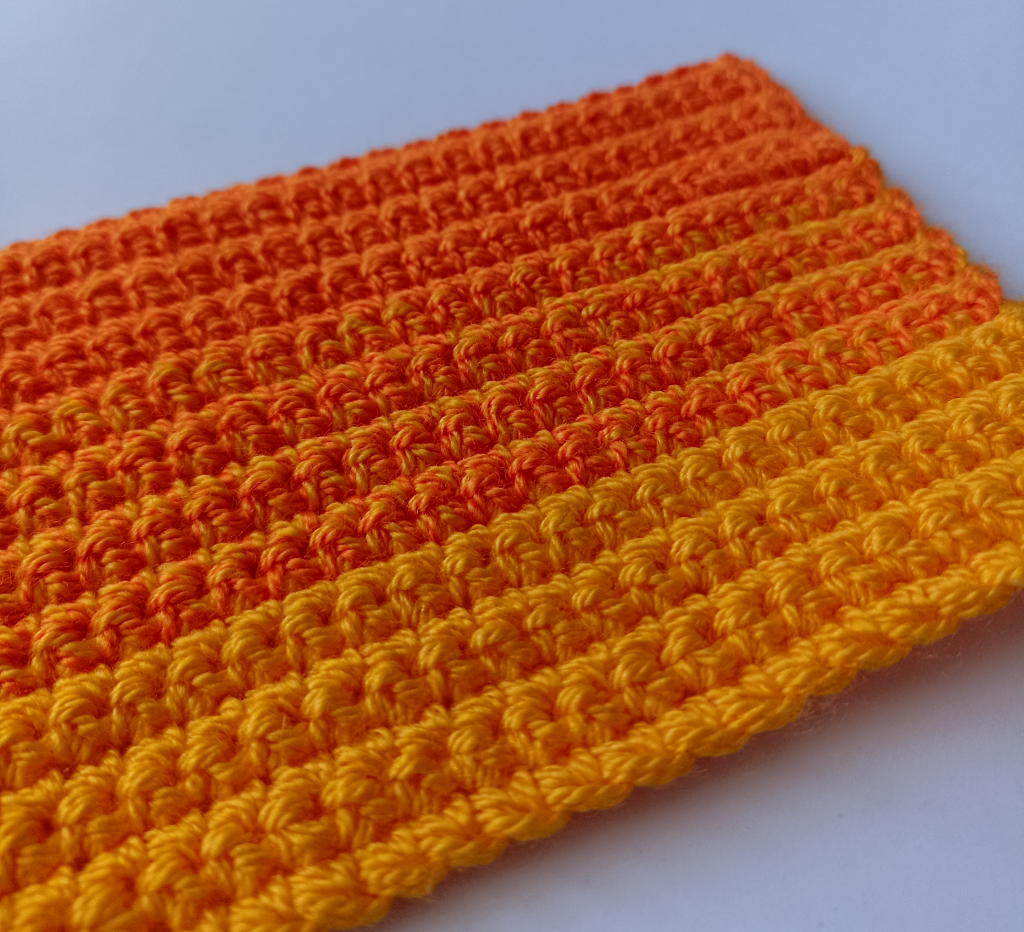
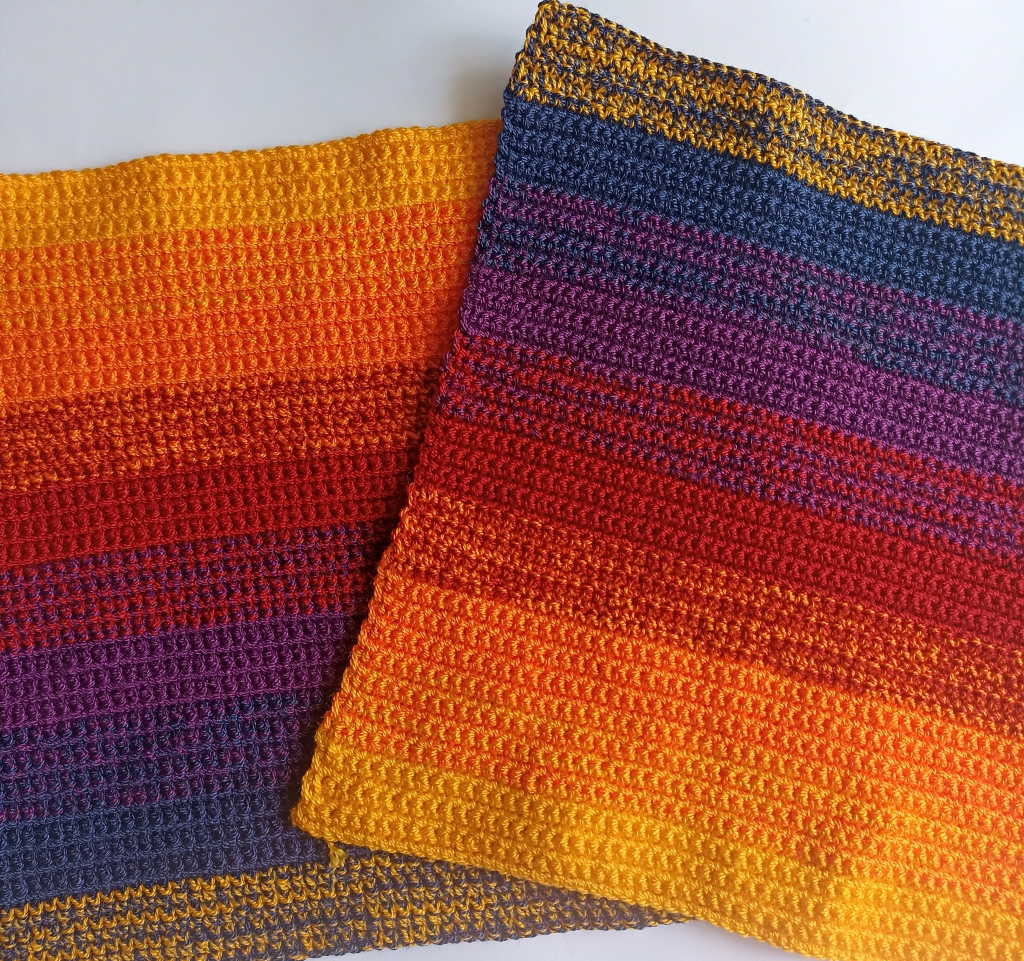
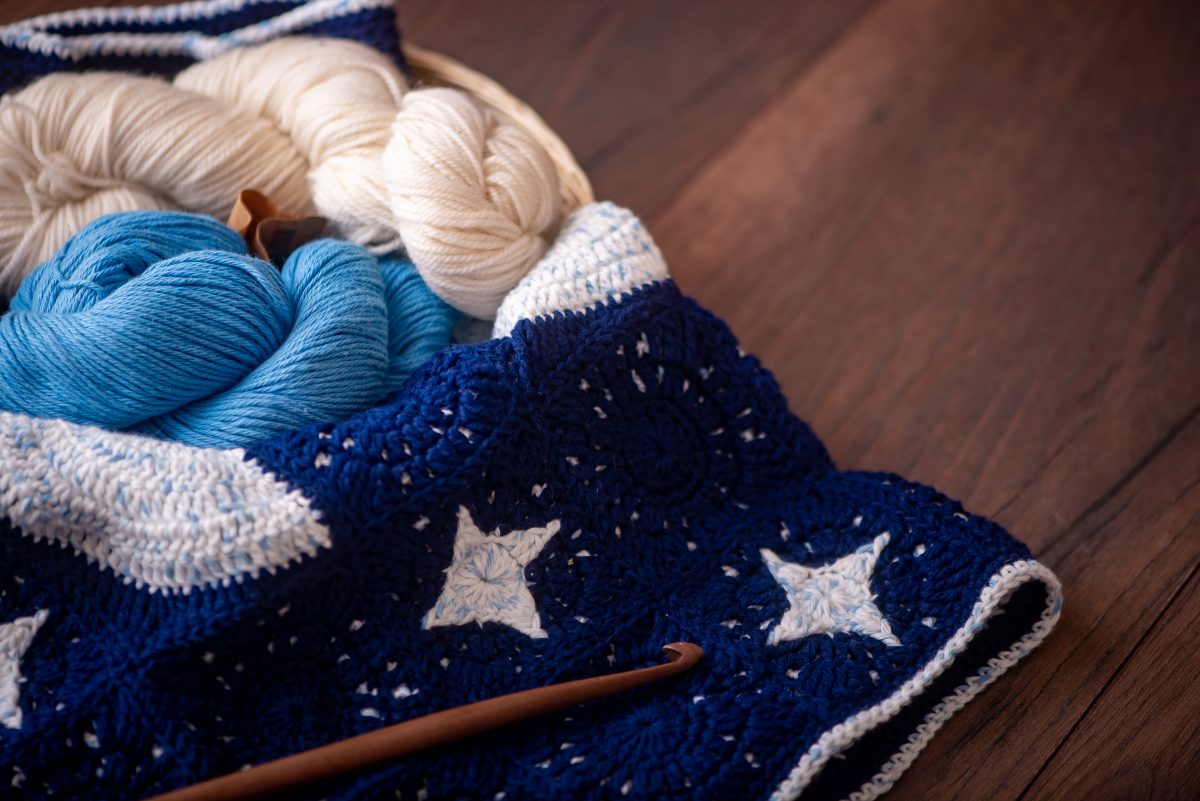
Esta vez usé los maravillosos Algodones premium grosor DK de revesderecho, y no les mentiré, son M A R A V I L L O S O S, con una suavidad inmejorable. Asi que si pueden hacer el cojín con estos materiales, no se arrepentirán. Para la versión 1: utilicé 1 ovillo de 100g de café moro (008) y 1 ovillo de color crudo (049).
Para la versión 2: 1 ovillo de negro (002) y un ovillo de crudo (049).
MATERIALS
Cotton yarn- DK weight
Colour 1: 100g/230m
Colour 2: 100G/230m
MATERIALES
Hilo de algodón- Grosor DK
Color 1: 100g/230m
Color 2: 100g/230m
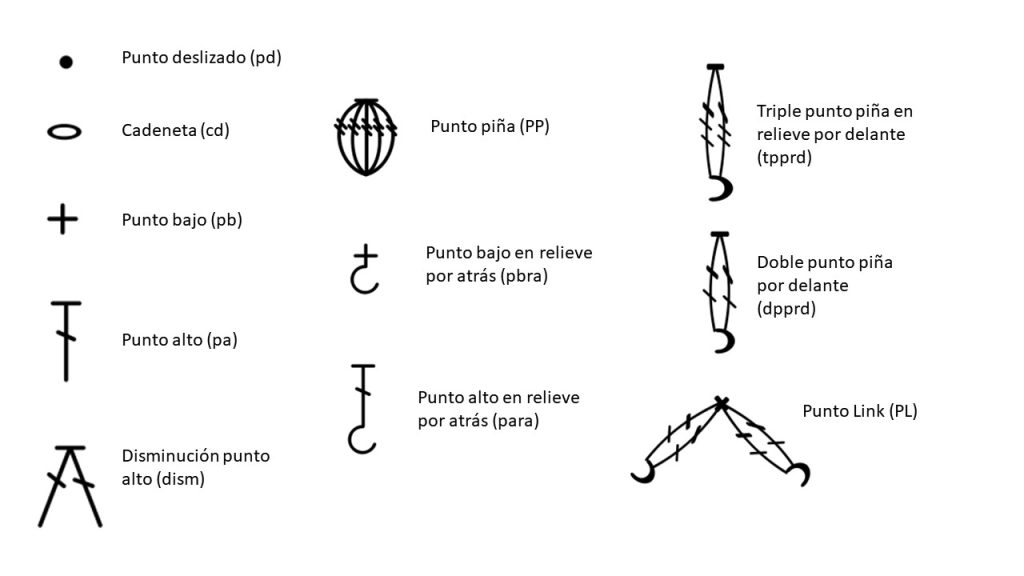
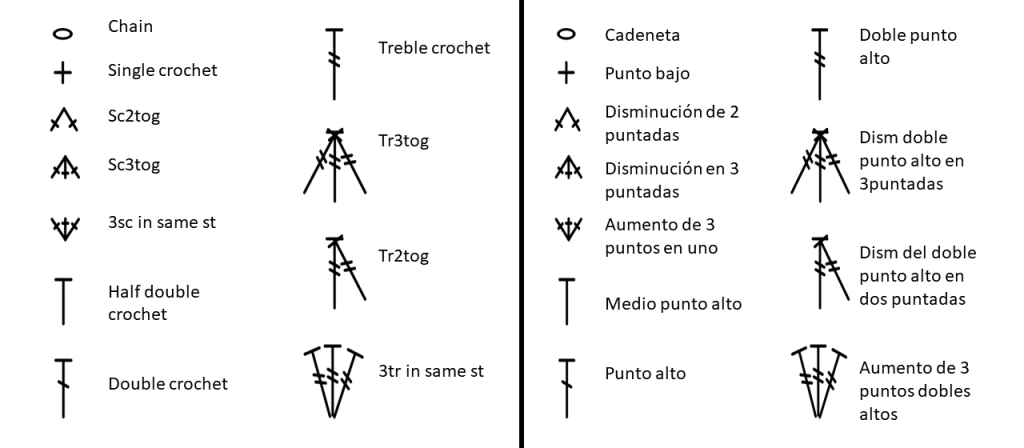
ABBREVIATIONS (US TERMS)
ch: chain
sc: single crochet
blo: back loop only
dc: double crochet
flo: front loop only
sk: skip
RS: Right side
tr: treble crochet
C1-C2: Colour 1-2
ABREVIACIONES
cad: cadeneta
pb: punto bajo
sht: tomar sólo hebra trasera
pa: punto alto
shd: tomar sólo hebra delantera
salt 1p: saltar 1 punto
LD: lado derecho del tejido
dpa: doble punto alto
C1-C2: Color 1-2
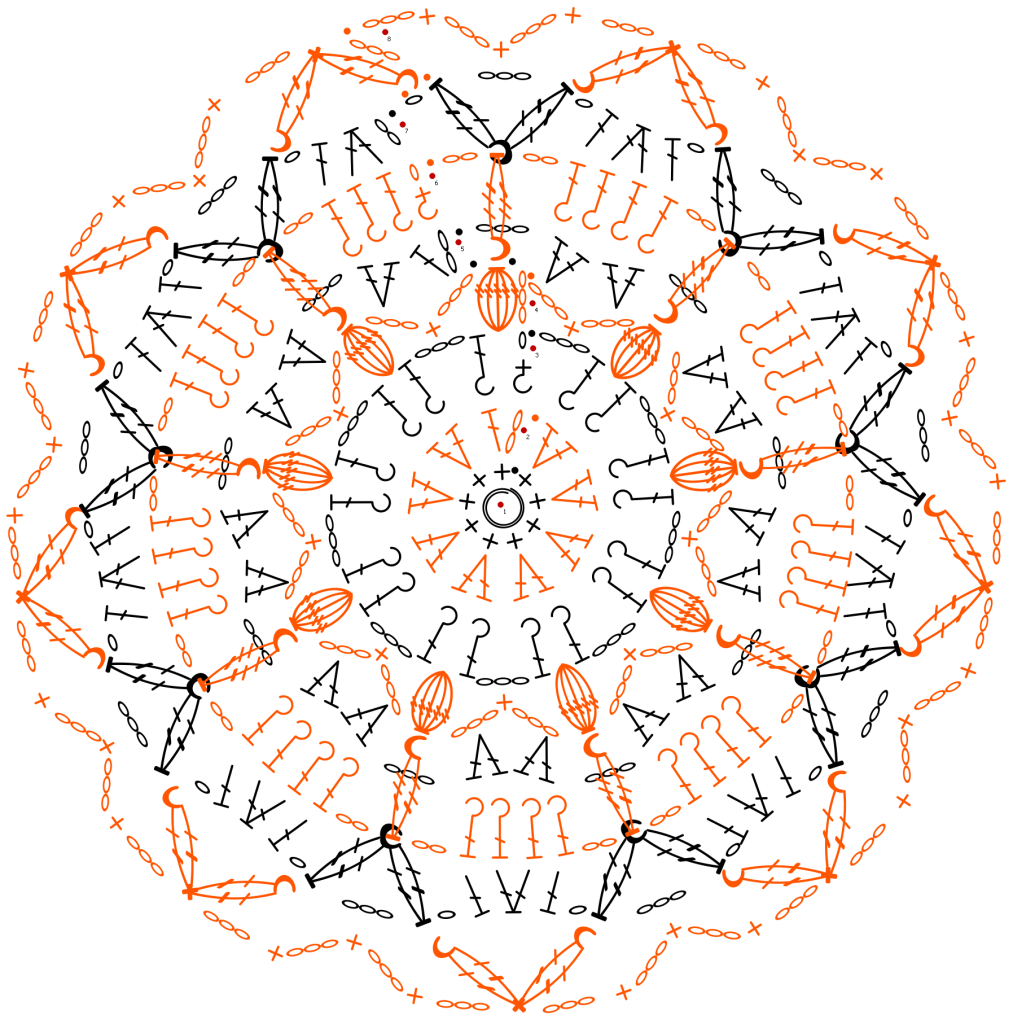
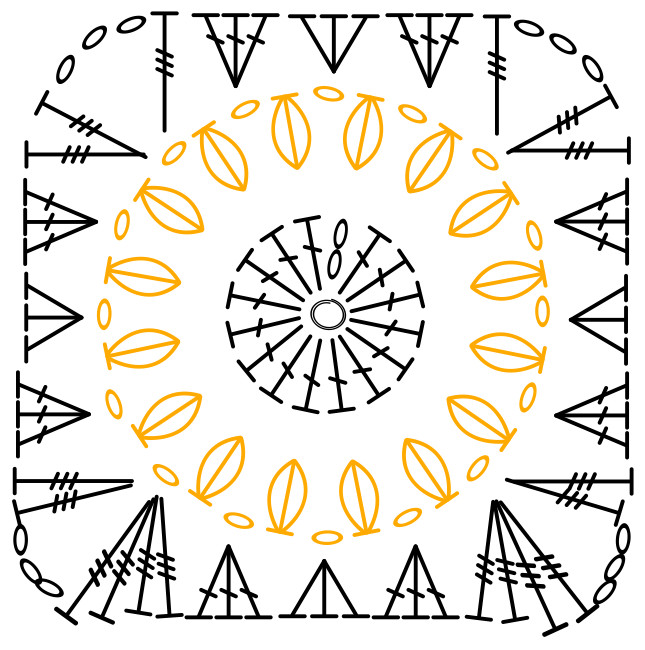
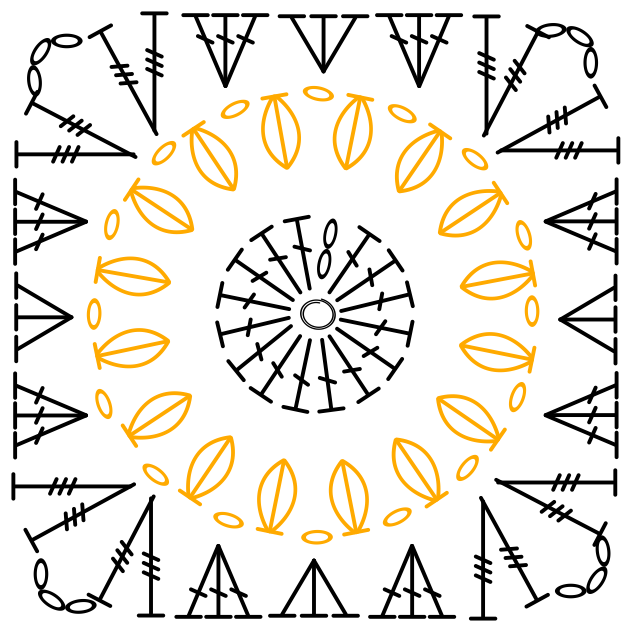
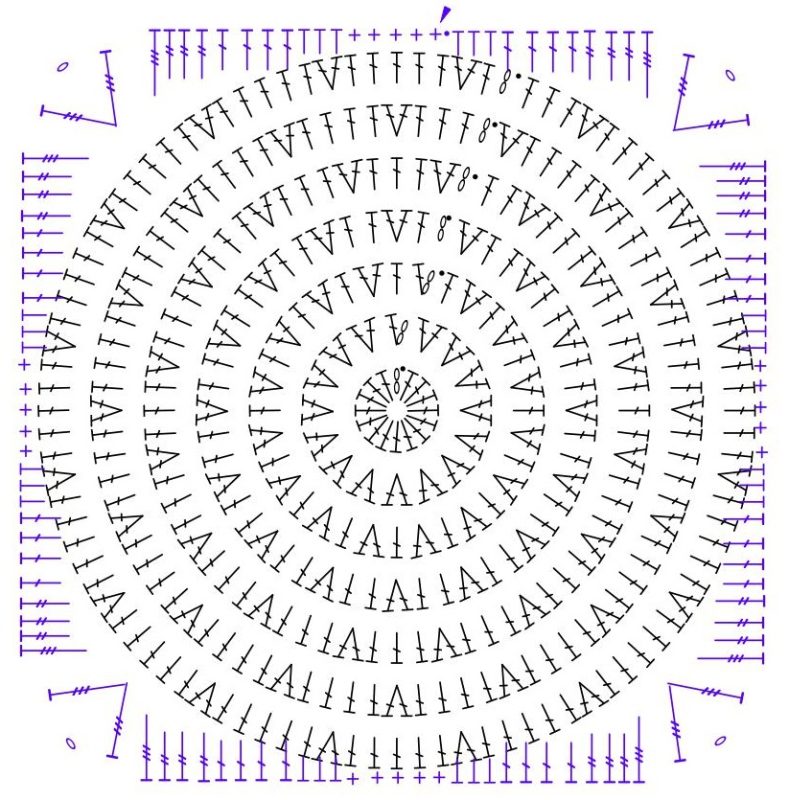
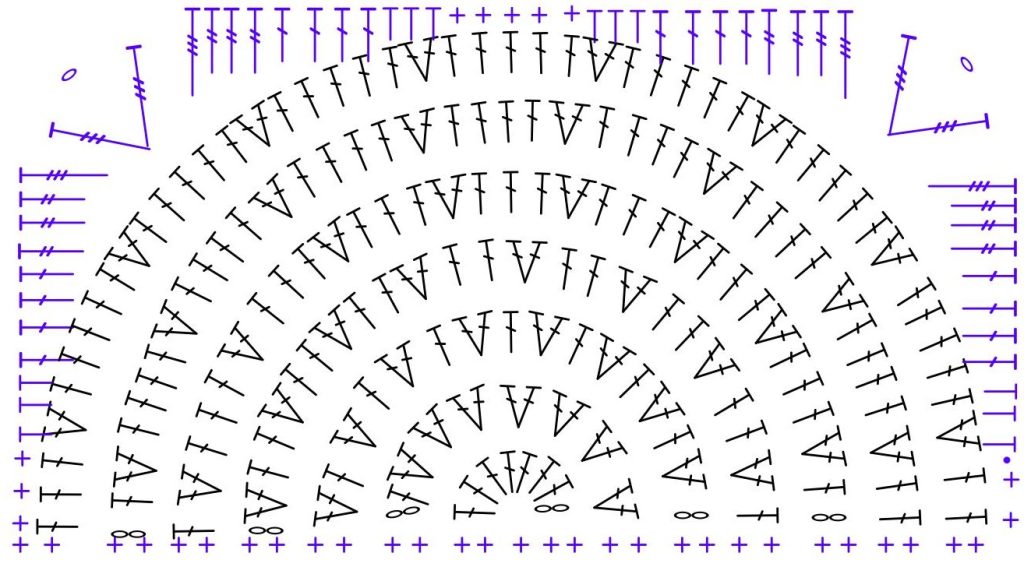
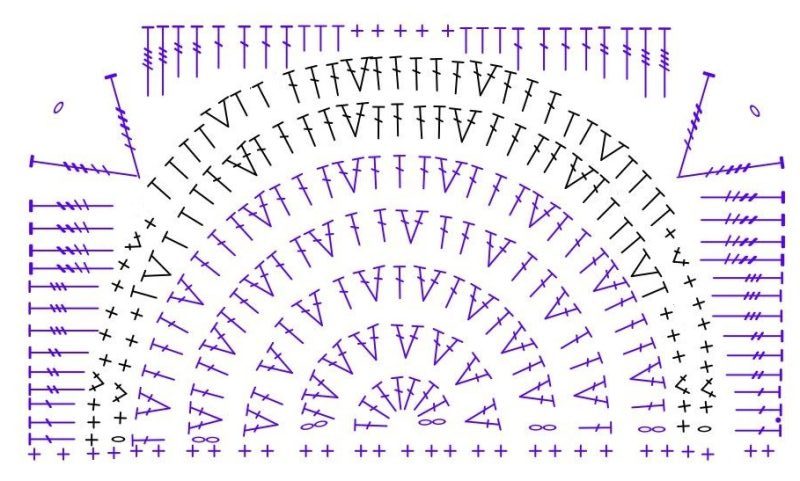
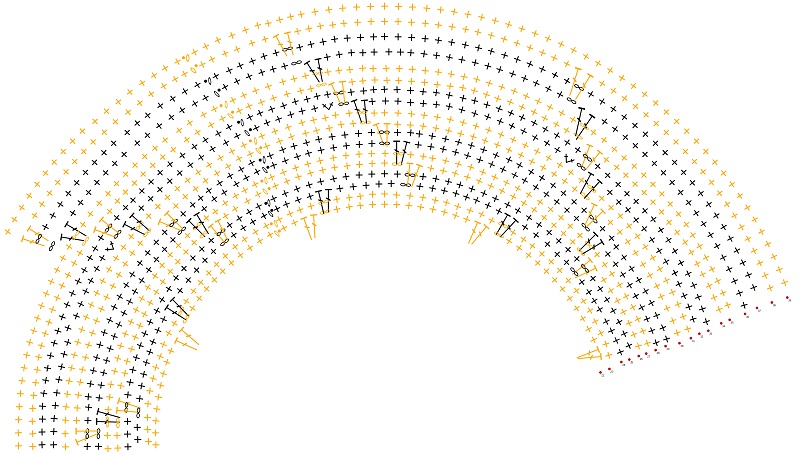
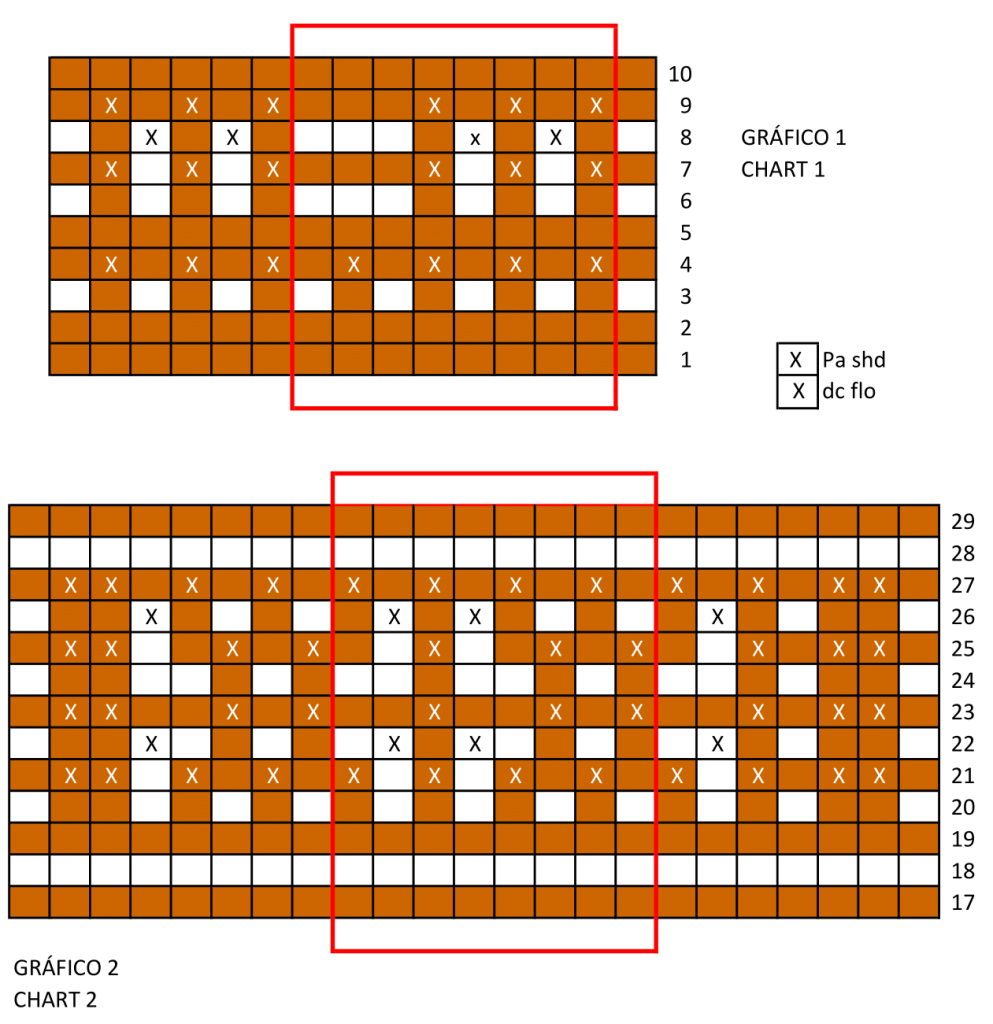
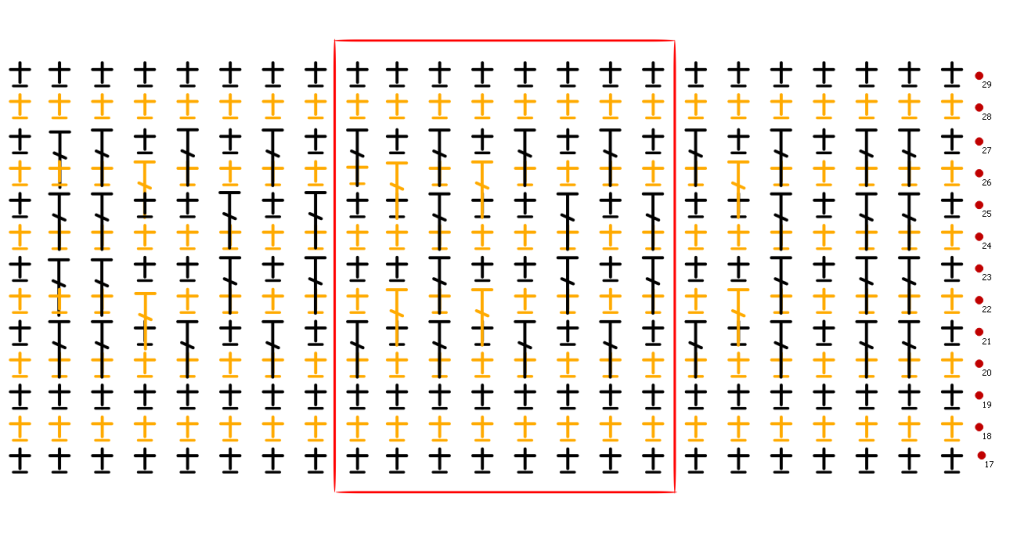
Gráficos de mosaico/ mosaic charts
Gráficos clásicos/ clasical charts
Gráfico A/ Chart A
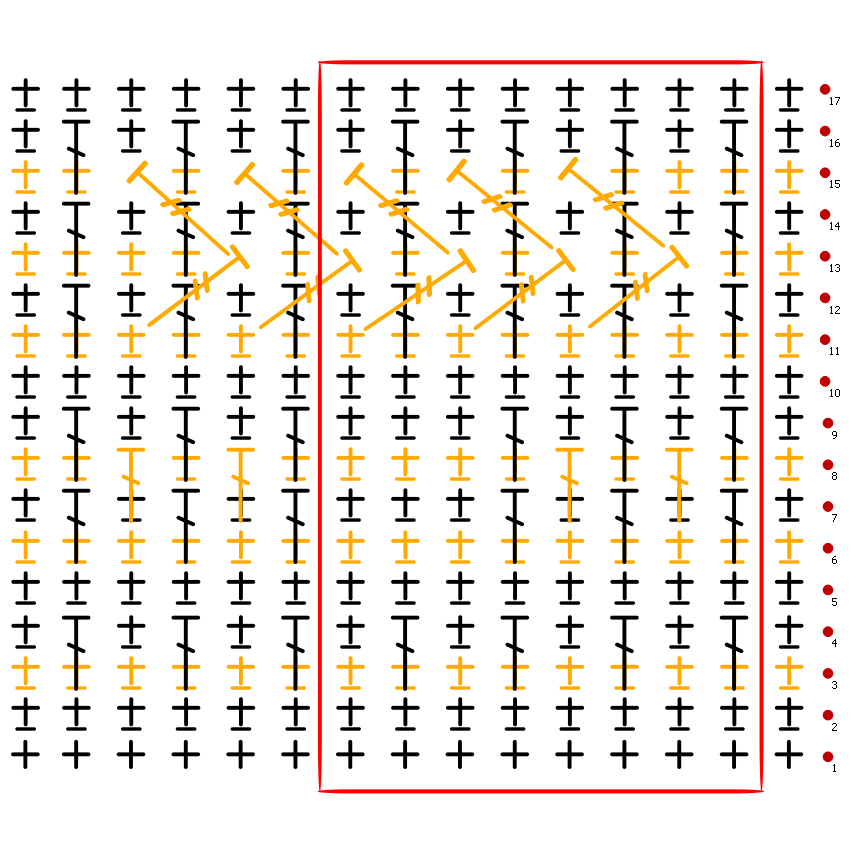
Gráfico B / Chart B
Acerca del patrón
- En un diseño en overlay mosaico. Trabajaremo siempre por el lado derecho del tejido, así que cuando terminemos una fila, debemos cortarla y comenzar por el otro extremo nuevamente; por ejemplo: si comienzas por la derecha, terminarás la fila en el extremo izquierdo, lo cortas y unes el color siguiente al extremo derecho nuevamente.
- Hay dos tipos de gráficos (Gráficos 1-2 y A-B), ambos tipos de gráficos te llevarán al mismo resultado, por lo que puedes elegir cualquiera para guiarte. Recuerda revisar las instrucciones escritas por si tienes dudas.
- La muestra no es necesaria ya que es un accesorio. Sólo debes utilizar un grosor DK. En caso de que quieras utilizar un grosor más delgado, ten en cuenta que el múltiplo de este diseño es de 8+7
About the pattern
- It is a mosaic overlay design. We will always work on the right side of the fabric, so when you finish a row, you must fasten it off and start again from the other end; for example: if you start from the right end, you’ll finish the row at the left end, fasten it off, and join the next color back to the right end again.
- There are two types of charts (Charts 1-2 and A-B), both types of charts will lead you to the same result, so you can choose either one to guide you. Remember to check the written instructions if you have any doubts.
- The gauge is not necessary as it is an accessory. You only need to use a DK weight yarn. In case you want to use a thinner weight, keep in mind that the multiple for this design is 8+7 stitches.
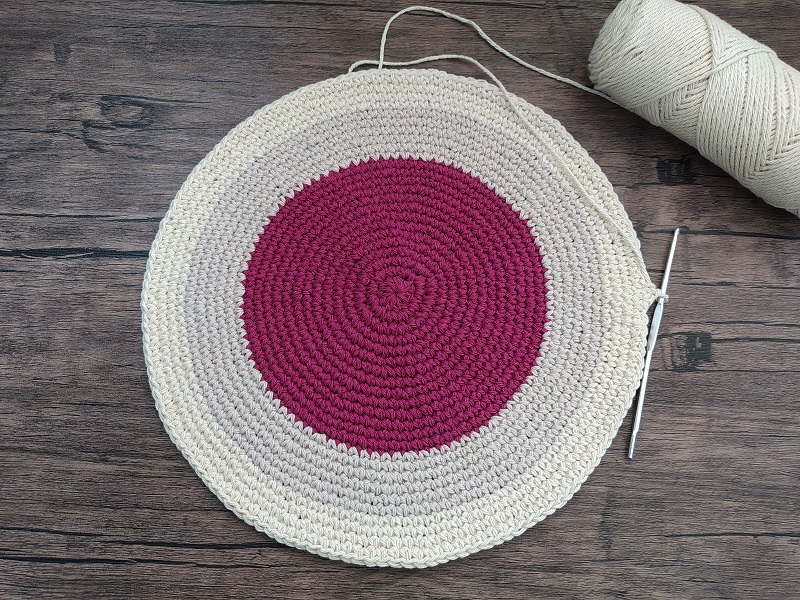
Comienza ................../ Start
Con C1, Urde 63 cad
F1, C1. LD: 1cad (no cuenta como p), 63 pb, cierra y corta.
F2, C1: 63 pb sht, cierra y corta.
F3, C2: 63 pb sht, cierra y corta.
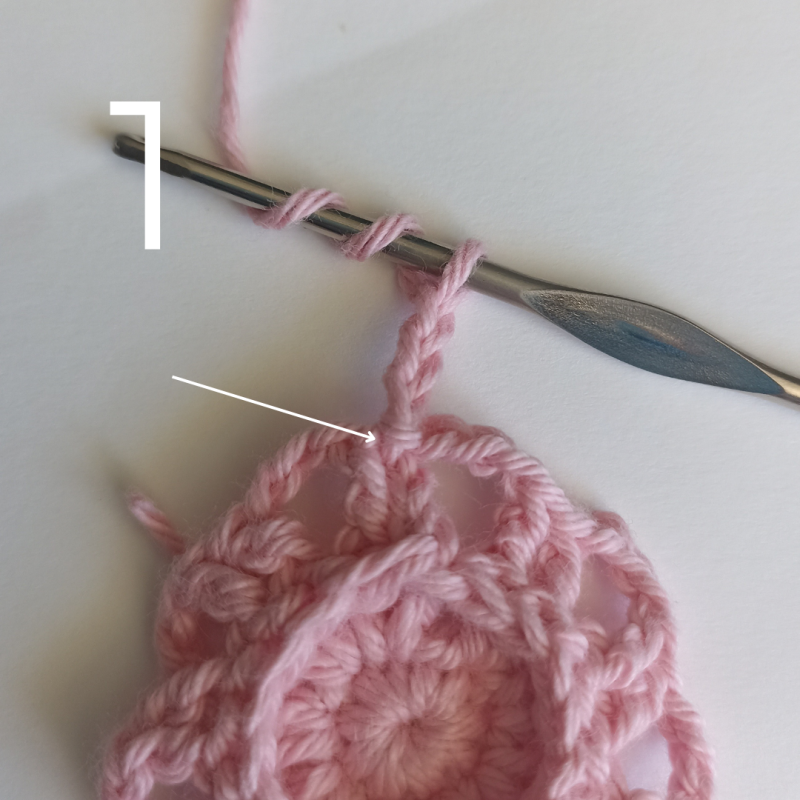
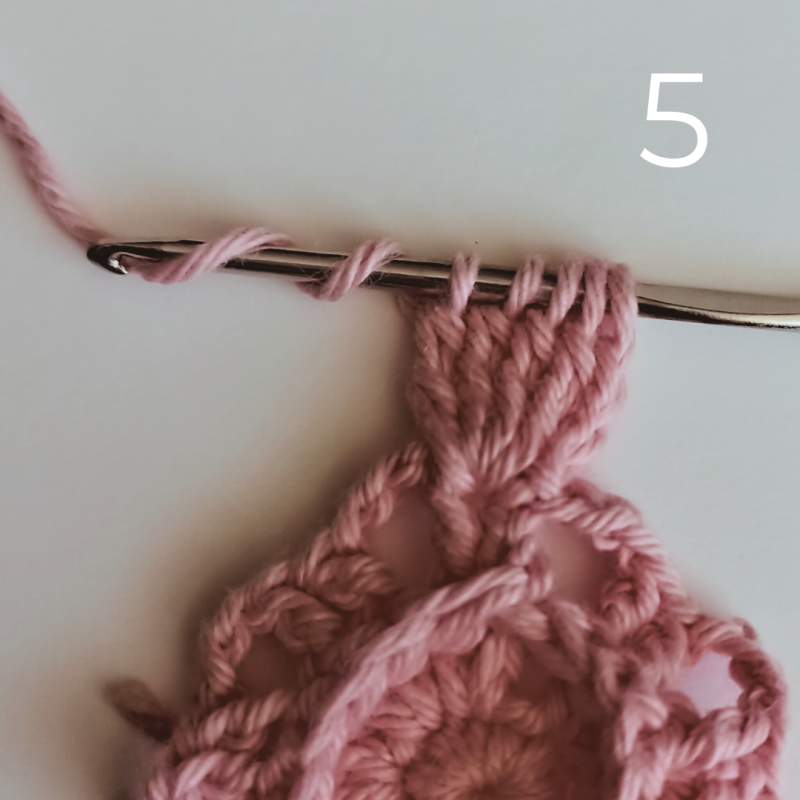
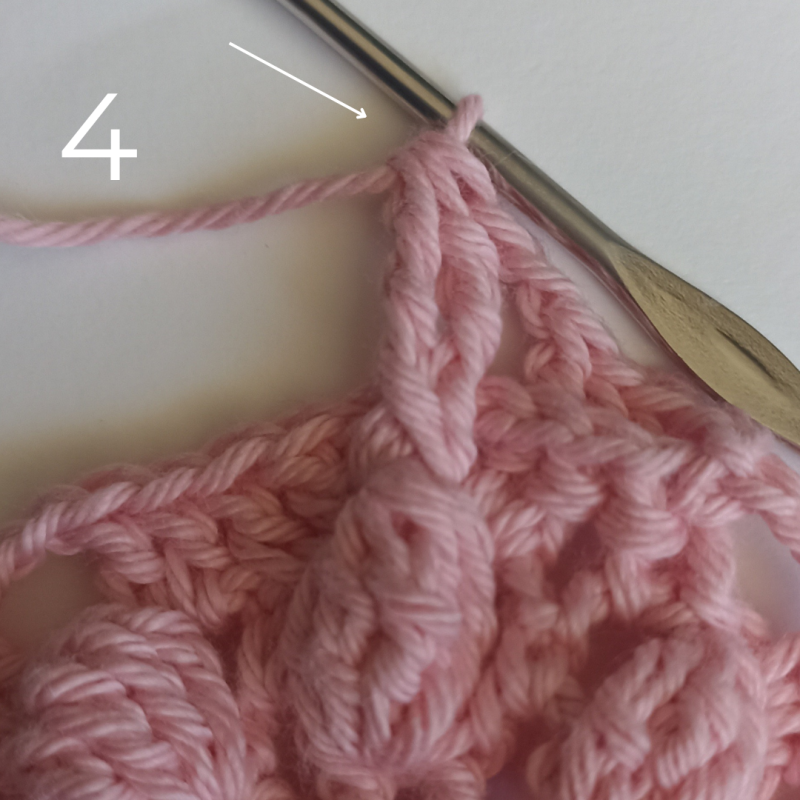
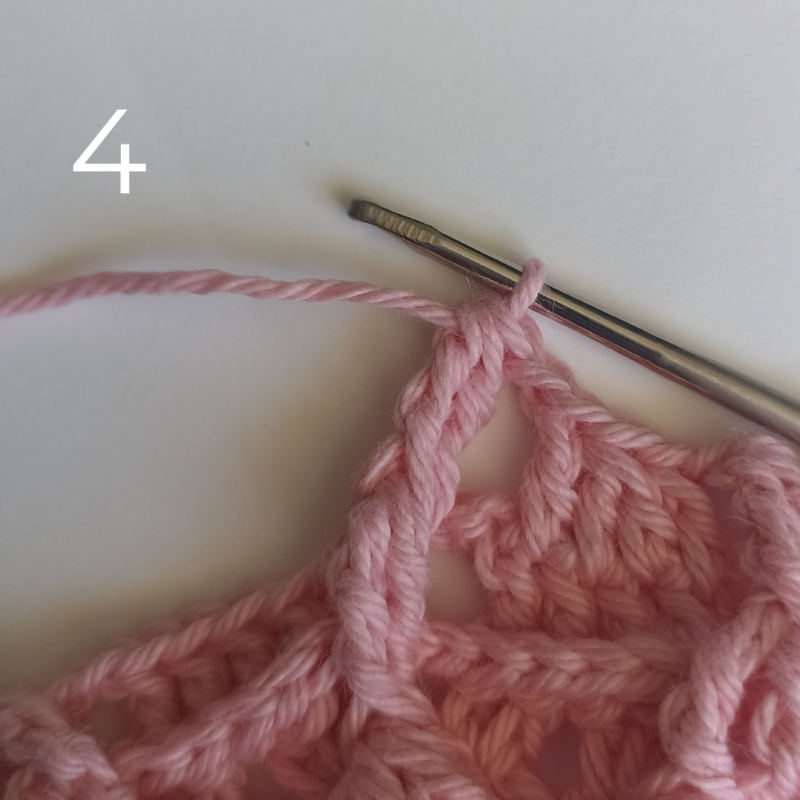
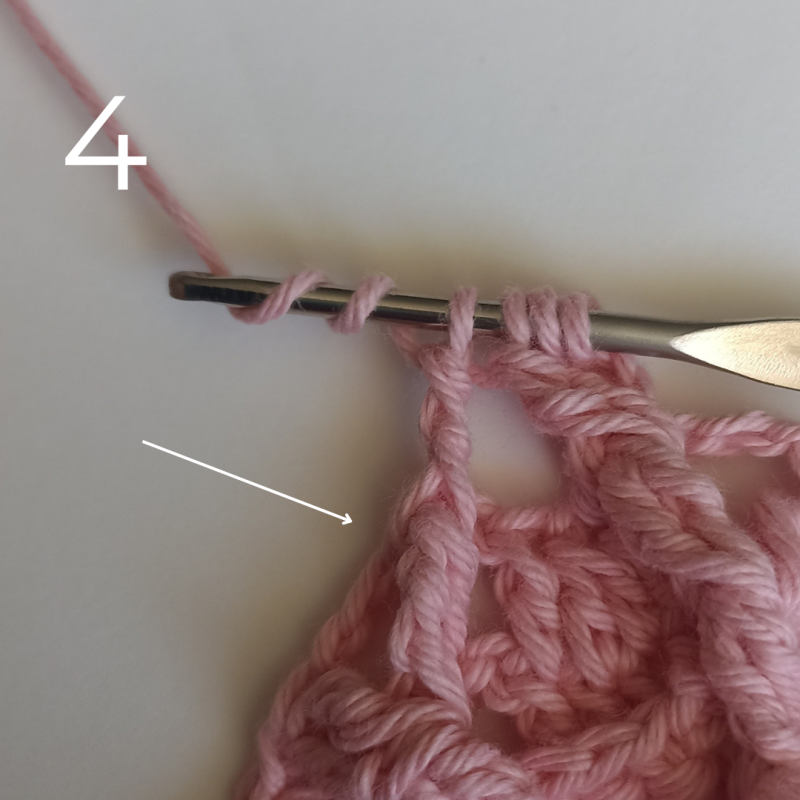
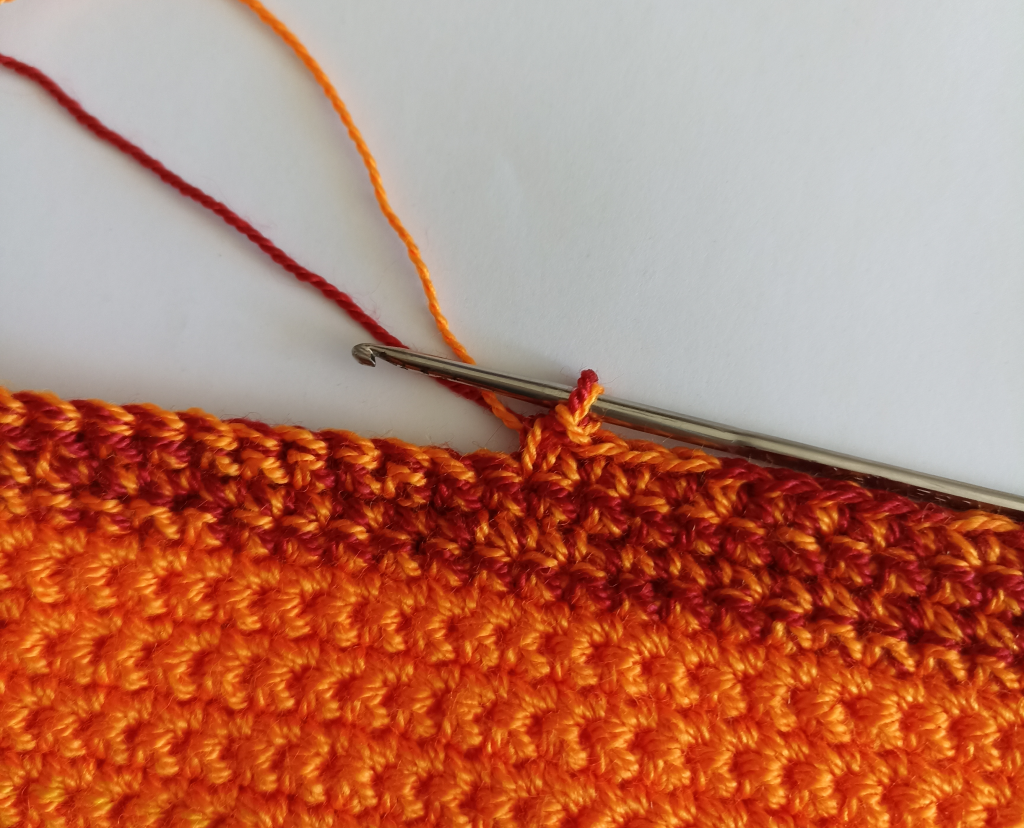
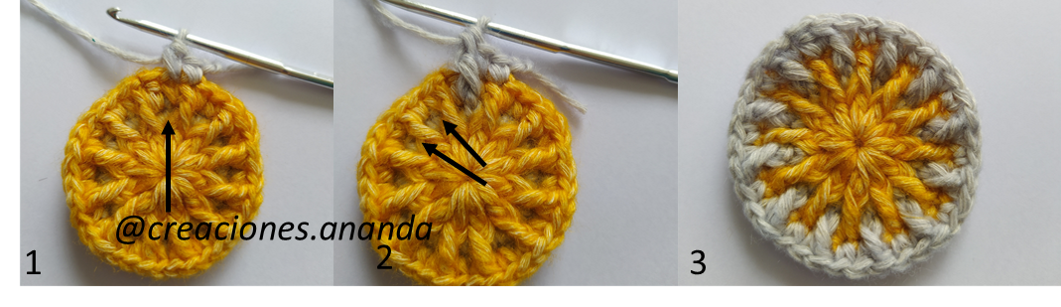
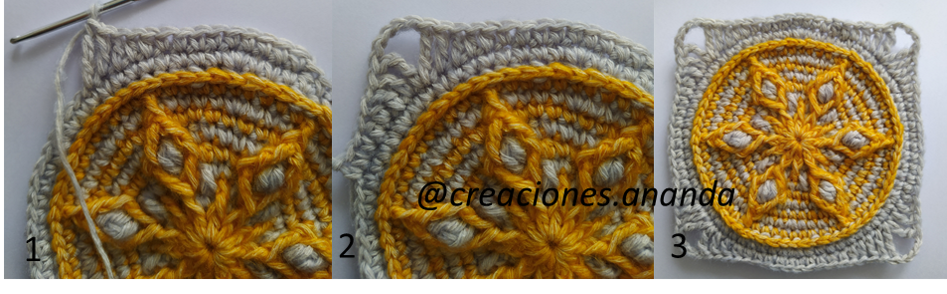
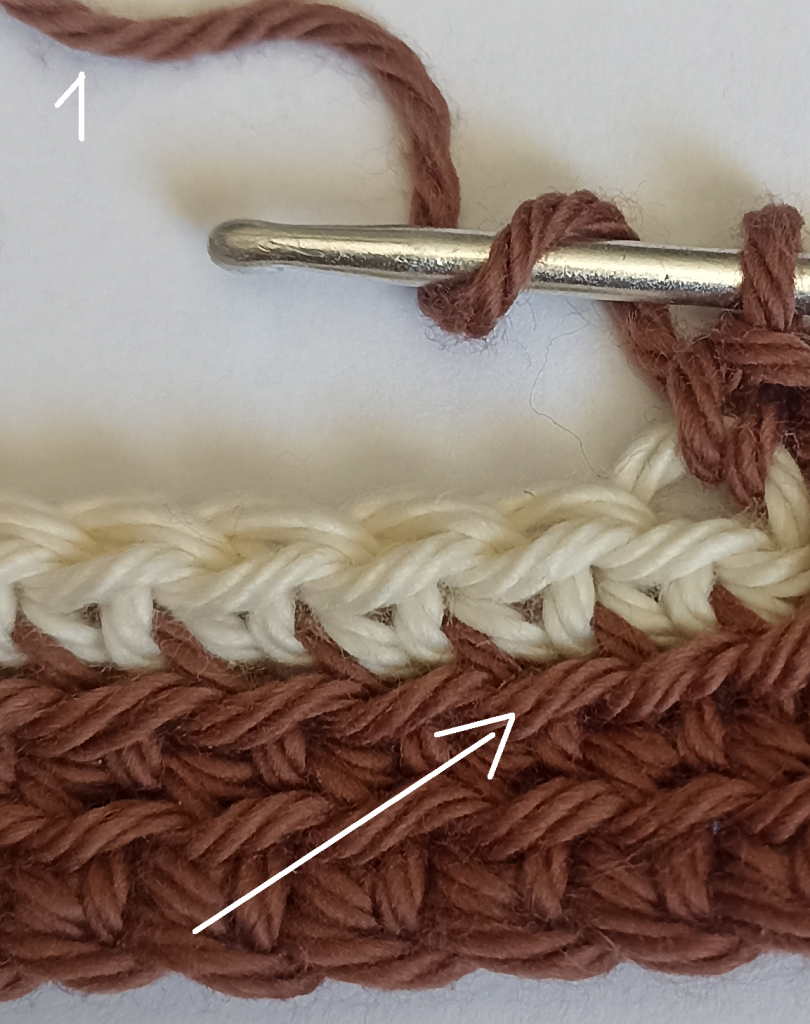
F4, C1: 1pb sht, *1pa shd en pb justo abajo en la F2 (fig 1 y 2), salt 1p, 1pb sht, rep desde* hasta el final, cierra y corta.
F5, C1: 63 pb sht, cierra y corta.
F6, C2: 63 pb sht, cierra y corta.
F7, C1: 1pb sht, *[1pa shd en pb justo abajo en la F5, salt 1p, 1pb sht] 3 veces, 2pb sht, rep desde* 7 veces, [1pa shd en pb justo abajo en la F5, salt 1p, 1pb sht] 3 veces, cierra y corta.
F8, C2: 1pb sht, *[1pb sht, 1pa shd en pb justo abajo en la F6, salt 1p] 2 veces, 4pb sht, rep desde* 7 veces, [1pb sht, 1pa shd en pb justo abajo en la F6, salt 1p] 2 veces, 2pb sht, cierra y corta.
F9, C1: Rep F7
F10, C1: 63 pb sht, cierra y corta.
F11, C2: 63 pb sht, cierra y corta.
F12, C1: Rep F4.
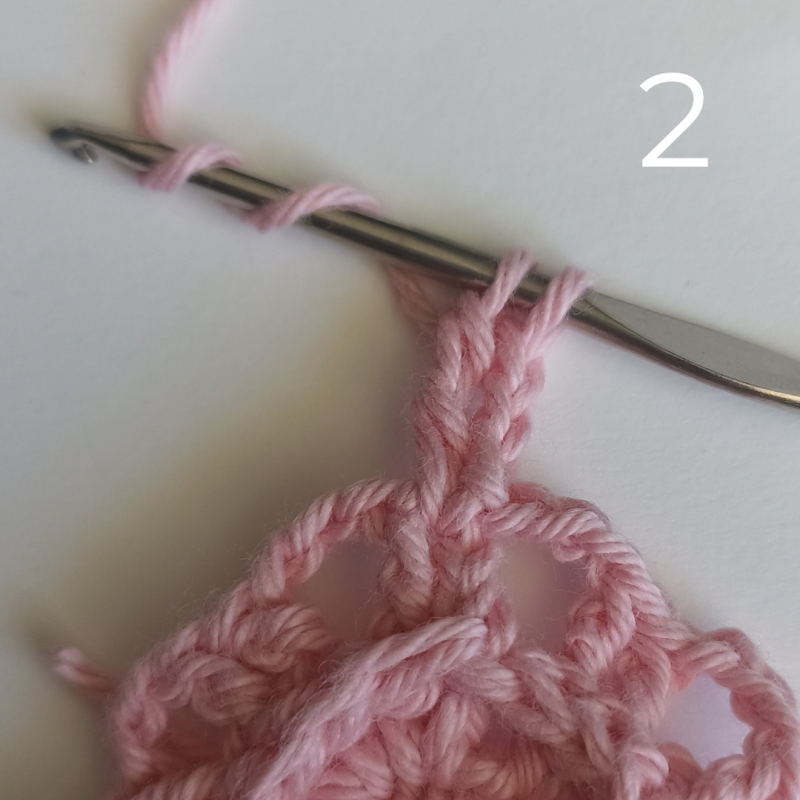
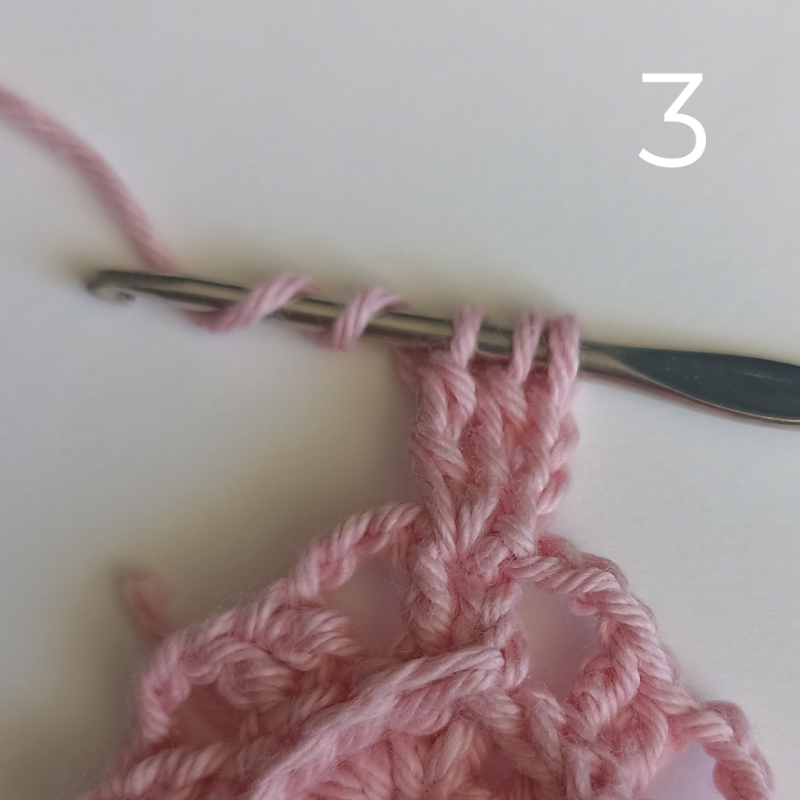
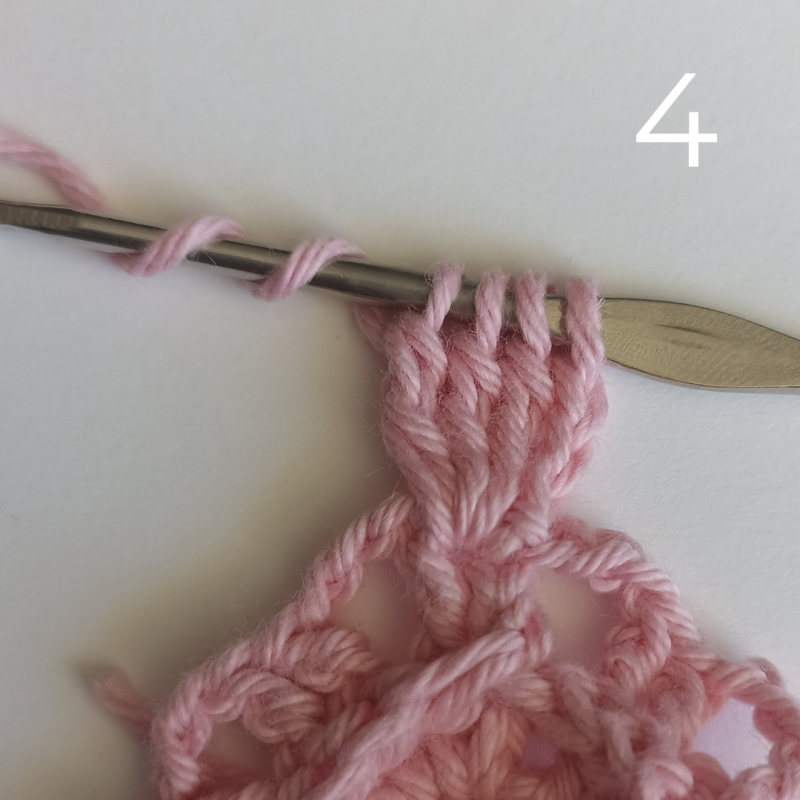
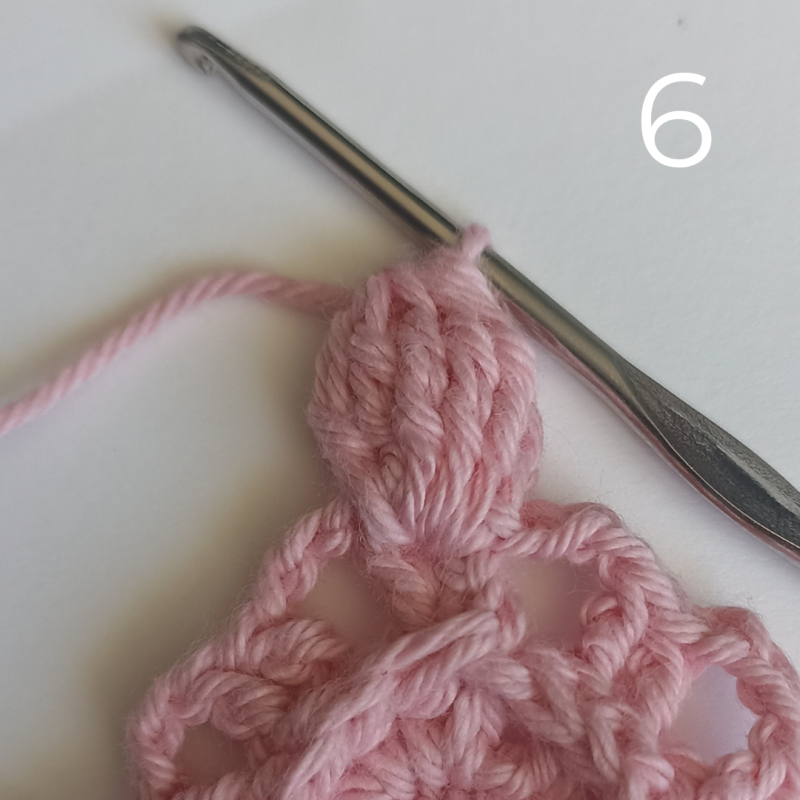
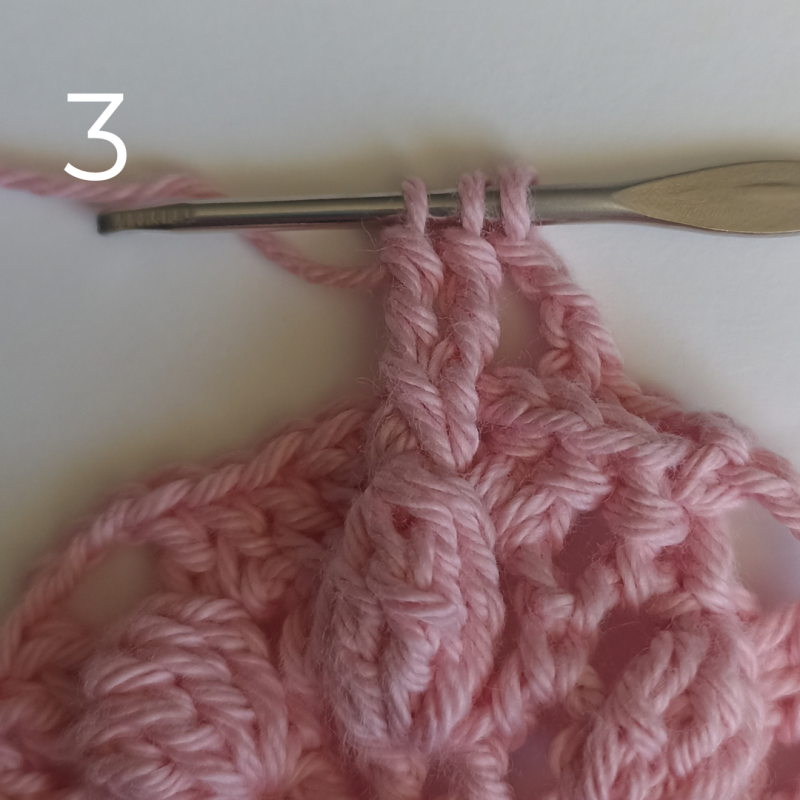
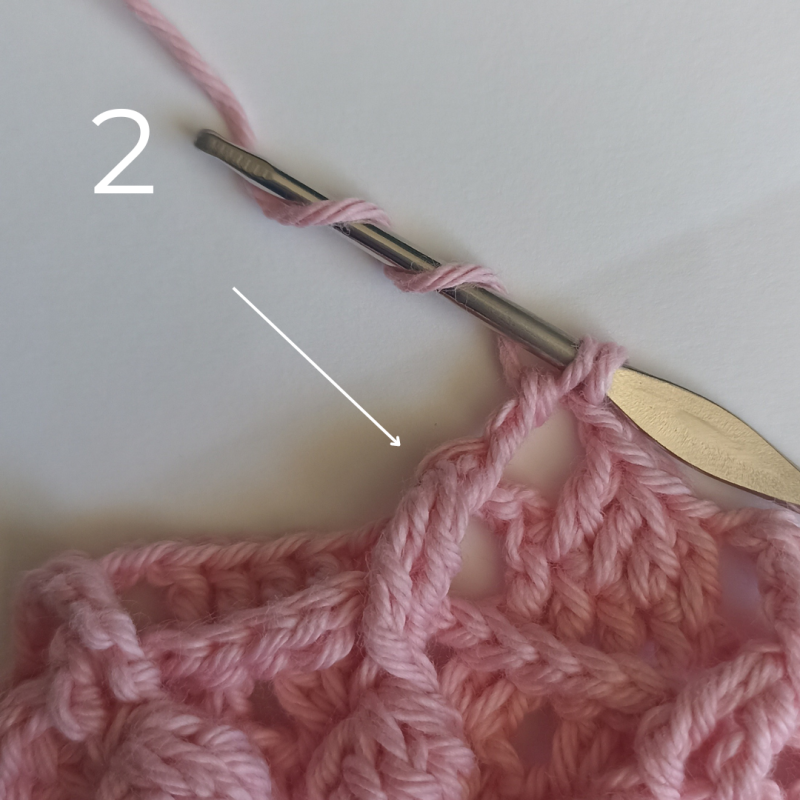
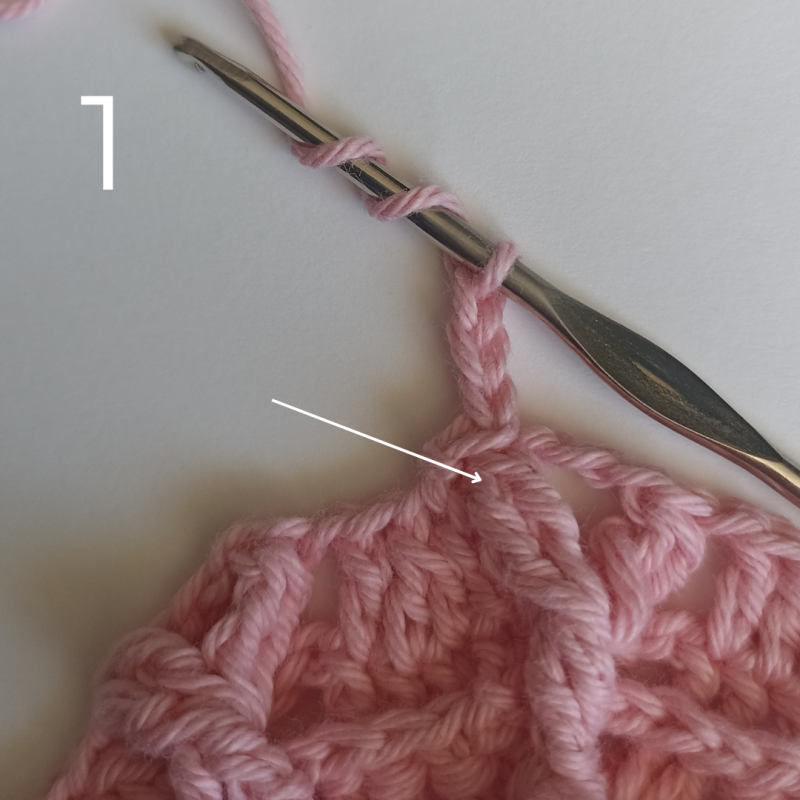
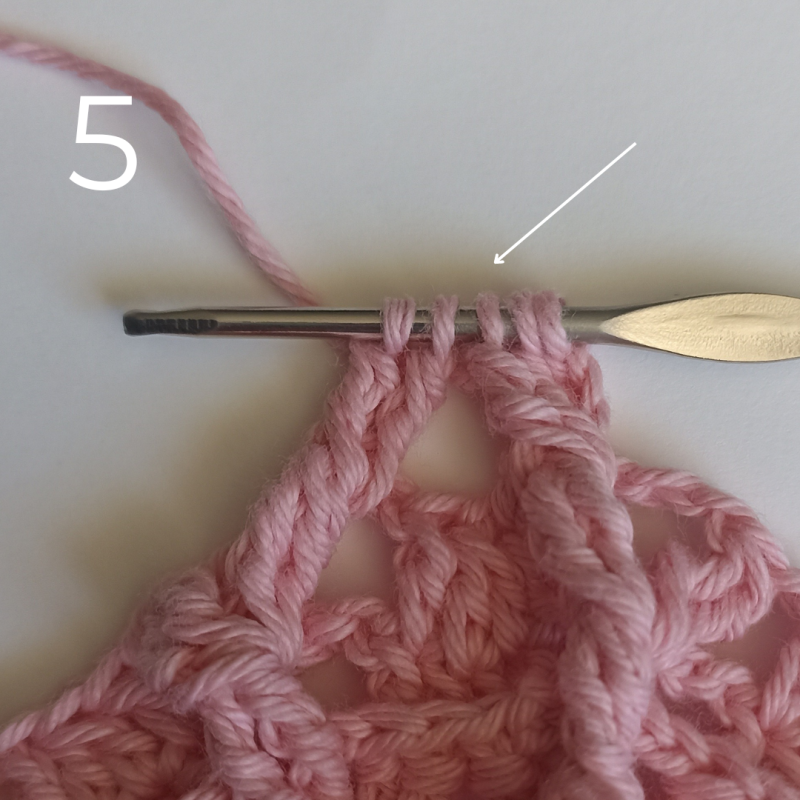
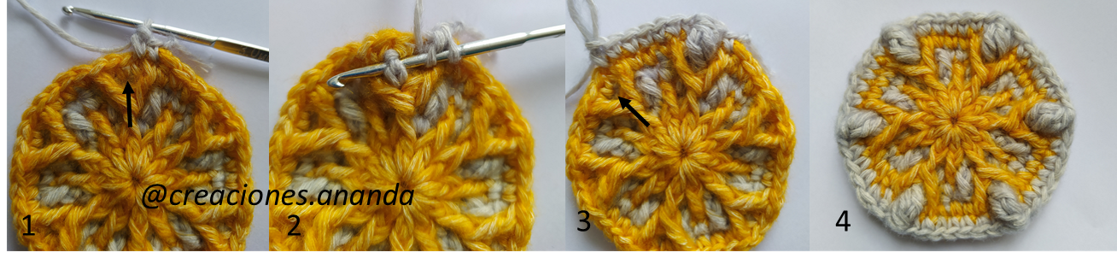
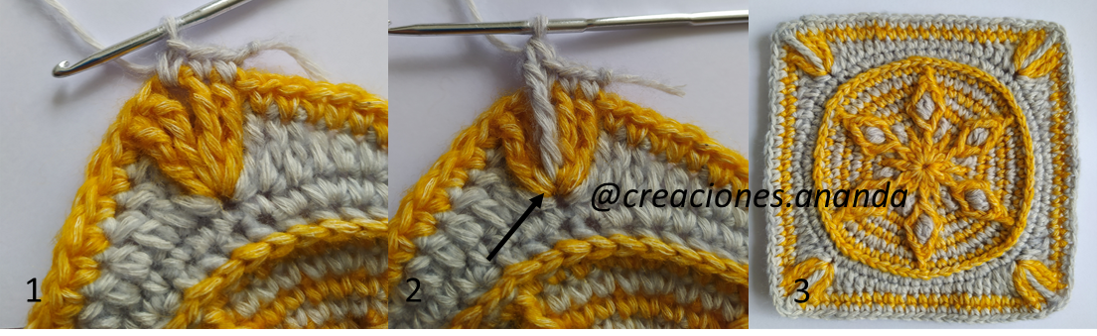
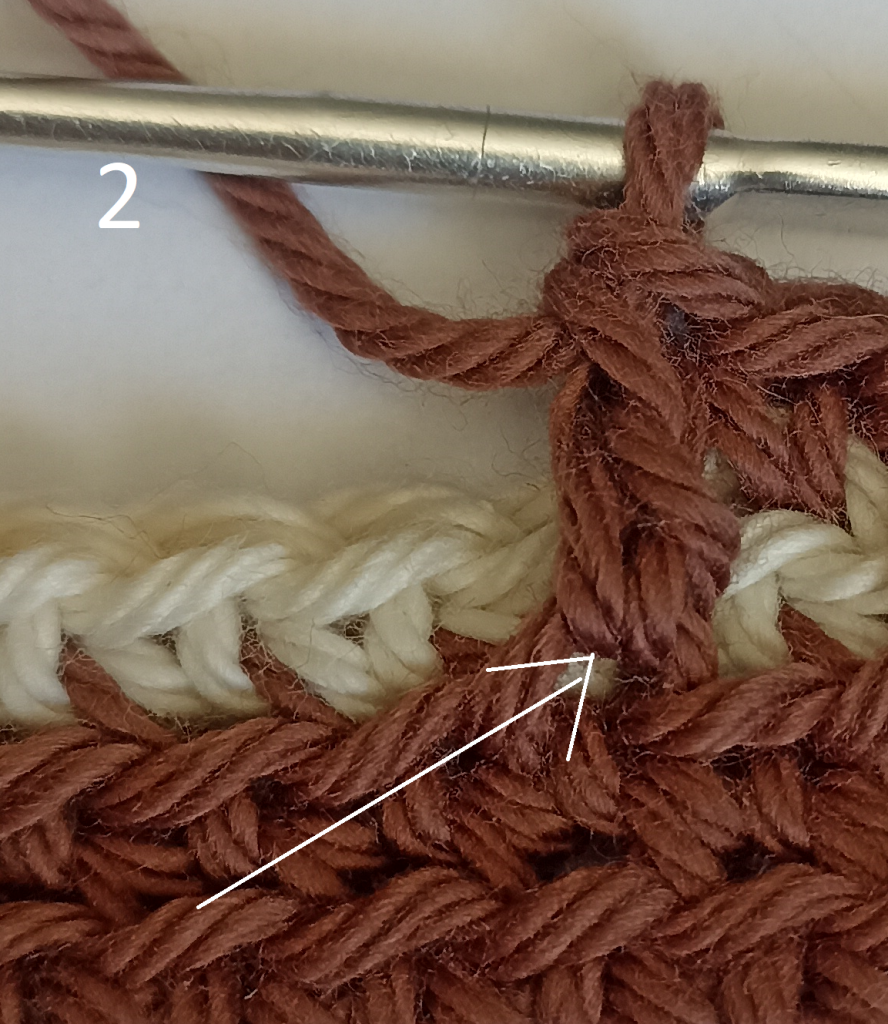
F13, C2: 1pb sht, *1pb sht, 1dpa shd en pb dos pts más adelante en la F11 (fig 3 y 4), salt 1p, rep desde* hasta 4pts antes de terminar la fila, 4pb sht, cierra y corta.
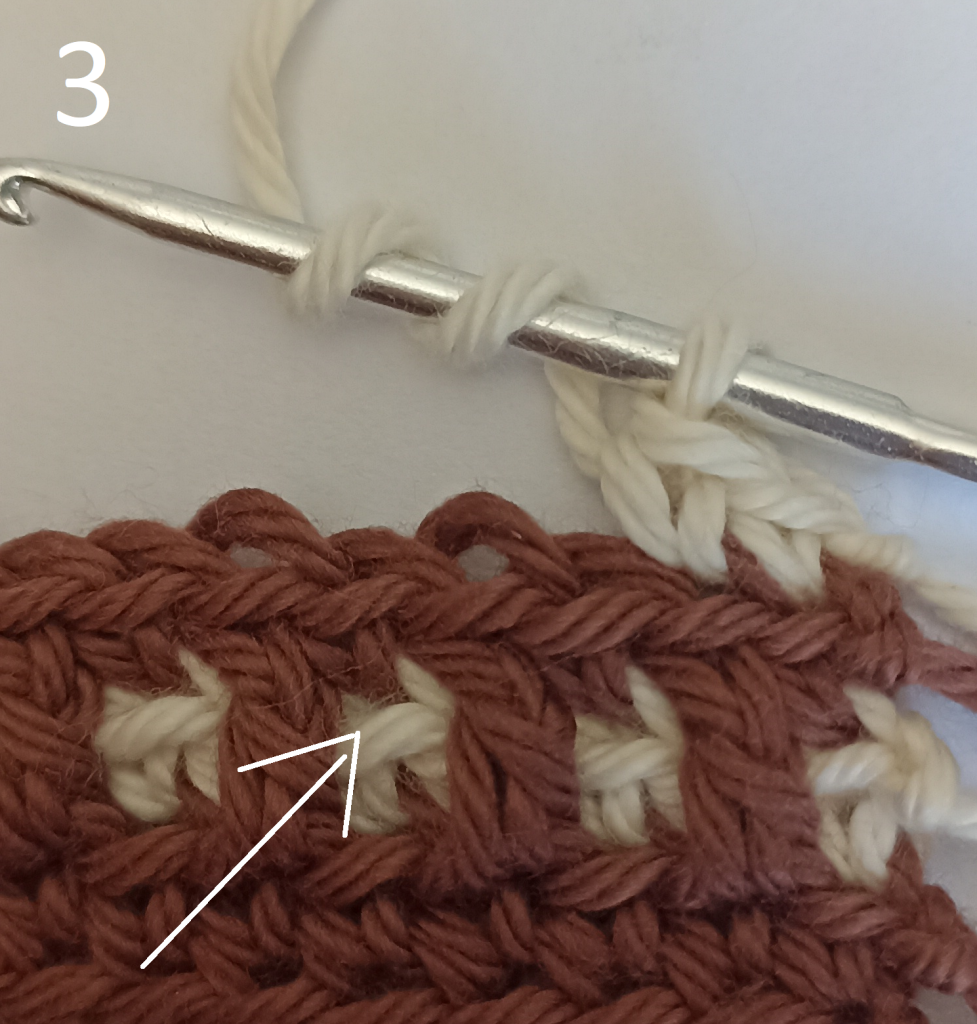
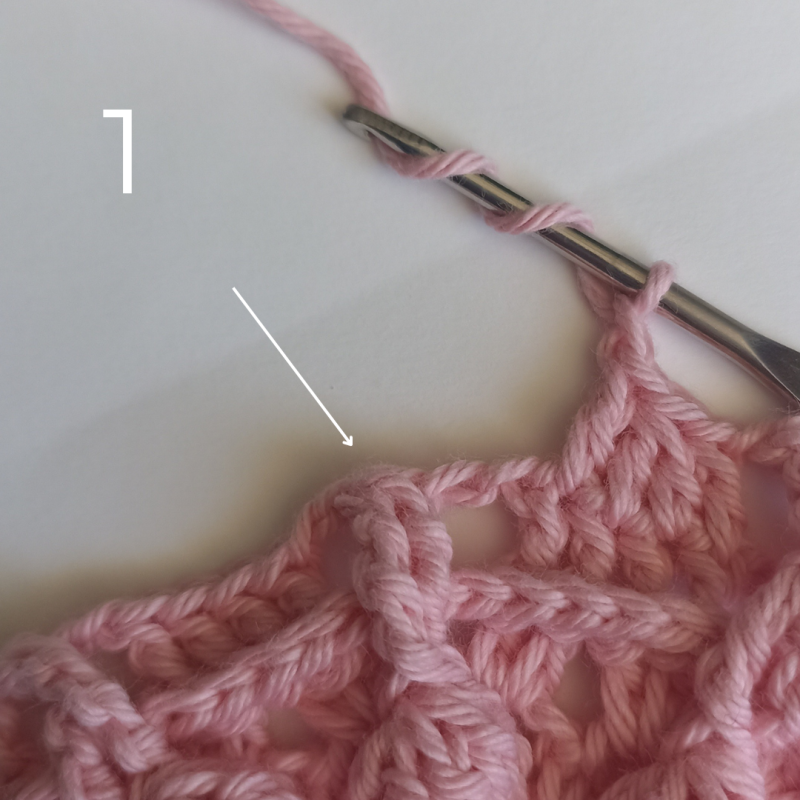
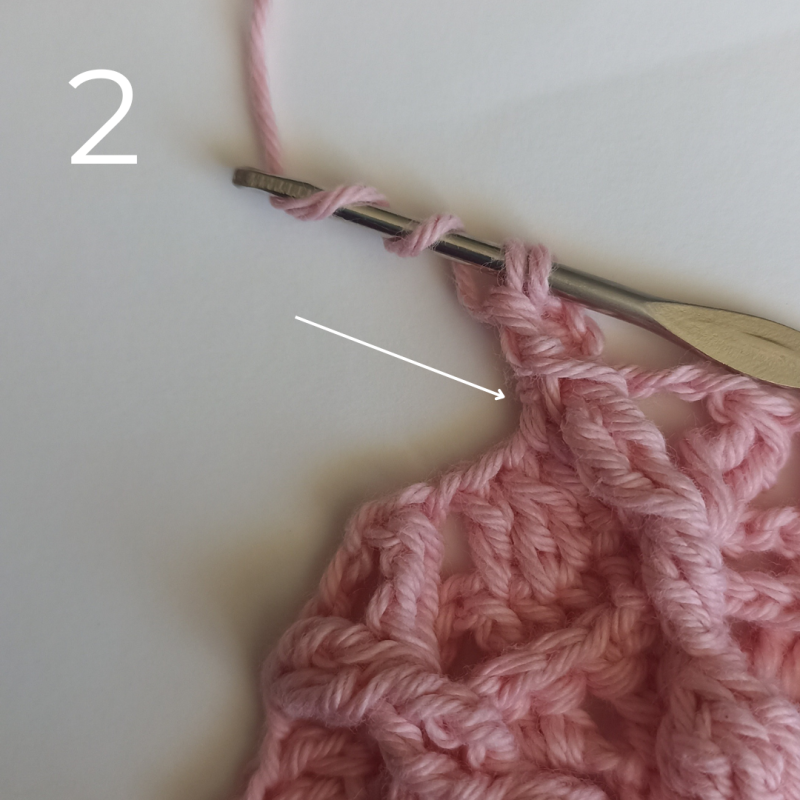
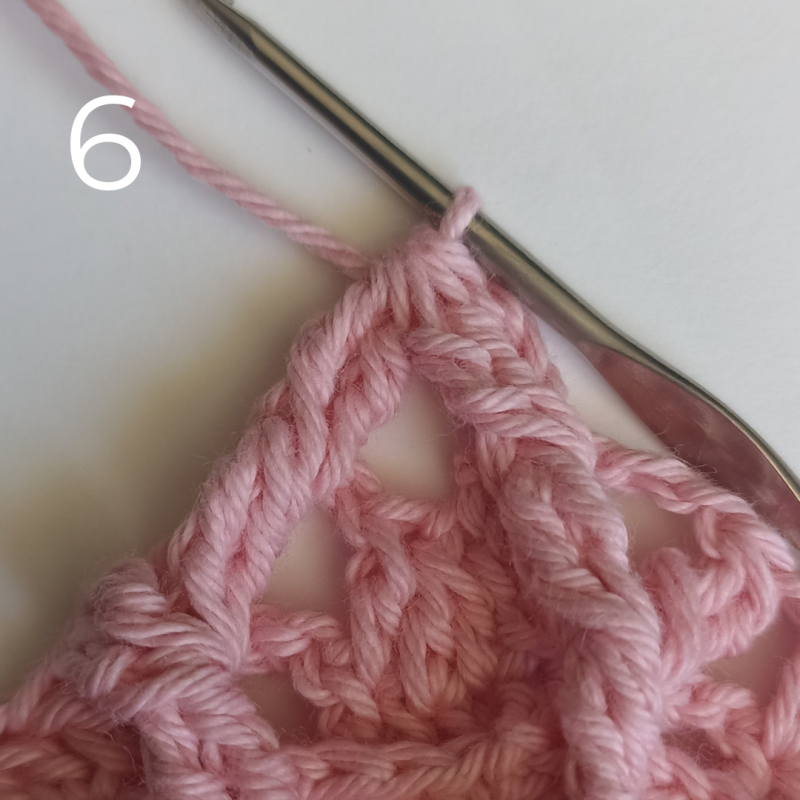
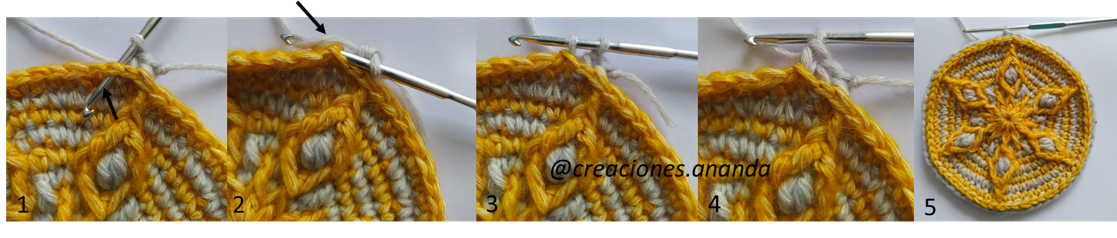
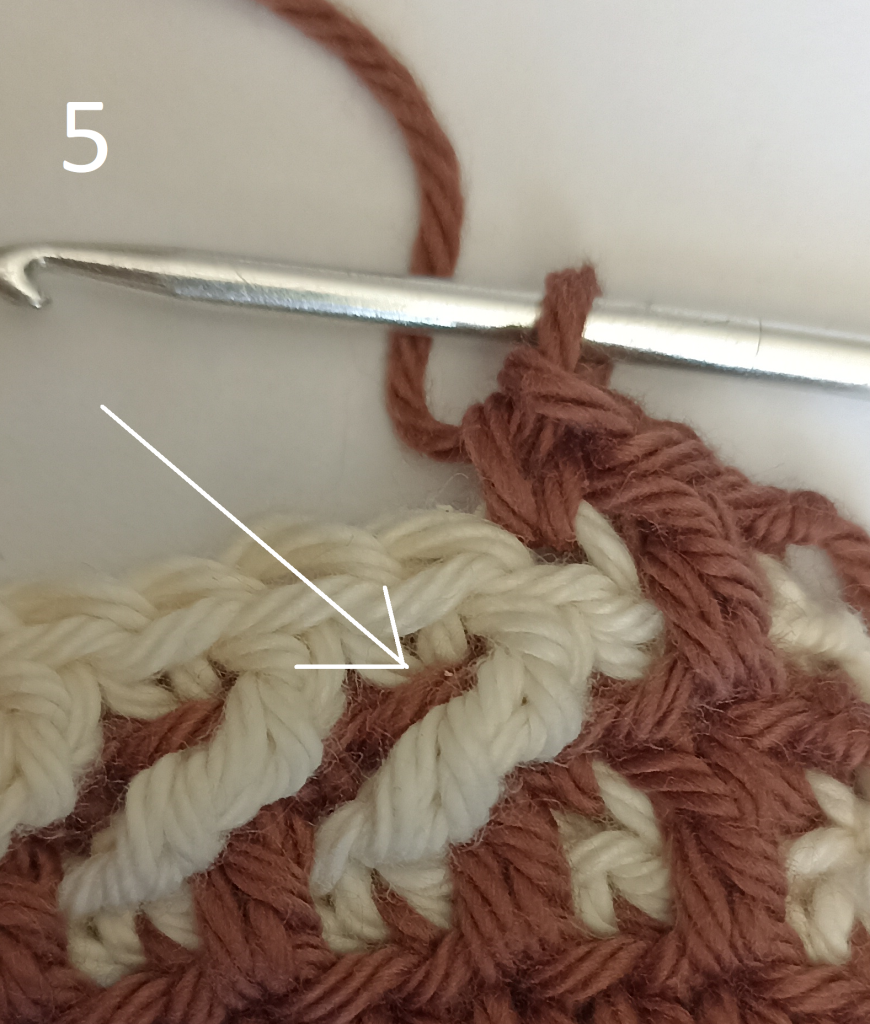
F14, C1: 1pb sht, *1pa shd en pa justo abajo en la F12 (fig 5 y 6), salt 1p, 1pb sht, rep desde* hasta el final, cierra y corta.

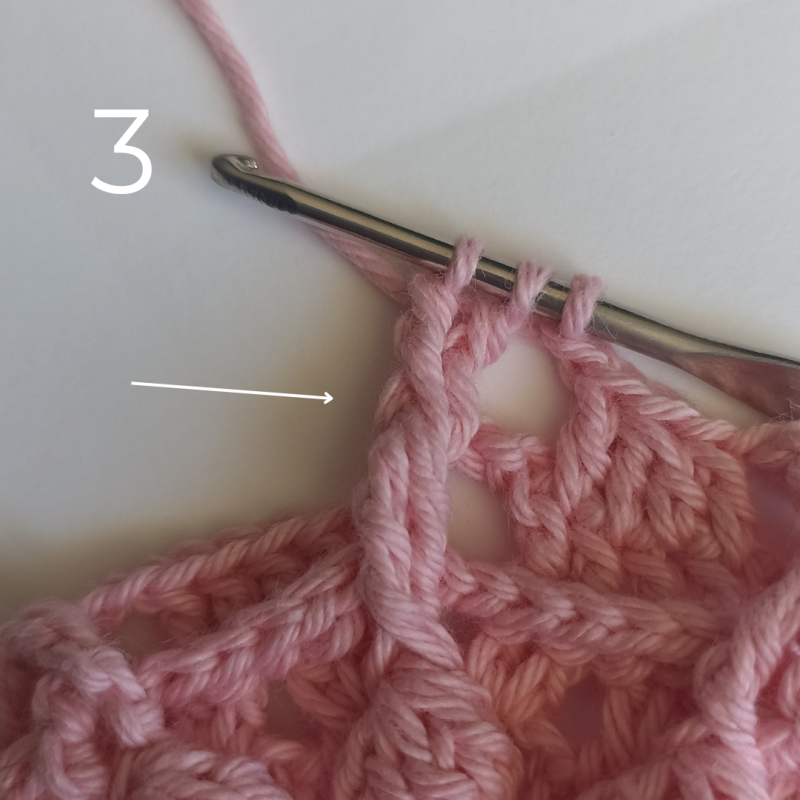
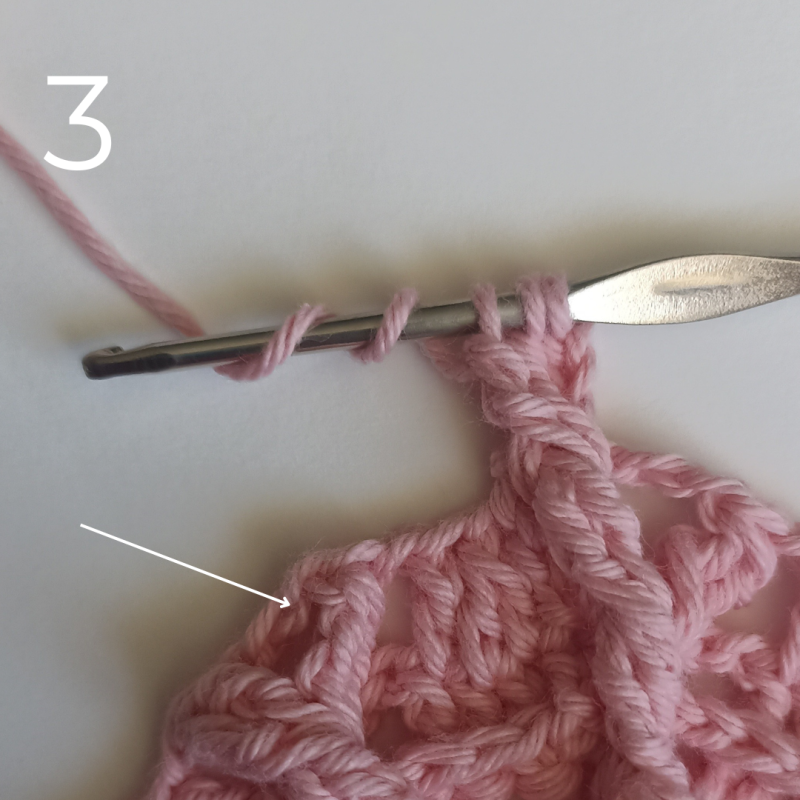
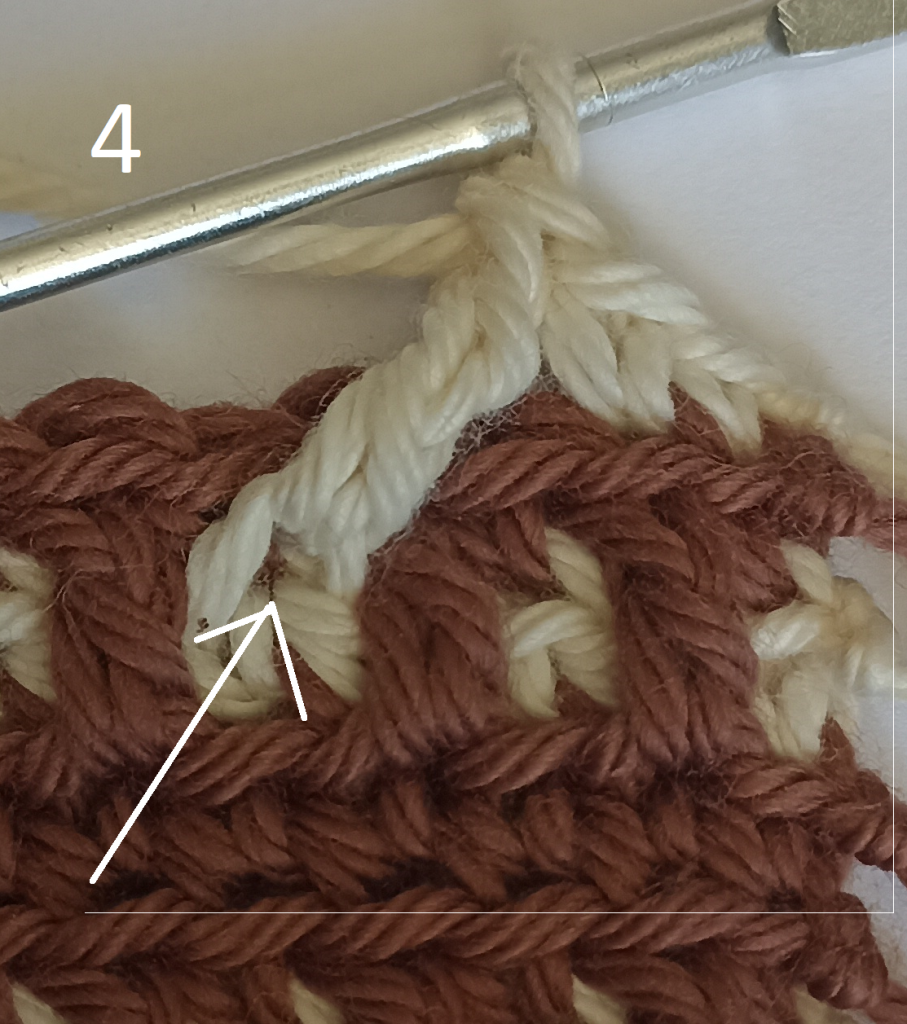
F15, C2: 4pb sht, *1dpa shd en dpa dos puntos más atrás en la F13 (ver gráfico B), salt 1p, 1pb sht, rep desde* hasta 1 pt antes de terminar, 1pb sht, cierra y corta.
F16, C1: Rep F14
F17, C1: 63 pb sht, cierra y corta.
F18, C2: 63 pb sht, cierra y corta.
F19, C1: Rep F17
F20, C2: Rep F18
F21, C1: 1pb sht, 2pa shd en 2pb justo abajo en la F19, salt 2pts,* 1pb sht, 1pa shd en pb justo abajo, salt 1p, rep desde* hasta 2pts antes de terminar, 1pa shd, 1pb sht, cierra y corta.
F22, C2: 5pb sht, 1pa shd en pb justo abajo en la F20, salt 1p, 1pb sht, *4pb sht, [pa shd en pb de la F20, salt 1p, 1pb sht] 2 veces, rep desde* 6 veces, 4pb sht, 1pa shd en pb de la F20, salt 1p, 3pb sht, cierra y corta.
F23, C1: 1pb sht, 2pa shd en 2pa justo abajo en la F21, salt 2pts, 1pb sht, 1pa shd en pb justo abajo, salt 1p, 2pb sht,* [1pa shd en pb justo abajo, salt 1p, 1pb sht] 2 veces, 1pb sht, 1 pa shd, salt 1p, 2pb sht, rep desde* 6 veces, [1pa shd en pb justo abajo, salt 1p, 1pb sht] 2 veces, 1pb sht, 2 pa shd en 2pa justo abajo en la F21, salt 2pts, 1pb sht, cierra y corta.
F24, C2: 63 pb sht, cierra y corta.
F25, C1: Rep F23
F26, C2: Rep F22
F27, C1: Rep F21
F28, C2: Rep F24
F29, C1: Rep F19
F30- F36: Rep desde la F10 a la F16
F37- F41: Rep desde la F5 a la F9
F42- F45: Rep desde la F2 a la F5
With C1, work 63 ch
F1, C1, RS: ch1 (does not count as st), 63 sc, fasten off.
F2, C1: 63 sc blo, fasten off.
F3, C2: 63 sc blo, fasten off.
F4, C1: 1sc blo, *1dc flo in sc right below in F2 (fig 1 and 2), sk 1st, 1sc blo in next st, rep from*, to end, fasten off.
F5, C1: 63 sc blo, fasten off.
F6, C2: 63 sc blo, fasten off.
F7, C1: 1sc blo, *[1dc flo in sc right below in F5, sk 1st, 1sc blo in next st] 3times, sc blo in next 2 sts, rep from* 7 times, [1dc flo in sc right below in F5, sk 1st, 1sc blo in next st] 3 times, fasten off.
F8, C2: 1sc blo, *[1sc blo in next st, 1dc flo in sc right below in F6, sk 1st] twice, sc blo in next 4sts, rep from* 7 times, [1sc blo in next st, 1dc flo in sc right below in F6, sk 1st] twice, sc blo in next 2sts, fasten off.
F9, C1: Rep F7
F10, C1: 63 sc blo, fasten off.
F11, C2: 63 sc blo, fasten off.
F12, C1: Rep F4
F13, C2: 1sc blo, *[1sc blo in next st, 1tr flo in sc two sts ahead in F11 (fig 3 and 4), sk 1st* to 4 sts before ending the row, sc blo in next 4 sts, fasten off.
F14, C1: 1sc blo, *1dc flo in dc right below in F12 (fig 6 and 7), sk 1st, 1sc blo in next st, rep from* to end, fasten off.
F15, C2: 4sc blo, *1tr in tr two sts back in F13 (see Chart B), sk 1st, 1sc blo in next st, rep from* 1st before ending the row, 1sc blo in next st, fasten off.
F16, C1: Rep F14
F17, C1: 63 sc blo, fasten off.
F18, C2: 63 sc blo, fasten off.
F19, C1: Rep F17
F20, C2: Rep F18
F21, C1: 1sc blo, dc flo in next 2sc right below in F19, sk 2sts, *1sc blo in next st, 1dc flo in sc right below in F19, sk 1st, rep from* to 2sts before ending the row, 1dc flo in sc right below in F19, 1sc blo in last st, fastn off.
F22, C2: 5sc blo, 1dc flo in sc right below in F20, sk 1st, 1sc blo in next st, *sc blo in next 4sts, [1dc flo in sc right below in F20, sk 1st, 1sc blo in next st] twice, rep from* 6 times, sc blo in next 4 sts, 1dc flo in sc right below, sk 1st, sc blo in next 3 sts, fasten off.
F23, C1: 1sc blo, 1dc flo in 2dc right below in F21, sk 2sts, 1sc blo in next st, 1dc flo in sc rightbelow in F21, sk 1st, sc blo in next 2sts, *[1dc flo in sc right below in F21, sk 1st, 1sc blo in next st] twice, 1dc flo in sc right below in F21, sk 1st, sc blo in next 2sts, rep from* 6 times, [1dc flo in sc right below in F21, sk 1st, 1sc blo in next st] twice, sc blo in next st, dc flo in next 2dc right below in F21, sk 2sts, sc blo in last st, fasten off.
F24, C2: 63 sc blo, fasten off.
F25, C1: Rep F23
F26, C2: Rep F22
F27, C1: Rep F21
F28, C2: Rep F24
F29, C1: Rep F19
F30- F36: Rep from F10 to F16
F37- F41: Rep from F5 to F9
F42- F45: Rep from F2 to F5
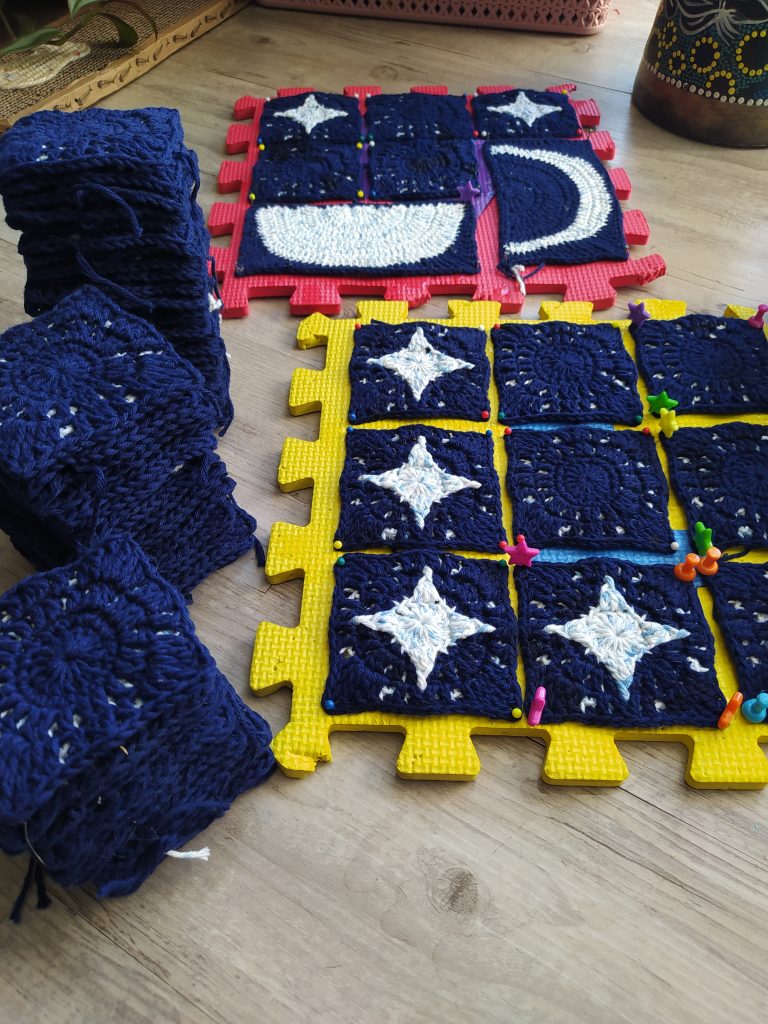
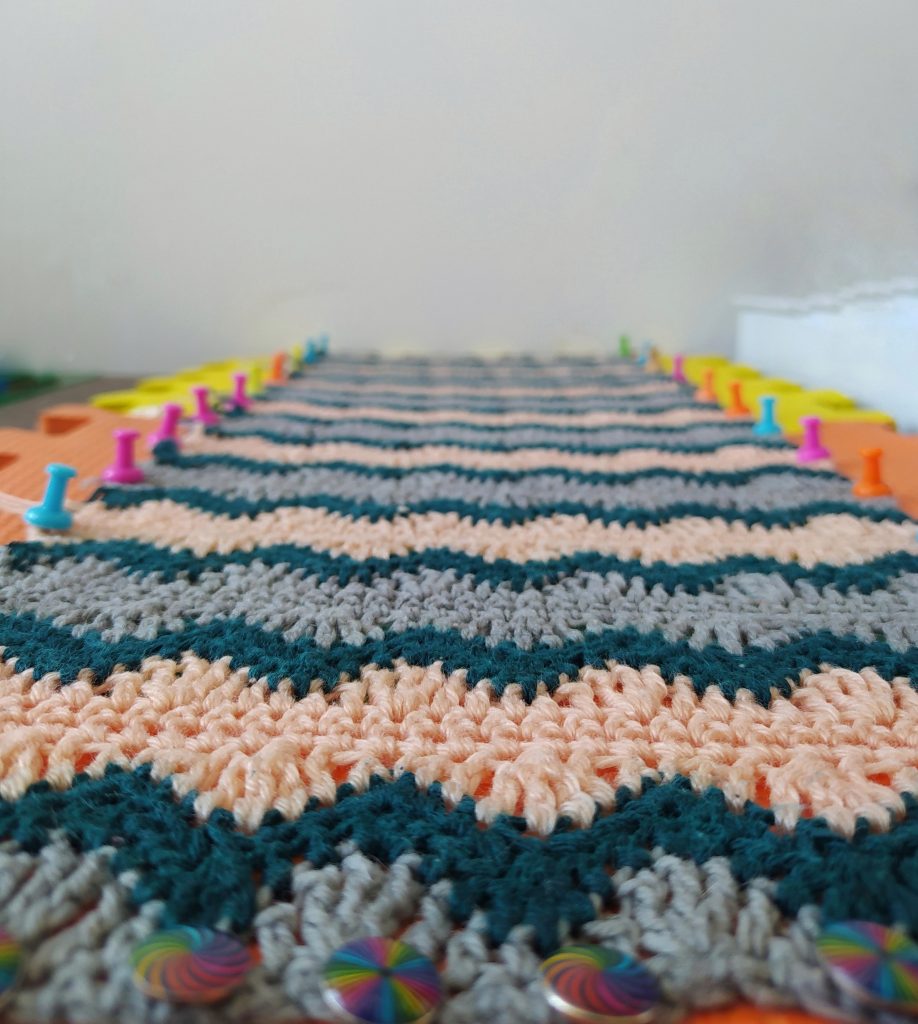
Otra mitad: Teje la otra mitad con 63 puntos bajos tomando sólo la hebra trasera por 45 filas. Utiliza los restos de hilos que ya utilizaste en el orden que prefieras.
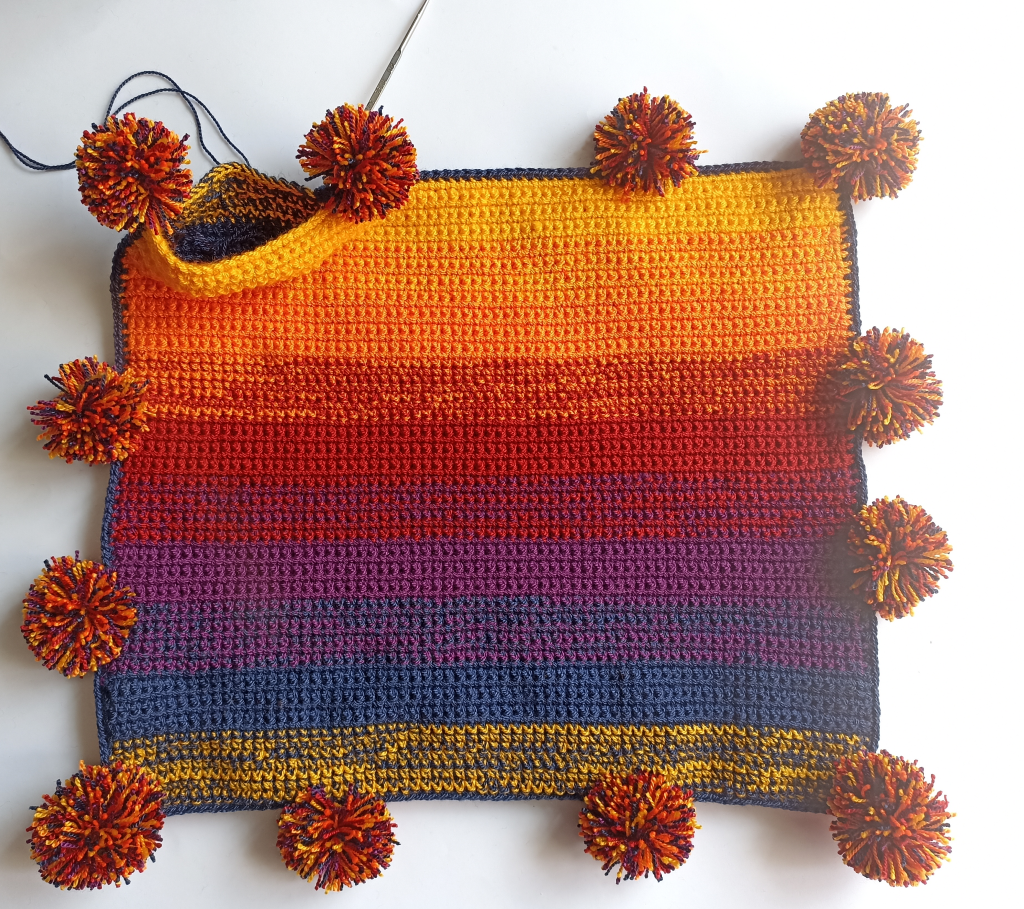
Bloquealas.
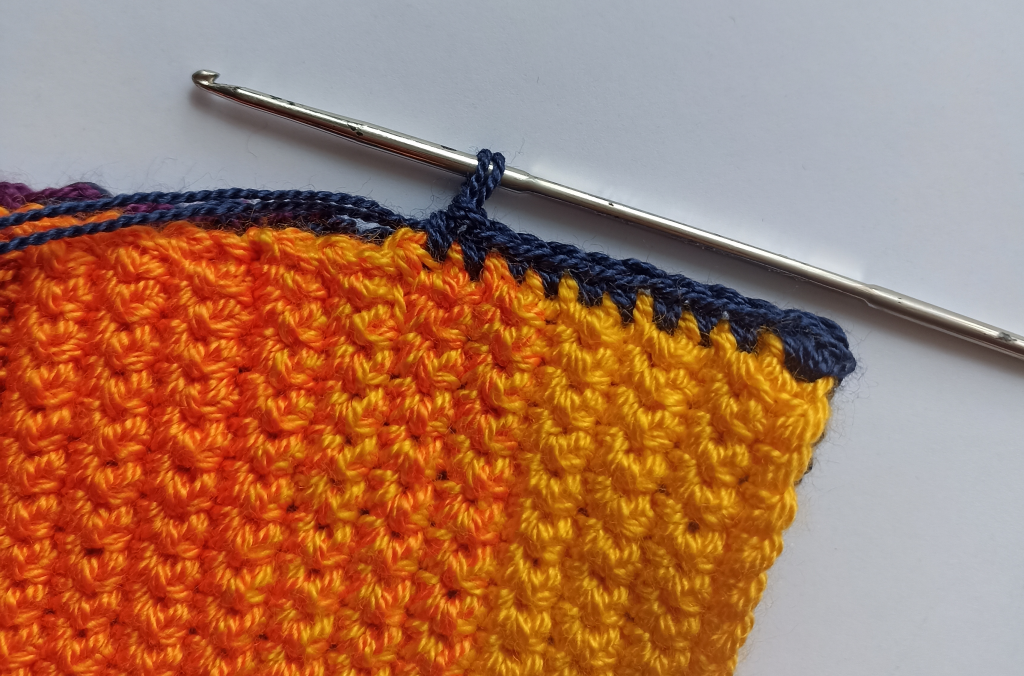
Únelas: Enfrenta ambas mitades por el lado revés de tejido, une los extremos trabajando 1 punto bajo en cada punto, pasando con 3 puntos bajos en cadaesquina, y unos puntos antes de finalizar, rellénala.
The other half: Crochet the other half with 63 single crochets, working only in the back loop, for 45 rows. Use the leftover yarn in the order you prefer.
Block them.
Joining: Place both halves with the wrong sides facing each other, join the ends by working 1 single crochet in each stitch, working 3 single crochets in each corner, and a few stitches before finishing, stuff it.
Realmente espero que hayas disfrutado de este bello proyecto. Recuerda leer bien. Tómate tu tiempo para comprender las instrucciones, gráficos y fotos que aquí aparecen.
Recuerda compartir este post, compartir tu progreso con el hashtag #AutoctonoCushion para ver todos sus avances 🙂
PD: este diseño NO ha sido testeado. Así que si encuentras algún error, por favor envíame un mensaje para actualizar el blog 🙂
I truly hope you’ve enjoyed this beautiful project. Remember to read carefully. Take your time to understand the instructions, charts, and photos provided here.
Remember to share this post, share your progress with the hashtag #AutoctonoCushion to see everyone’s advancements 🙂
PS: This design has NOT been tested. So if you find any mistakes, please send me a message to update the blog 🙂